Manual workflow
This guide shows how to manually create one AudioScene with full control over:
- track content and timing,
- source placement through IR selection,
- and listener/device configuration.
Load and prepare an IR collection
Start from an IRCollection, which serves as the pool used for IR selection. Optionally, pre-process the collection by adding metadata columns that simplify source selection later in the workflow.
Example:
# Load an IR collection and flag elevated sources as noise candidates.
from treble_tsdk.collections.ir_info import IRInfo

ir_collection = tsdk.datasets.purchase("Treble10")

def is_noise_source(ir_info: IRInfo):
    return ir_info.source.z > 1.9

ir_collection.add_column("IS_NOISE_SOURCE", is_noise_source)
Load audio datasets
The next step is to load audio recording datasets. Treble supports loading datasets from Hugging Face and from repositories containing WAV files. It also supports custom AudioLoader implementations for dataset-specific formats.
Example:
The following setup loads:
- a pre-sliced LibriSpeech dataset for conversational foreground tracks,
- a local music dataset loaded from a parquet index that maps entries to WAV files in a local repository,
- and a background noise dataset filtered to HVAC-like recordings.
The LibriSpeech variant below is pre-sliced into shorter utterances, which yields more realistic conversational timing and turn-length variability than long, continuous monologues.
import treble_tsdk.scene as scene
from pathlib import Path

# Load pre-sliced LibriSpeech recordings.
speech_dataset = scene.AudioDataset.from_huggingface(
    repo_id="treble-technologies/librispeech_asr_sliced",
    split="test",
    audio_loader_class=scene.LibriSpeechAudioLoader,
    schema_mapping={"transcript": "text"},
    drop_columns=["audio"],
)

# Load a local music dataset.
music_wav_dir = "my_music_wav_dir"
music_dataset = treble.scene.AudioDataset.from_local_wav_directory(
    wav_dir=Path(music_wav_dir)
)

# Load background recordings and filter for HVAC-related labels.
hvac_dataset = scene.AudioDataset.from_huggingface(
    repo_id="agkphysics/AudioSet",
    config="full",
    split="bal_train",
    audio_loader_class=scene.AudioSetAudioLoader,
    schema_mapping={"id": "video_id"},
    drop_columns=["audio"],
    max_parquet_files=1,
)
hvac_dataset = hvac_dataset.filter_collection(
    pl.col("human_labels")
    .list.join(" ")
    .str.to_lowercase()
    .str.contains(r"air conditioning|air conditioner")
)
Build conversation tracks
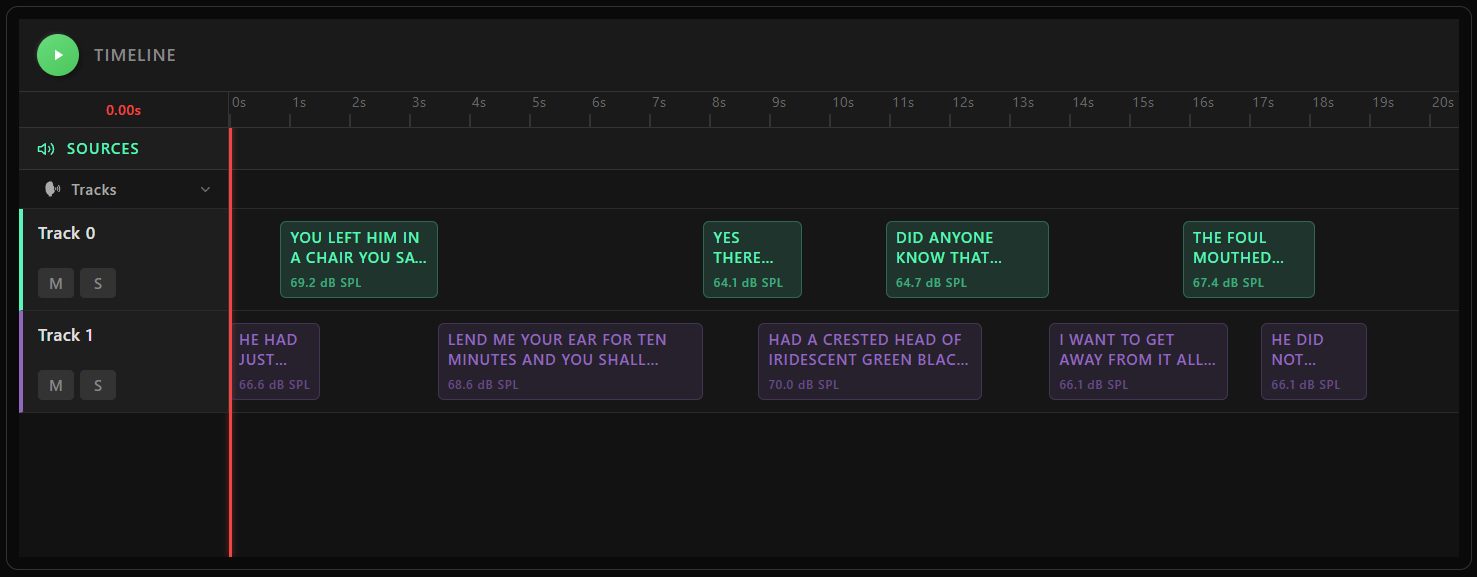
One core capability of TrackGenerator is conversation synthesis. It controls conversational timing mechanics (turn-taking, overlap, and per-block levels) through ConversationRules. The result is a set of AudioTrack objects, each containing timed AudioBlock references.
Tracks can also be constructed manually by creating an AudioTrack and adding individual AudioBlock entries with explicit start times and levels.
Example:
# Build tracks with explicit rule settings.
duration_s = 20
conversation_generator = scene.TrackGenerator(
    audio_dataset=speech_dataset,
    rules=scene.ConversationRules(
        block_duration_range=(1.5, 5.0),
        overlap_range=(0.2, 0.5),
        in_track_level_range_db_spl=(64, 70),
    ),
    talker_identifier="speaker_id",
)
conversation_tracks_1 = conversation_generator.generate_tracks(
    n_tracks=2,
    duration_s=duration_s,
    seed=21,
)

# Build tracks using a predefined rule preset.
conversation_generator = scene.TrackGenerator(
    audio_dataset=speech_dataset,
    rules=scene.ConversationRules.from_preset(
        scene.ConversationRulesPresets.sequential_talkers_no_overlap
    ),
    talker_identifier="speaker_id",
)
conversation_tracks_2 = conversation_generator.generate_tracks(
    n_tracks=2,
    duration_s=duration_s,
    seed=21,
)

# Visualize generated track timelines.
scene.plot_audio_tracks(conversation_tracks_1, duration_s)
Choose a receiver and filter the IR collection
A scene is built around a single receiver position. Filter the IR collection so it contains only IRs associated with that receiver, yielding one IR per source position in the room.
Example:
rec = ir_collection[68].receiver
ir_collection = ir_collection.filter_collection(pl.col("receiver_id") == rec.id)
Assign tracks to sources
Each track is paired with an IR through a TrackMap, which binds the track to a spatial position in the room. GroupTag categorizes tracks (for example TARGET or BACKGROUND), and group_name groups related tracks in the visualization.
Examples:
Assign conversation tracks to two sources:
track_maps = [
    scene.TrackMap(
        conversation_tracks_1[0],
        ir_collection[0],
        scene.GroupTag.TARGET,
        group_name="conversation",
    ),
    scene.TrackMap(
        conversation_tracks_1[1],
        ir_collection[2],
        scene.GroupTag.TARGET,
        group_name="conversation",
    ),
]
Add a RepeatedAudioTrack for the HVAC source. The sample is looped with overlap to create a continuous background signal across the full scene duration at the specified level.
track_maps.append(
    scene.TrackMap(
        scene.RepeatedAudioTrack(hvac_dataset[0], free_field_level_db_spl=60),
        ir_collection[3],
        scene.GroupTag.BACKGROUND,
        group_name="hvac",
    )
)
Configure the listener
SceneListener defines how the scene is captured at the selected receiver. It combines:
- rendering device (for example a KEMAR dummy head),
- orientation,
- optional per-channel noise floors,
- optional output filters.
device = tsdk.device_library.get_device_by_name("KEMAR051123_1")

device_noise = [
    scene.StaticNoiseTrack(scene.StaticNoiseProfile.pink_noise(), level_db_spl=40),
    scene.StaticNoiseTrack(scene.StaticNoiseProfile.pink_noise(), level_db_spl=40),
]

listener = scene.SceneListener(
    receiver=rec,
    device=device,
    orientation=treble.Rotation(180),
    noise_definitions=device_noise,
)
Assemble and inspect the scene
AudioScene brings everything together: the track-to-source mappings and the listener definition. The interactive plot displays the track timeline and a 3D room view for quick inspection.
my_scene = scene.AudioScene(
    track_map=track_maps,
    scene_listener=listener,
    duration_s=duration_s,
)
my_scene.plot()
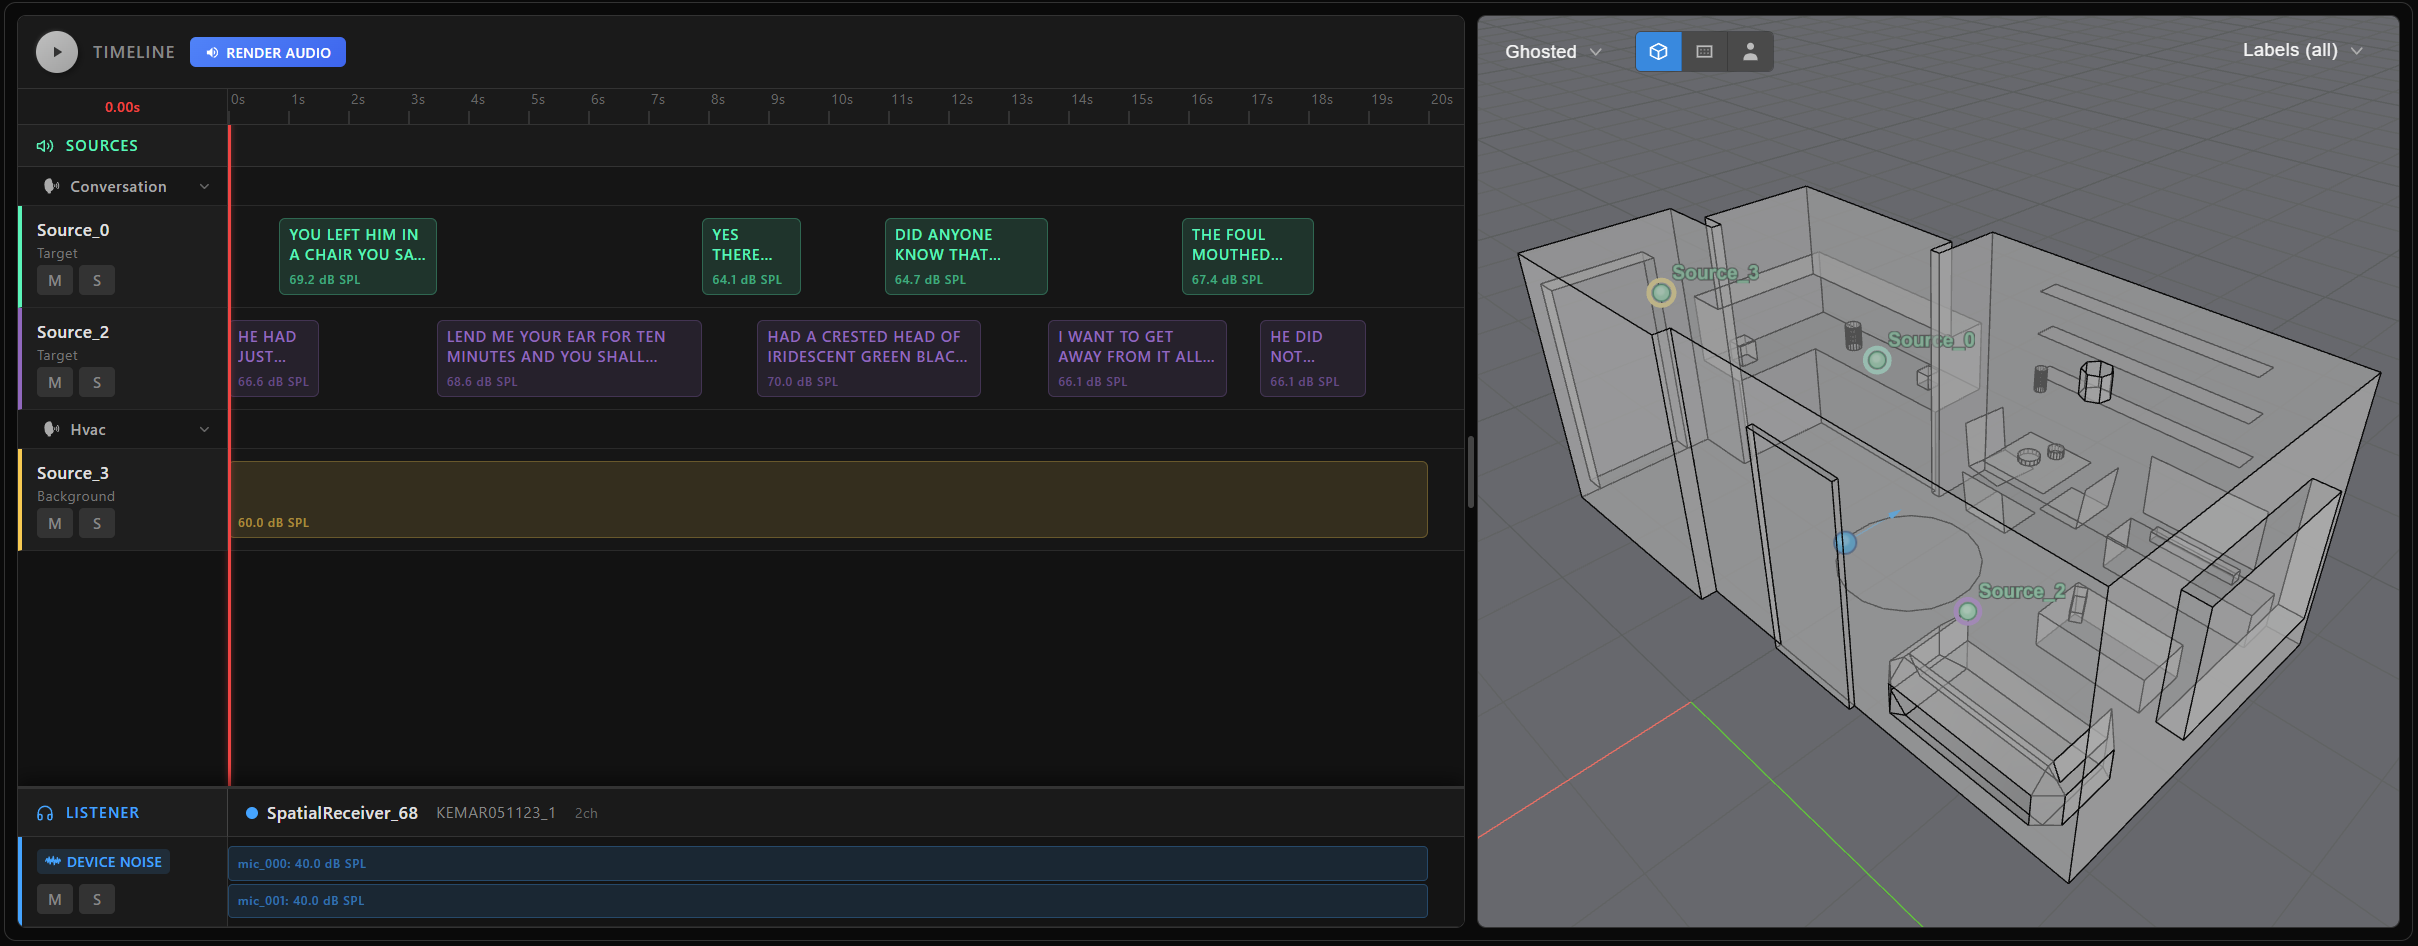
At this point, my_scene is simply a declarative recipe—it's a lightweight, serializable definition that specifies how the audio scene should be constructed, but no audio waveforms have been rendered yet. This makes scene creation fast and flexible. To actually generate audio, extract target signals, or export scene metadata, you need to explicitly trigger rendering. For a detailed walkthrough of how to render scenes, extract targets, and work with metadata, see the next page Scene rendering and targets.