Setting up an auralization
After running a simulation select the Auralizer button to set up and listen to auralizations of your simulations.
To set up an auralization you need to add anechoic sounds to sources, select a receiver to listen from and click the play button to start the auralization.
Adding sounds
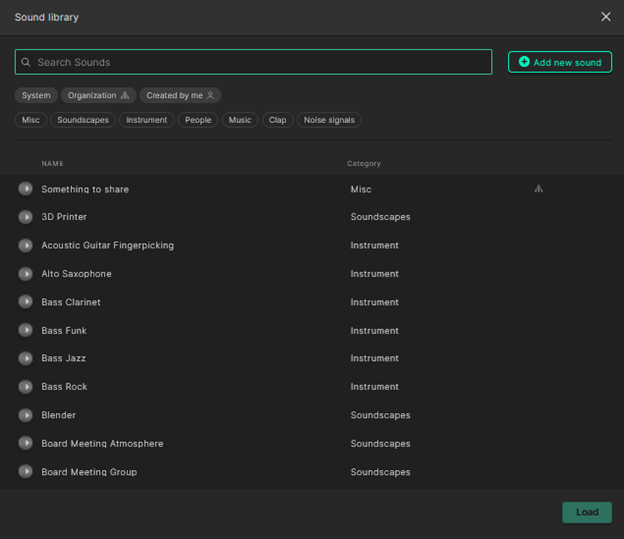
For a given source, click "Add sound +" to open the sound library and choose an anechoic sound. Click the Load button to add it to the source.

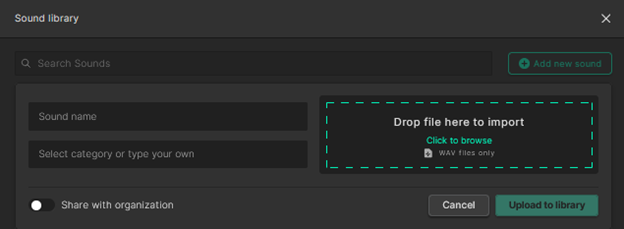
It is also possible to upload your own sound files in the .wav format by selecting the ‘+Add new sound’ button within the sound library. When uploading a sound file, you will automatically add it to your personal sound library for quick access later on. You can also choose to share it within your organization to create an organization wide database of custom sound files.
Changing the input volume of sounds
After assigning sounds to sources you can play audio by selecting the play button above the simulation name. Additionally, you can hover over the headphone icon next to the play button to listen to the original sound, without the impulse response convolution.
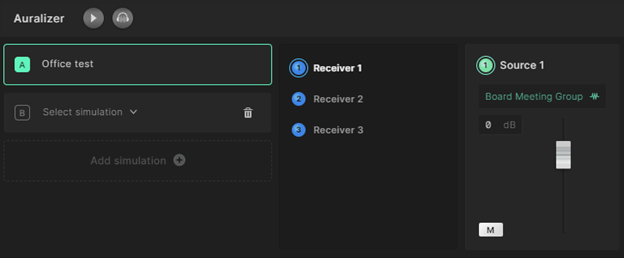
The source slider changes the input volume of your anechoic sound. Changing this slider will affect the sound level balance between sources when more than one source is simulated. You can also mute a source by clicking the mute button.
The master volume (rightmost slider) changes the overall level of your auralization.

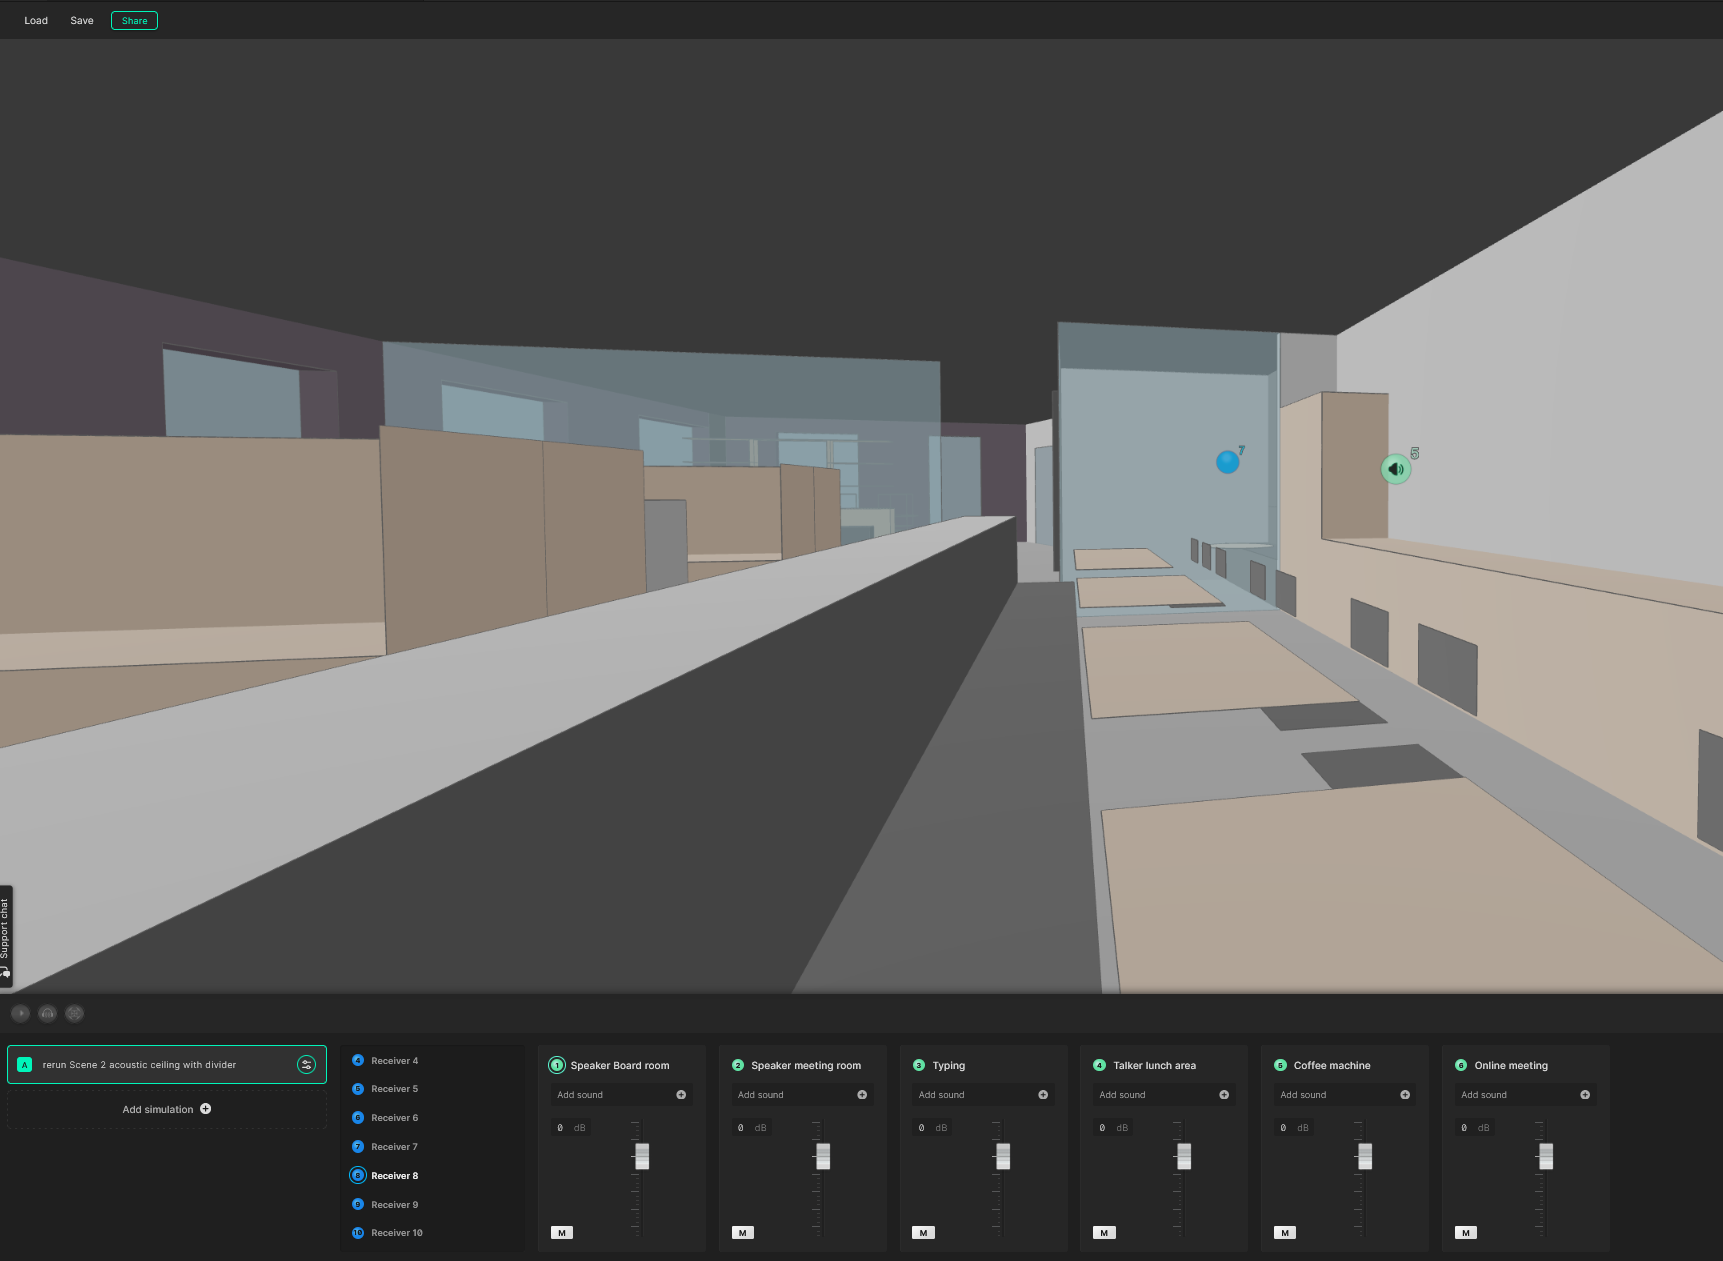
Receiver positions
After assigning a sound to one or more sources you can select a receiver to listen to the sound of your choice convolved with the spatial impulse response of that receiver. The camera will be changed to a first person view from the selected receiver. You can rotate the camera to get a feeling for different head orientations at the selected receiver location. To exit the first person view you can click again on the selected receiver from the list of receivers. You can also switch between receivers while playing.
The binaural rendering is currently powered by the Omnitone library. The Head Related Transfer Functions (HRTFs) employed correspond to the KU100 Neumann dummy head binaural stereo microphones, as recorded for the SADIE dataset, subject two. Check out our paper for more technical details.
Each point receiver simulates a 2nd order ambisonics impulse response that is rendered binaurally in the auralizer. The auralizer's output can also be switched from the binaural downmix to the raw 9-channel second order ambisonic signal directly in the UI, for use in e.g. dedicated listening rooms. This option is available both in the live auralizer and in pre-rendered auralizations, on machines with a multichannel audio output device. To have this feature enabled for your organization, please contact our support team.
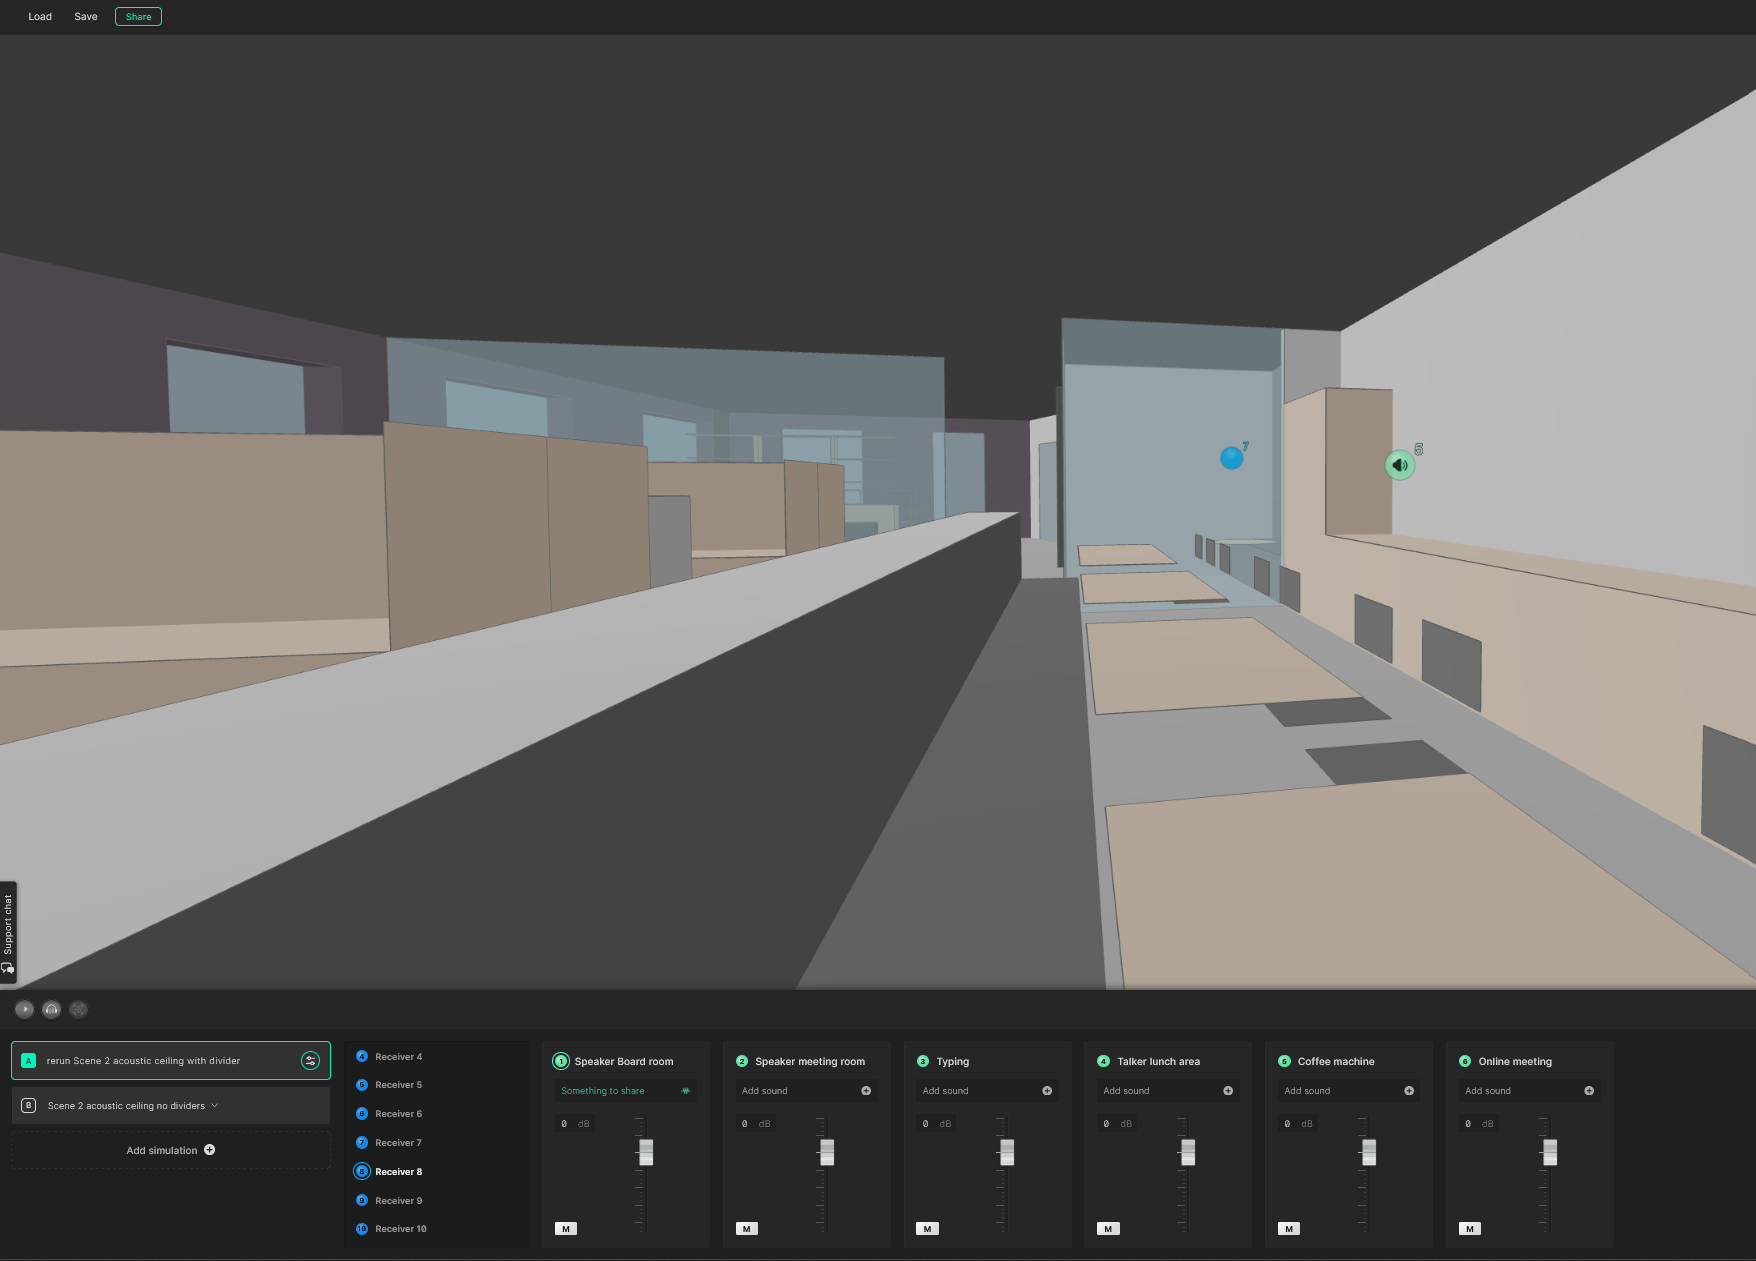
Comparing auralizations
Select the ‘Add simulation +’ button to add another simulation to the current auralization setup. Note that to compare simulations within the auralizer they must be within the same space in the Treble hierarchy and must have the same amount of sources and receivers with the exact same coordinates.
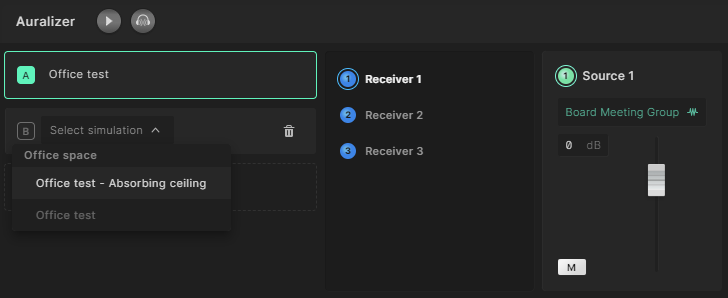
Select the simulation you want to compare to. With the sound on, you can now switch between simulations on the fly by selecting the letter that identifies each simulation (ex. A, B, etc.). This allows for a quick and efficient way to compare the audible difference between simulations.
Saving and loading auralizations
In Treble, you have the option to save your auralization setup for quick access later, both for yourself and your team members. This feature allows you to maintain an organized overview of your acoustic designs and comparisons.
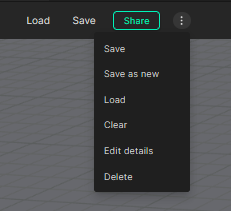
To save an auralization select the save button in the top left corner of the viewport while in the auralizer.
![]()
This open up a pop-up in which you can name the setup you wish to save and write a description.

There are two ways to load a saved auralization:
- By selecting the load icon in the top left corner of the viewport while in the auralizer
- By opening the ‘Auralization’ menu in the sidepanel on the homepage
Note that if you save an auralization in a project with multiple members, all members of the project will have access to the saved setup.
When you edit a saved auralization you can save the new version, either by overriding the previous one or saving a new copy. This is done by selecting the action menu (three dots) in the top left corner of the viewport while in the auralizer. Within this menu you can also edit the description of the auralization.
Pre-render audio in the auralizer
When working in the auralizer, all audio processing takes place directly in the user’s browser. This enables a smooth workflow, for example, you can instantly hear the effect of adjusting a source’s gain.
However, since the audio processing depends on the capabilities of the local machine, audible distortion may begin to occur once a certain number of source–receiver combinations is reached.
To overcome this limitation and generate significantly larger auralizations, you can select the Pre-render audio button, at the bottom right of the interface, at any time. This sends the current auralization setup to the cloud for processing. Once the button is pressed, a new browser tab will open. When the auralization has been processed in the cloud it will become interactive in the tab.
This not only removes distortion caused by local performance constraints but also allows for the creation of much larger auralizations than would otherwise be possible. The feature ensures a reliable, high-quality result, making it a powerful option for complex auralizations.
