Exporting a Model to Treble
Export Workflow
The Treble Revit Add-In uses a step-by-step wizard to guide you through the export process. Each step is clearly labeled and helps you configure exactly what you want to export.
Step 1: Choose Export Type
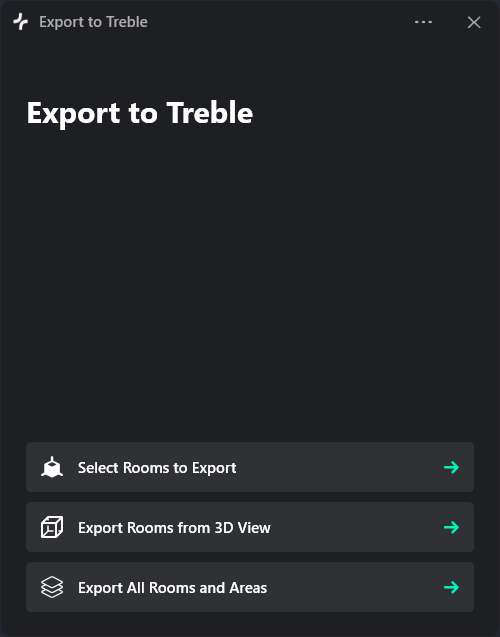
After launching the add-in and authenticating, you'll be presented with two export options:
Entire Model
- Exports all rooms in your Revit document
- Includes all rooms regardless of their location in the model
- When to use:
- Small to medium-sized projects (under 50 rooms)
- When you need to analyze all spaces in the building
- When export and processing time is not a concern
- For comprehensive building-wide acoustic studies
3D View
- Exports only the rooms visible in a selected 3D view
- Particularly useful when combined with a Section Box to focus on a specific area
- When to use:
- Large buildings where you only need to analyze specific floors or zones
- Iterative design workflows where you're refining a particular area
- When you want fast export cycles for rapid testing
- To isolate a specific set of rooms for focused acoustic study
- When full model exports are taking too long
For large models where you only want to export part of the building, using a 3D view with a Section Box can make the export much faster. The Section Box limits the scope of the export to a specific region, reducing file size, upload time, and processing time. A Section Box that isolates 10-20 rooms will export much faster than a full building model with hundreds of rooms. See the Getting Started guide for details on creating Section Boxes.
Step 2: Select 3D View (if applicable)
If you chose the "3D View" option in Step 1, you'll be prompted to select which 3D view to use for the export.
The dropdown will show all 3D views in your document with a Section Box.

Tips for 3D View Selection:
- Verify that the Section Box (if used) contains all the rooms you want to export
- The add-in will only detect rooms that are fully within the 3D view's boundaries
Step 3: Select or Create Treble Project
Next, you'll choose which Treble project to add your exported spaces to.
Select an Existing Project:
- Choose from the dropdown list of your existing Treble projects
- Useful when adding new spaces to an ongoing project or updating existing spaces
Create a New Project:
- Click the "Create New Project" button
- Enter a project name (e.g., "Office Building Acoustic Study")
- The new project will be created in your Treble account and selected automatically

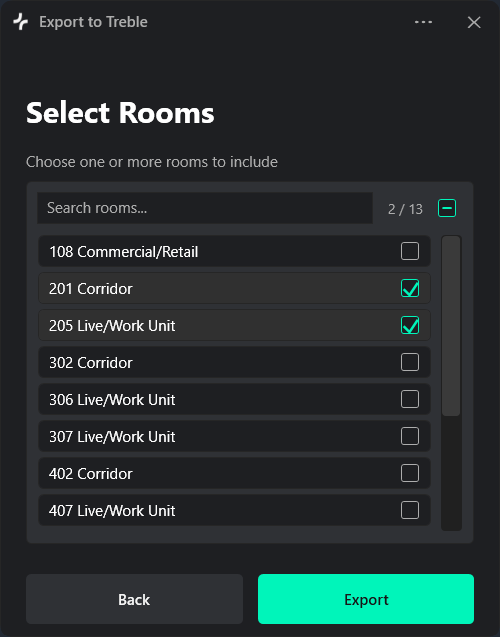
Step 4: Select Rooms to Export
The add-in will display a list of all rooms detected in your model (or within the selected 3D view's section box).
Room Selection Features:
- Search and Filter: Use the search box to quickly find specific rooms by name or number
- Select All / Deselect All: Quickly select or deselect all rooms in the list
- Individual Selection: Check or uncheck individual rooms as needed
- Intelligent Pre-selection: If you're adding to an existing Treble project, the add-in will automatically pre-select rooms whose unique IFC identifiers match spaces already in that project. This makes it easy to update or iterate on existing spaces even if room names have changed.
Room Selection Tips:
- Remember that Treble will automatically merge acoustically coupled rooms into single spaces during processing
Some rooms may not generate spaces that can be used within Treble. The Treble web application will show you which spaces were successfully extracted after upload.
Step 5: Export and Completion
Once you've selected your rooms, click the "Export" button to begin the process.
What Happens During Export:
- IFC Export: The add-in creates a detached clone of your document, converts units to meters, and exports to IFC 2x3 Coordination View 2.0 format using Revit's built-in IFC exporter
- File Upload: The IFC file is uploaded to Treble's cloud platform
- Space Extraction: Treble initiates automated processing to extract enclosed volumes suitable for acoustic simulation
Completion Screen:
When the export completes successfully, you'll see a completion message with an "Open in App" button.
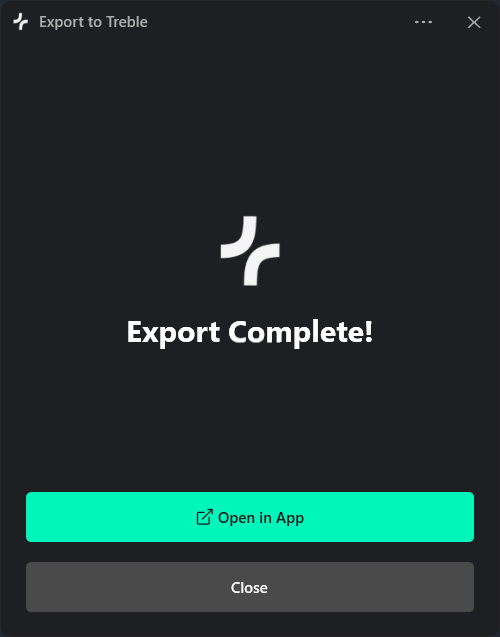
Click "Open in App" to open the Treble web application in your default browser, where you can:
- Review the extracted spaces
- Select which spaces to import into your project
- Assign acoustic materials
- Place sources and receivers
- Configure and run simulations
Post-Export Notes:
- Treble automatically merges acoustically coupled rooms (rooms with large openings between them) into single spaces for simulation
- You'll be able to review and select which extracted spaces to import in the web application
- Your original Revit document is never modified during the export process