Exporting IFC files from Revit
This guide aims to help users export a file from Revit so that it can be correctly processed by the Treble IFC processing module.
For the best experience exporting from Revit, we recommend using the Treble Revit Add-In. The add-in provides a guided workflow, automatic IFC configuration, and intelligent room pre-selection when updating existing projects.
This workflow covers the process from Revit 2022 to IFC 2x3 Coordination View 2.0, completed using the Autodesk IFC plugin 2022. Newer or older versions of Revit might differ.
The guide will cover the following topics:
- Exporting an IFC file compatible with Treble IFC importer
- Exporting an IFC file with a selection of spaces
- Split Walls, Columns, Ducts by Level
- Level of detail
Exporting an IFC file compatible with Treble IFC importer
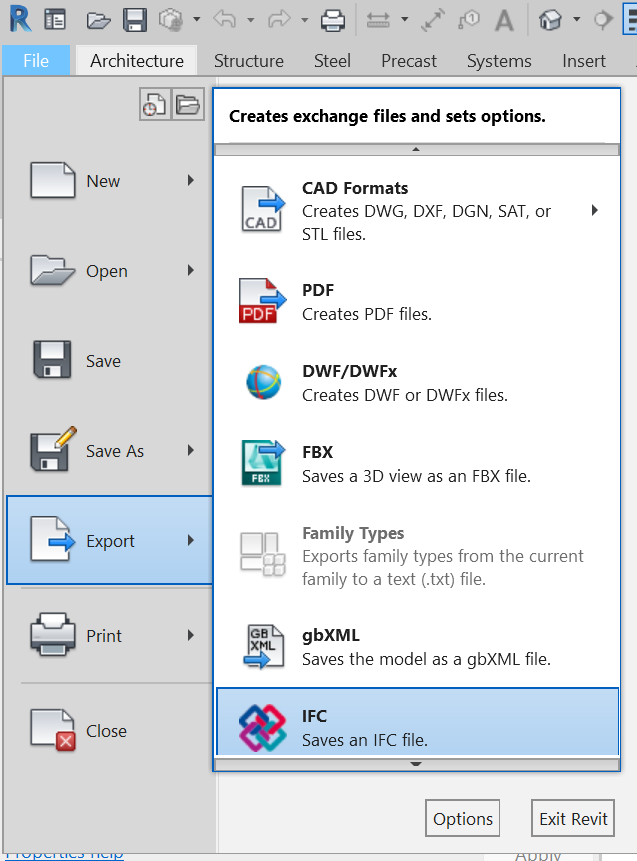
From Revit, open a model and go to File > Export > Ifc
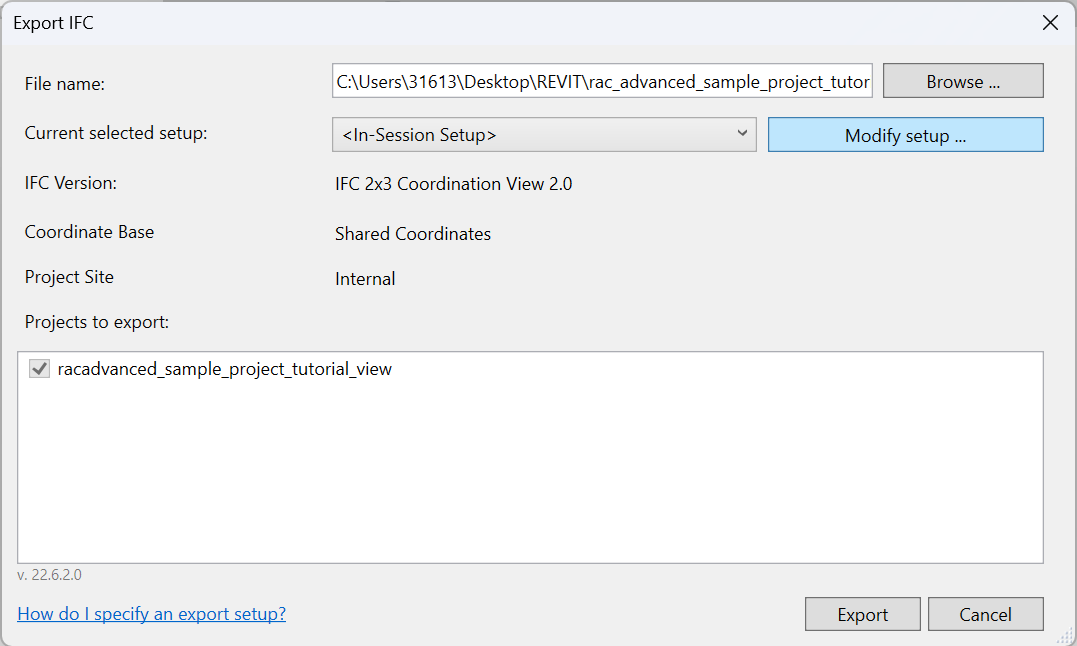
A prompt will open, allowing to set the export name and directory and additional options through Modify setup ...
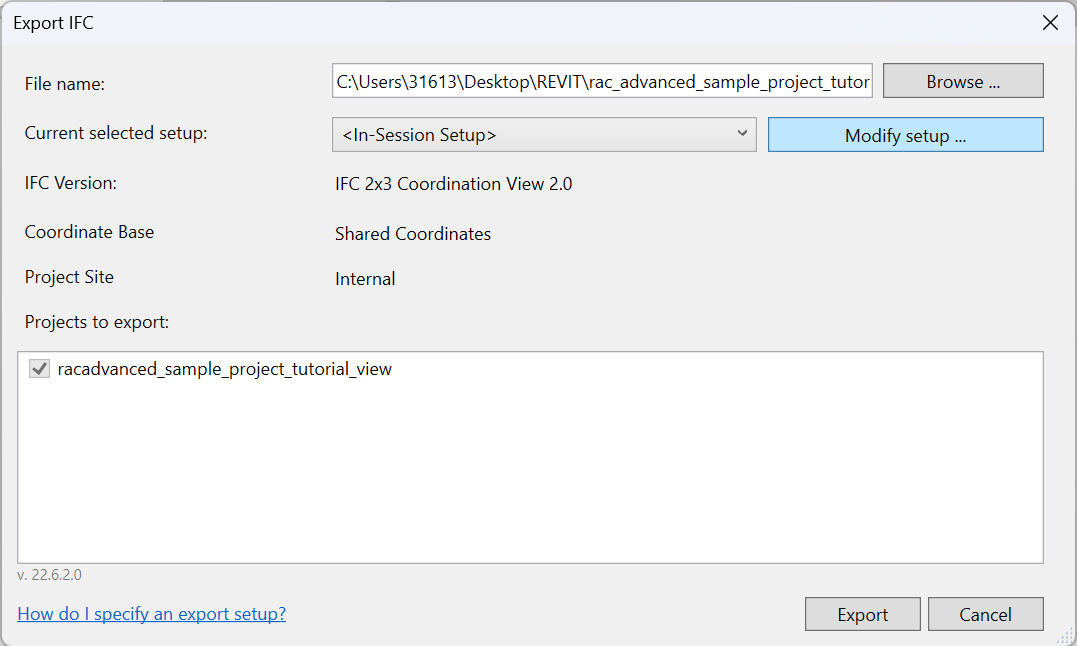
The default options are based on the Ifc 2x3 Coordination View v2.0 scheme.
The default export will create an IfcSpace for every Room and Area tag in the Revit model.
The file created (with extension .ifc ) will be compatible with the IFC importer as long as there is at least one Room or Area tagged.
Tagging rooms
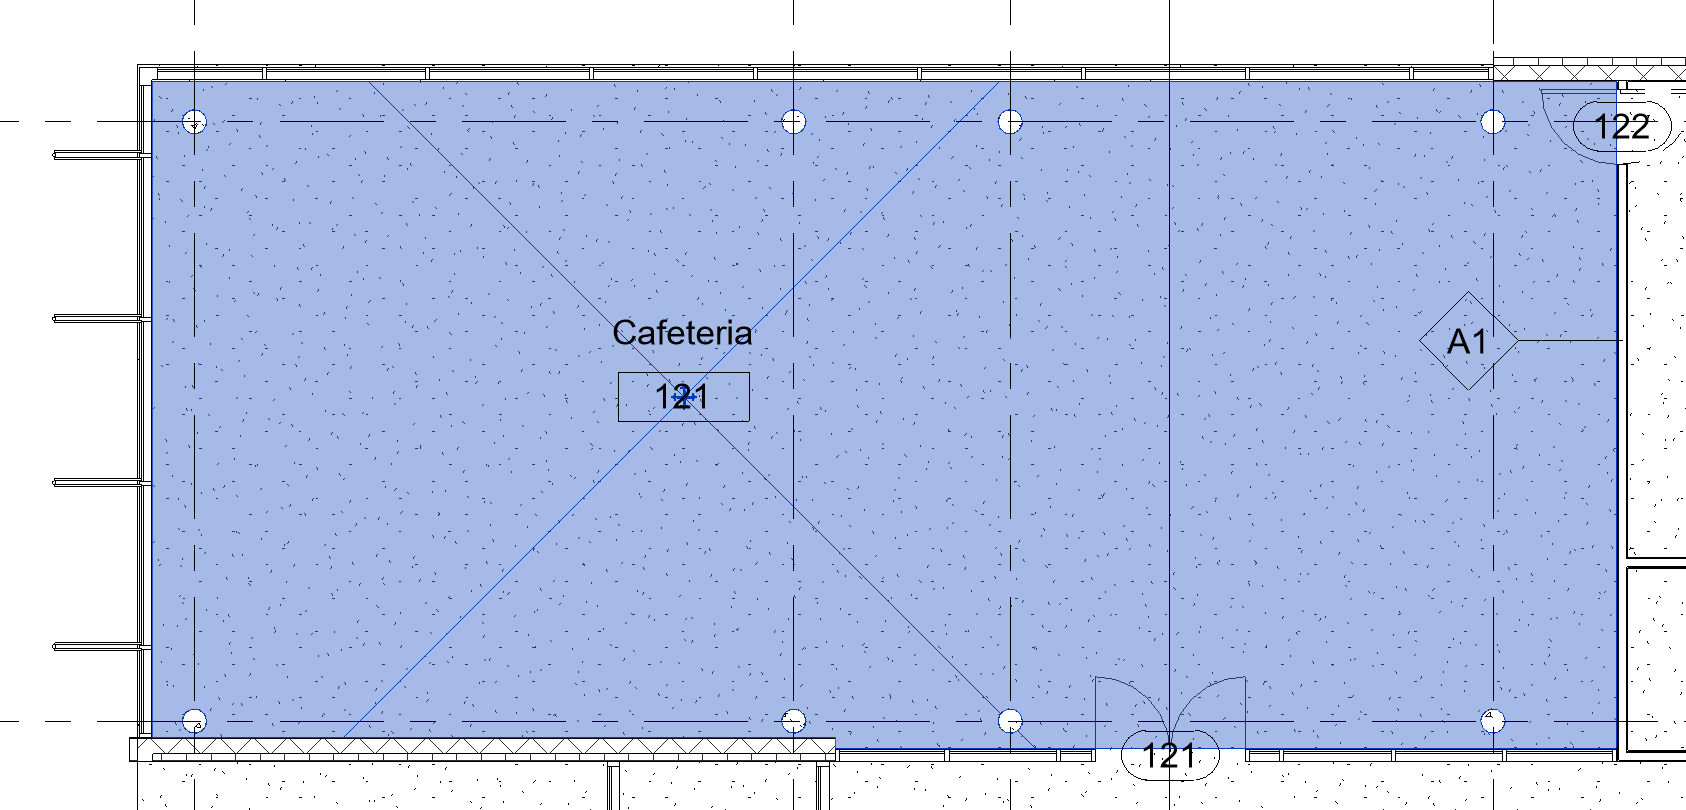
Giving names to rooms in Revit helps creating lists and tracking properties. A room tag looks like a label, showing a Room name and number. Rooms are typically displayed under the Floor Plans view type. When hovering over an area contained by walls, if a room was created, a cross should appear, as displayed in the figure below.
Had a room not been created, it is possible to do so using the Room tool from the Architecture tab. With the tool activated, the user can click over a bounded area.
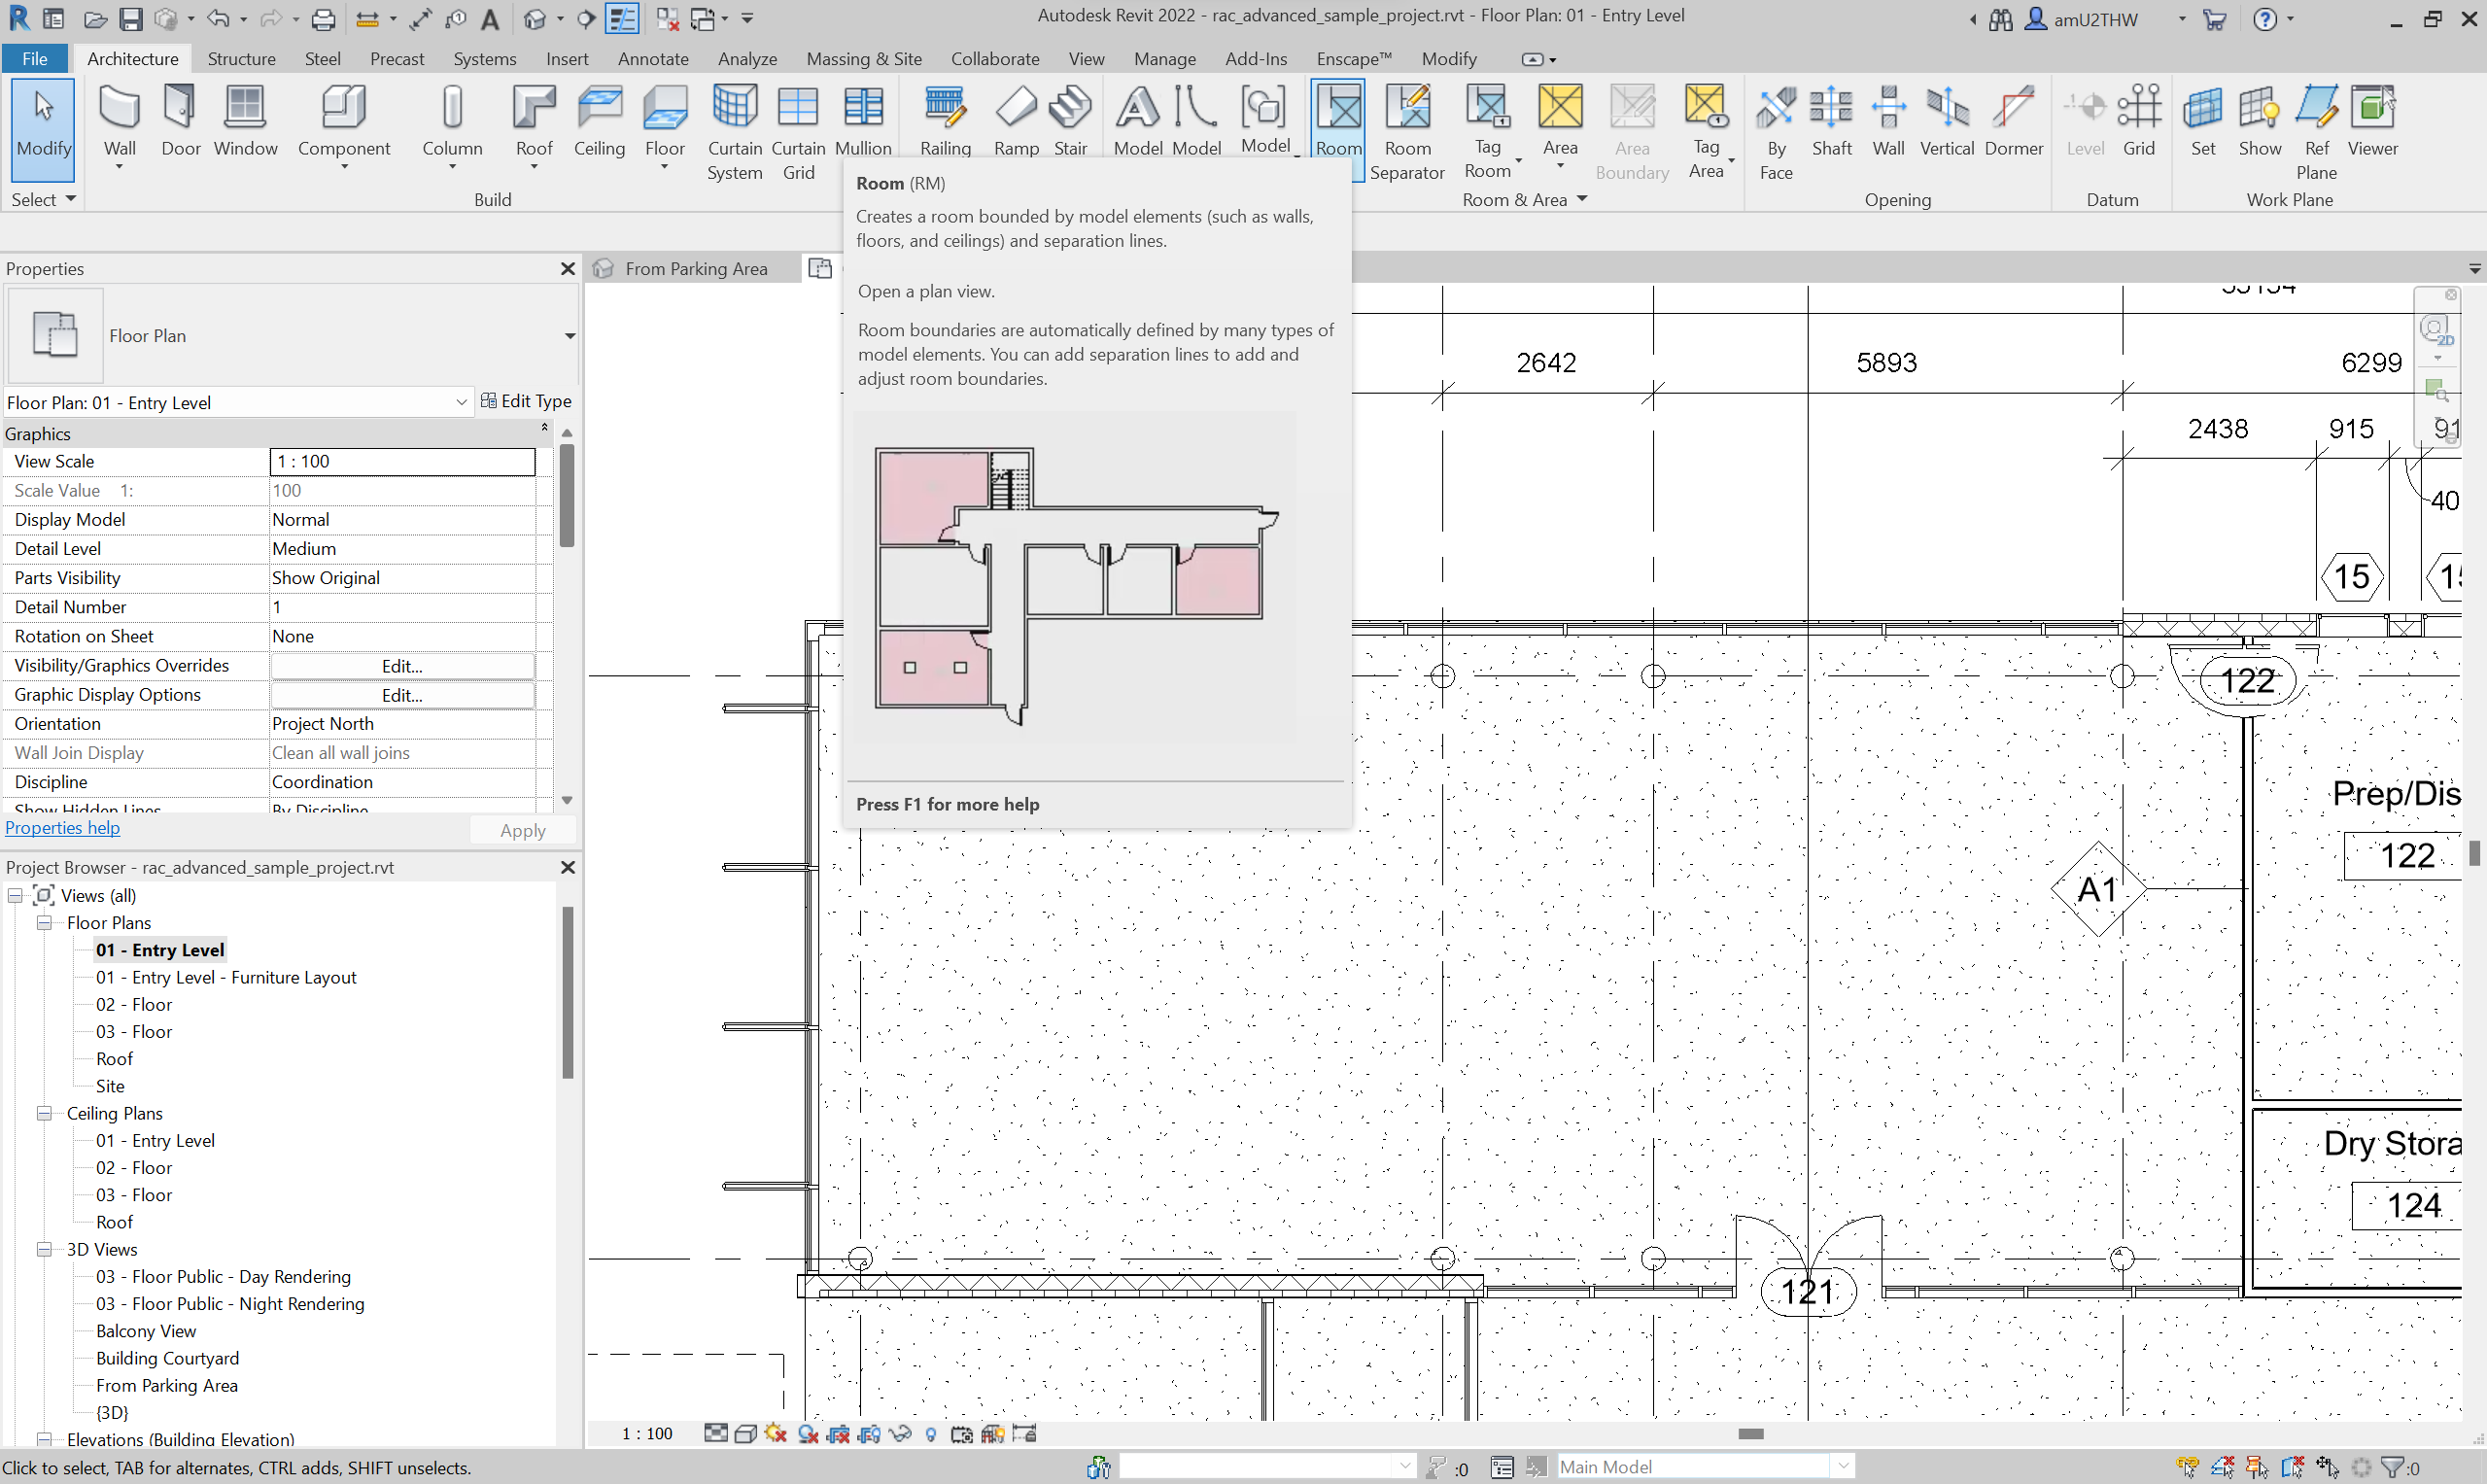
A cross will be shown with a temporary label at its center. It is sufficient to click and the room will be created.
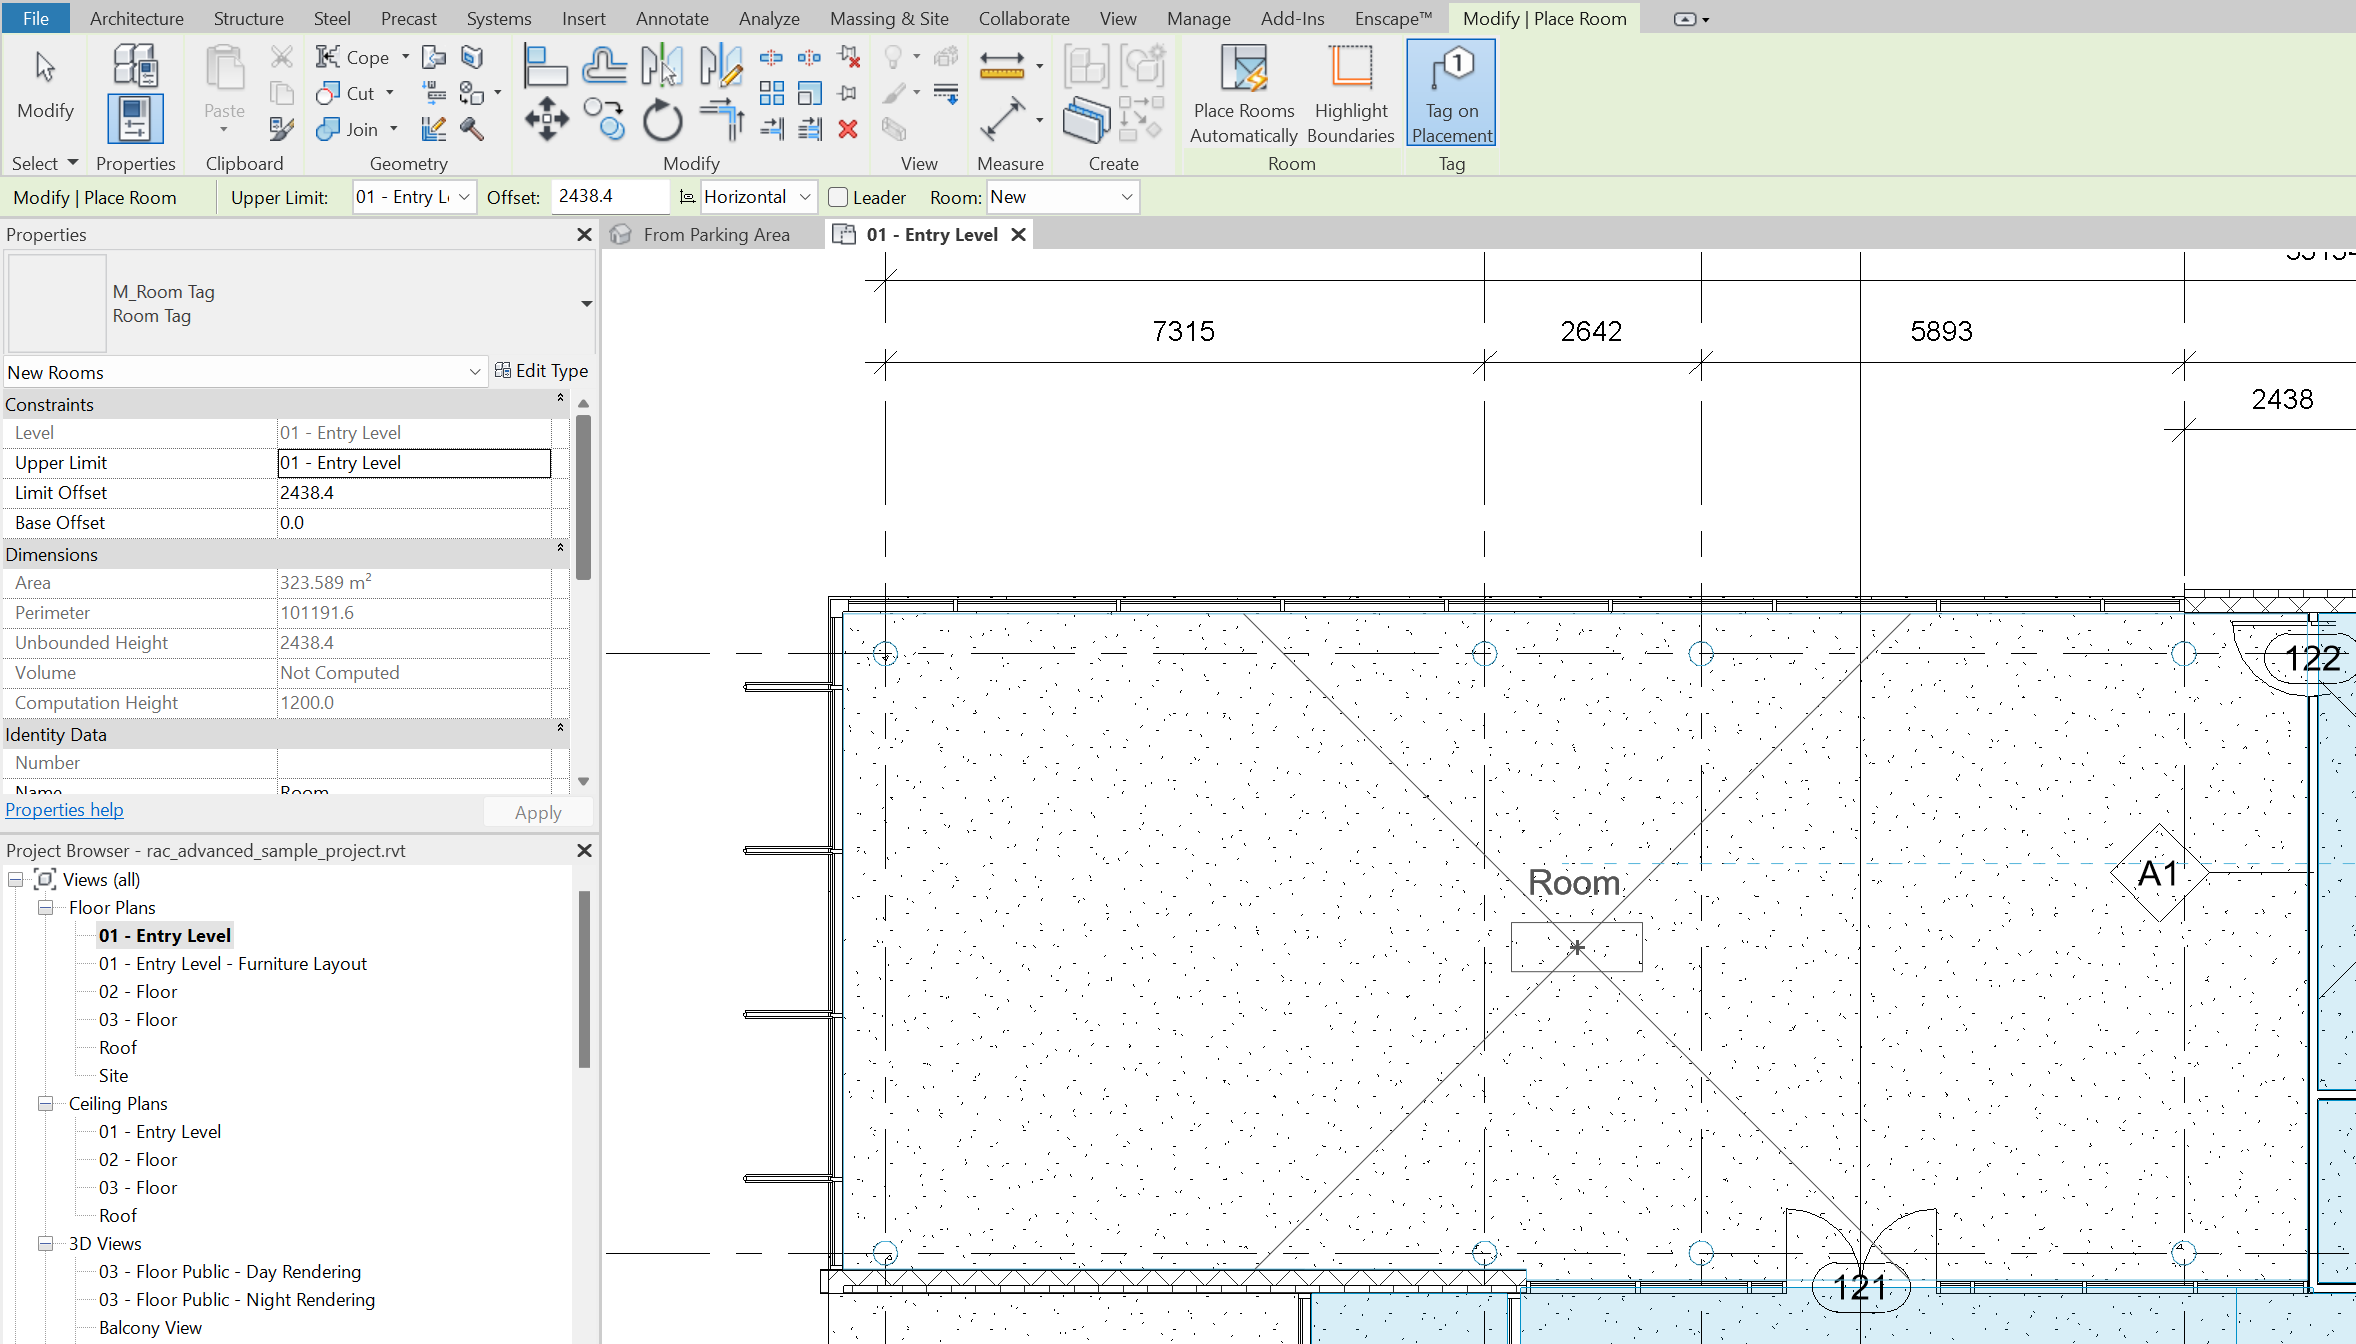
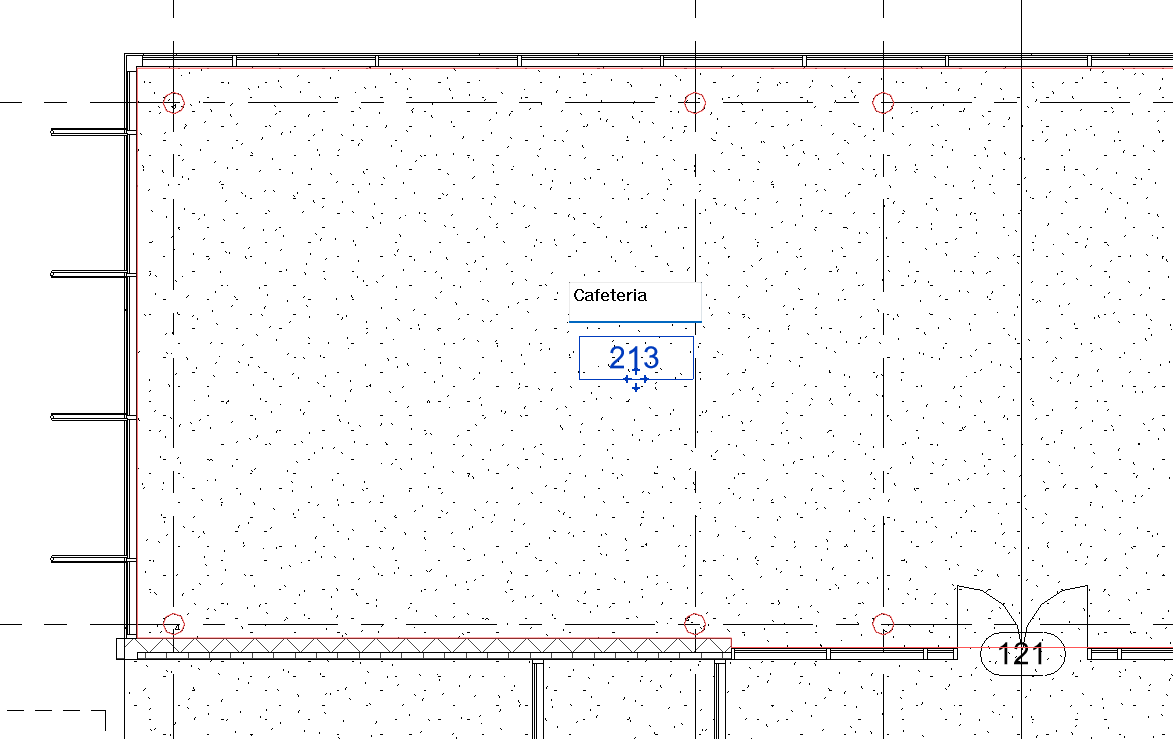
It is possible to edit the text of the label by clicking on the name and number. The IFC importer will assign names to Spaces in the Treble suite according to these labels, and we recommend giving meaningful names.
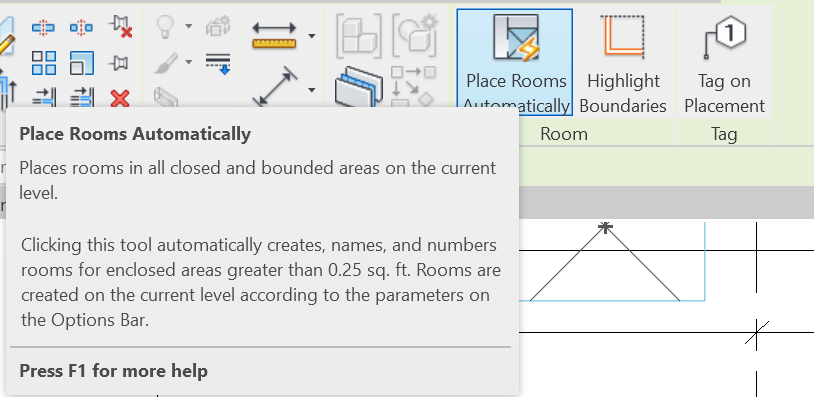
It is also possible to place Rooms automatically.
We recommend to leave the default Tag on Placement on.
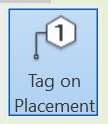
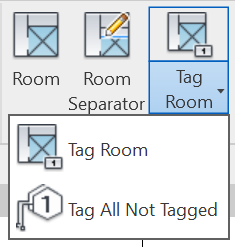
Alternatively, it is possible to Tag rooms later, as shown by the Tag Room tool.
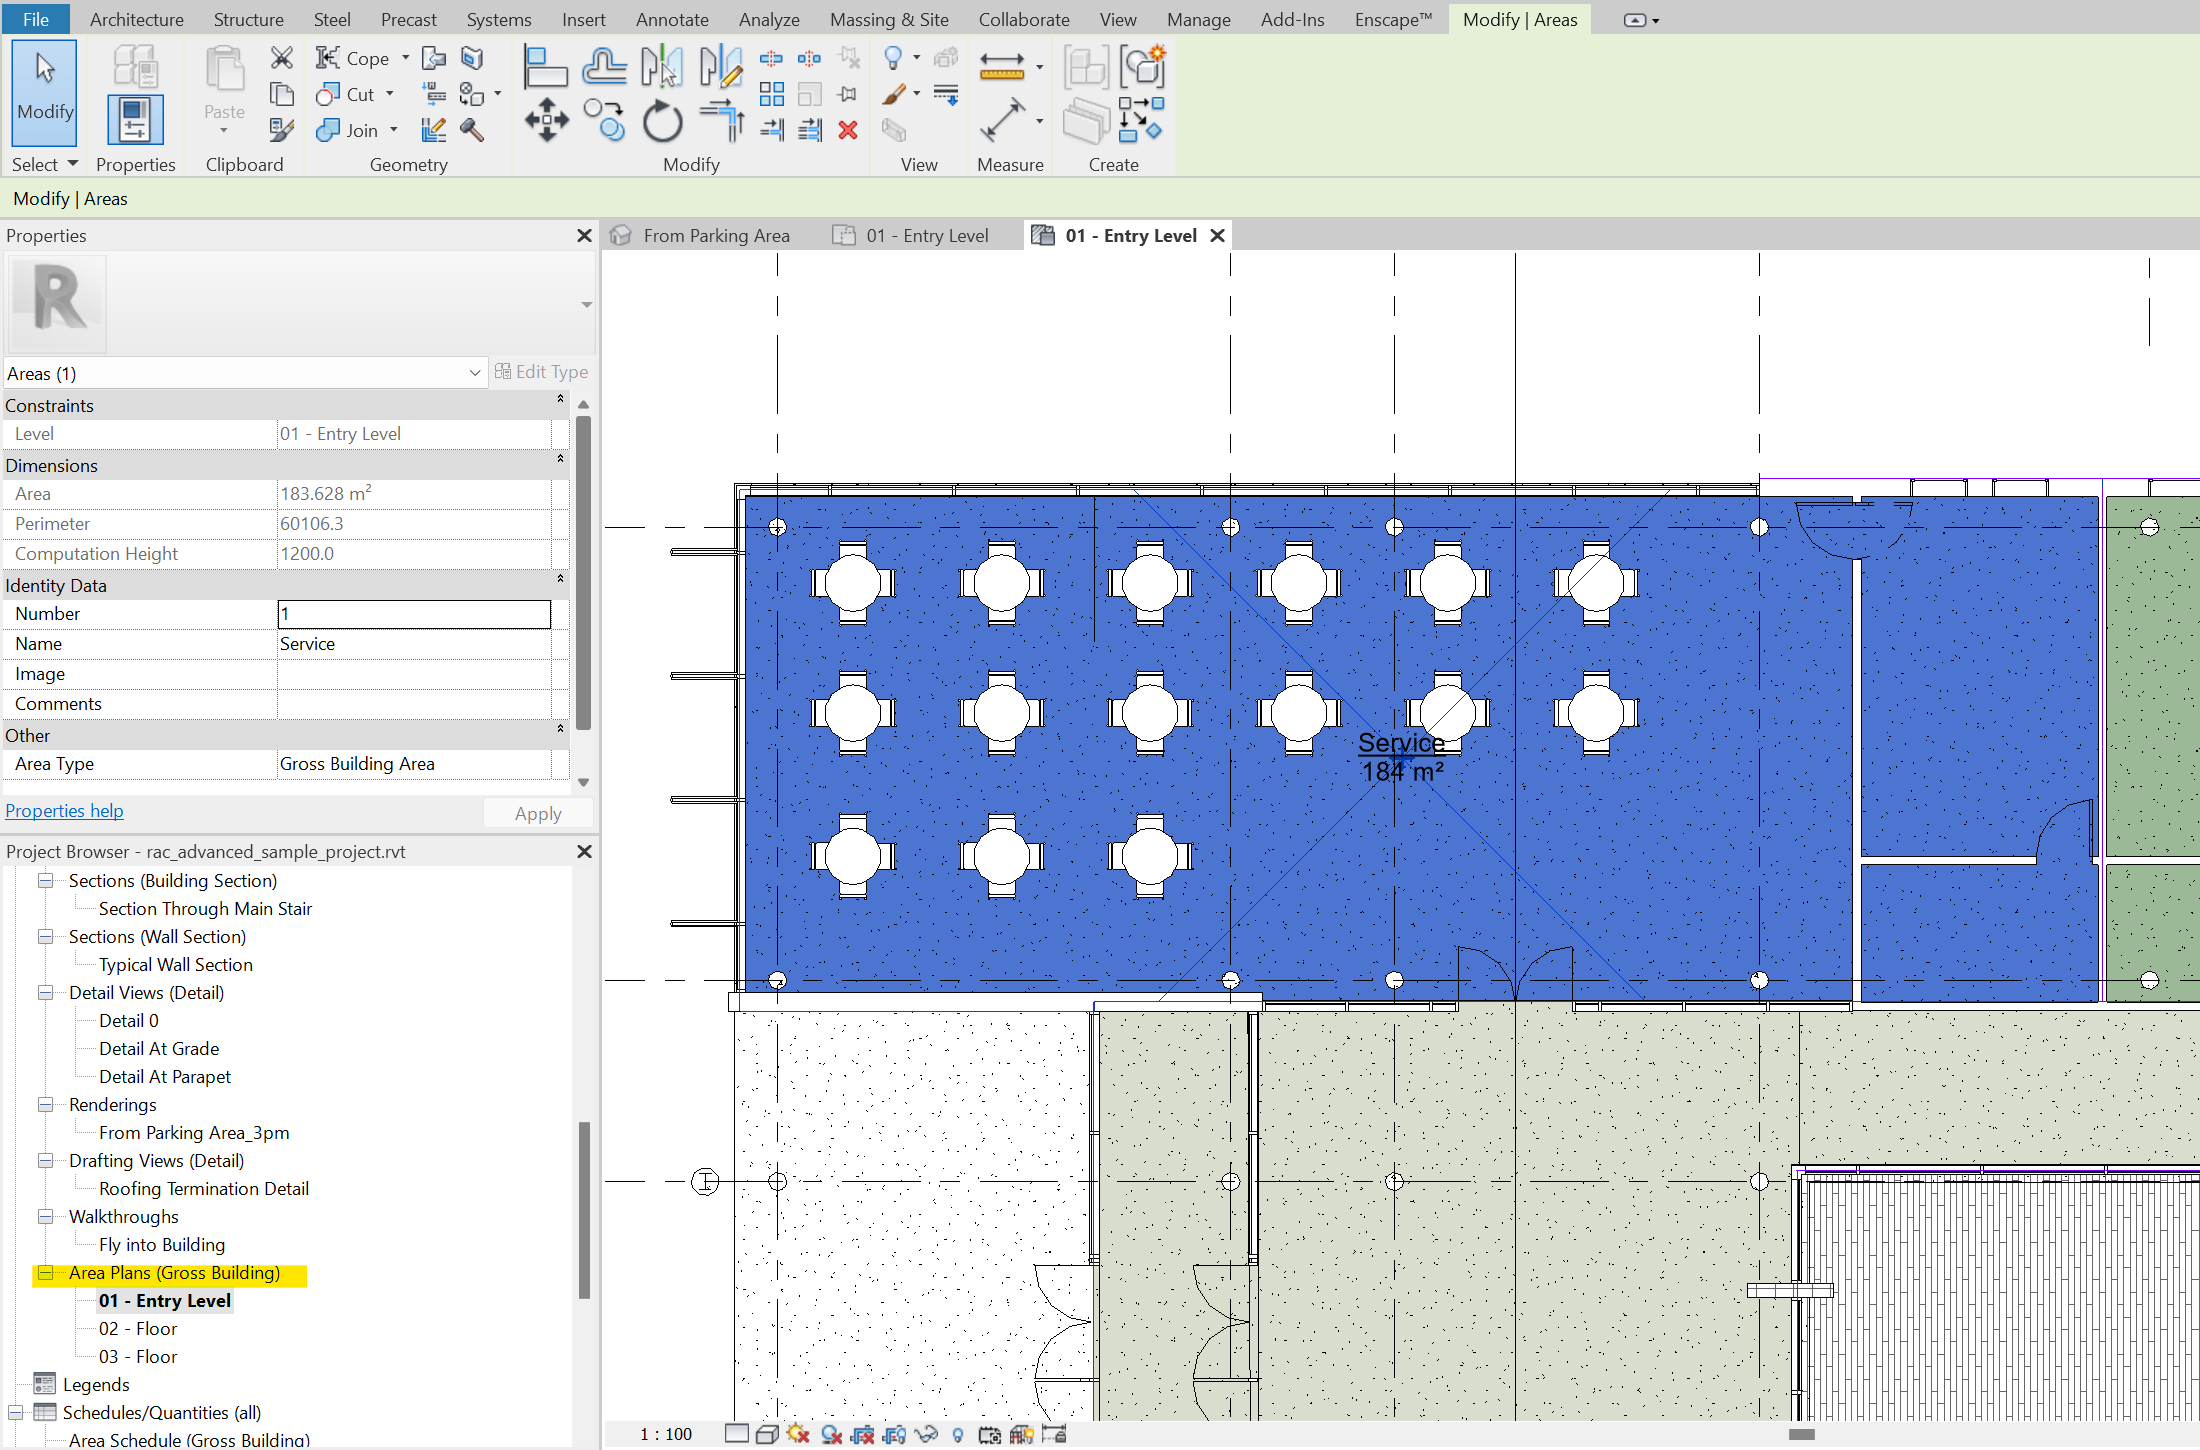
Already tagged Areas
Areas are similar to rooms, but they can span over several bounded spaces, as shown in this picture. They can be used to compute quantities for groups of spaces with similar functions. They can be displayed under the Area Plans view type (highlighted in yellow in the picture). We don’t recommend using Areas for the purposes of this guide since our acoustic simulators do not simulate transmission across walls. Having both Rooms and Areas can lead to confusion such as duplicates and wrongly named environments for the spaces generated by the IFC importer. In the next section we will explain how to avoid exporting already existing Areas.
Exporting an IFC file with a selection of spaces
When a model presents many Rooms (and possibly Areas), it might be desirable to create an IFC file with only few Rooms exported as an IfcSpace. This can be achieved in two ways. Next, we explain how to go from more than 100 Rooms in the Revit advanced sample model, to only one Room to be exported as an IfcSpace.
Isolating spaces using views
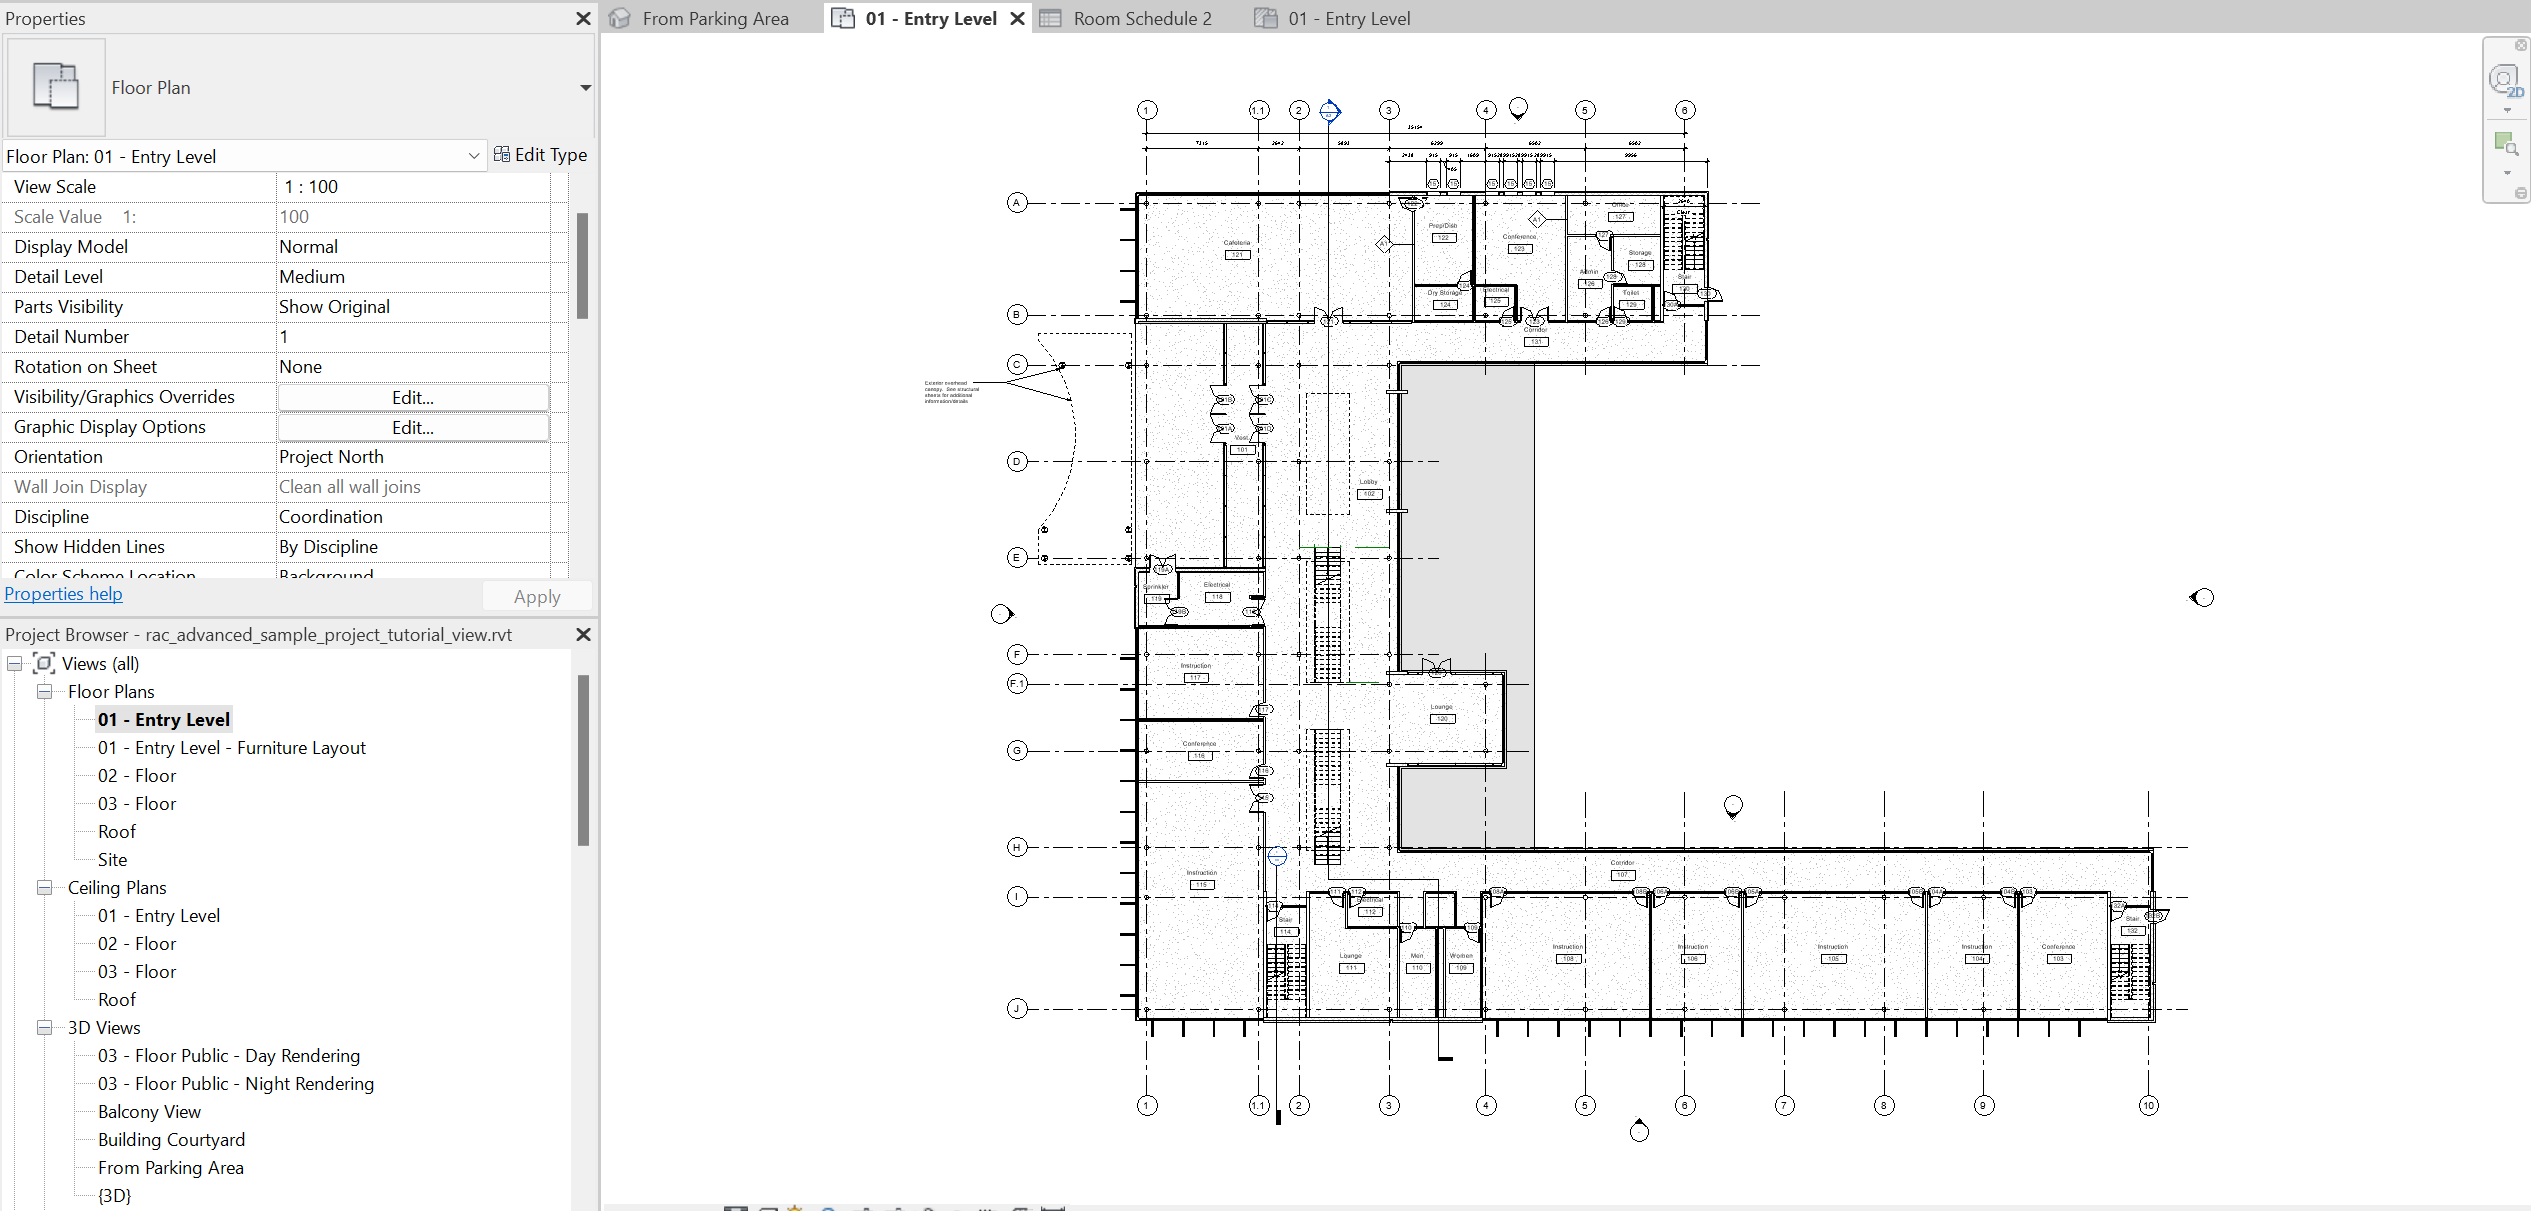
It is possible to export a selection of spaces depending on the view chosen. For example, let us export the Entry Level view of the Advanced sample project. From the Entry Level view we go to the IFC Export dialogue as done previously.
In this dialogue, we click Modify setup …
From the Additional Content tab, we select Export only elements visible in view and Export rooms, areas and spaces in 3D views.
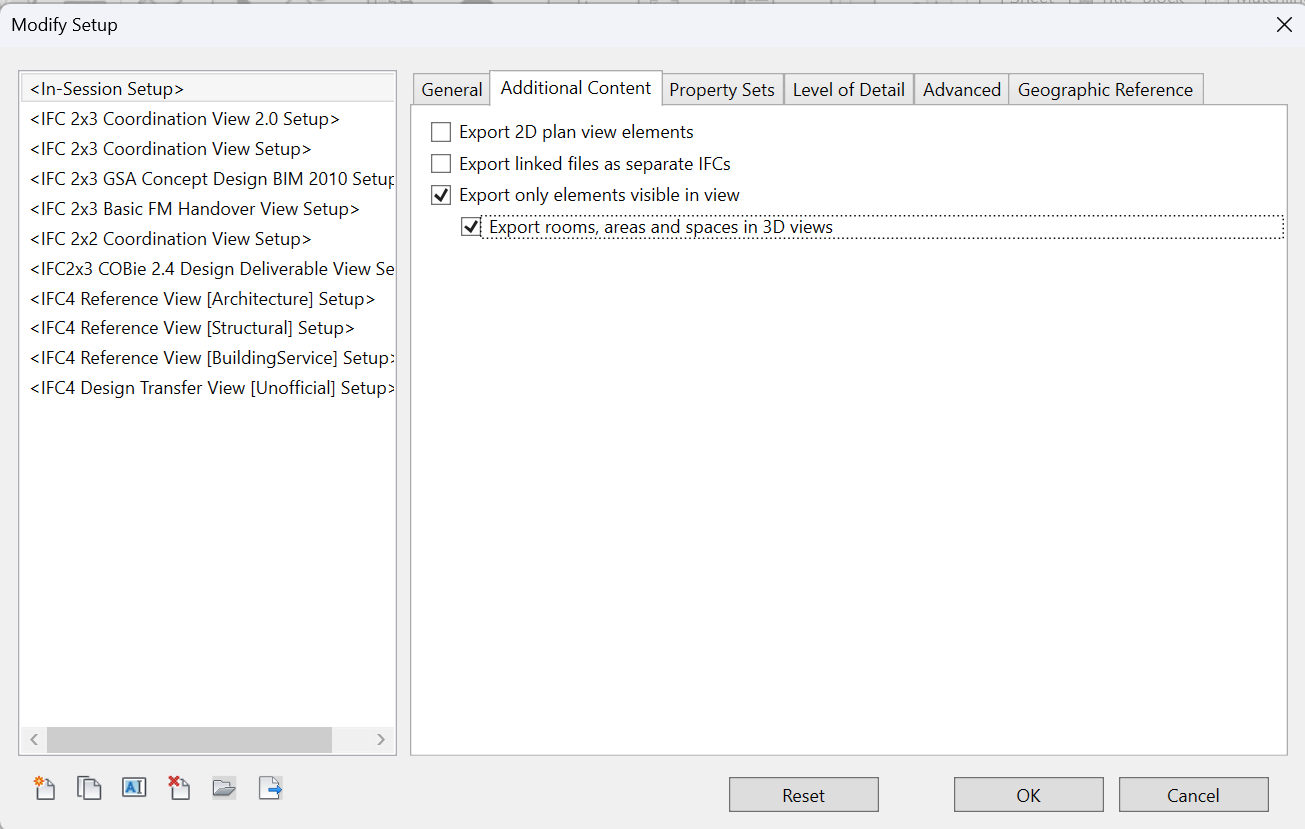
This will result in an IFC file with only 31 IfcSpaces, corresponding to the number of Rooms visible in the Entry Level view. Isolating spaces using Section Box in 3D views
When using 3D views, it might be advisable to create a Section Box and show only part of the 3D model.
Duplicate the current 3D view. Go to the Project Browser Views > 3D Views > and right click {3D} (or any other 3D view ) to activate the context menu. Then, select Duplicate View > Duplicate.
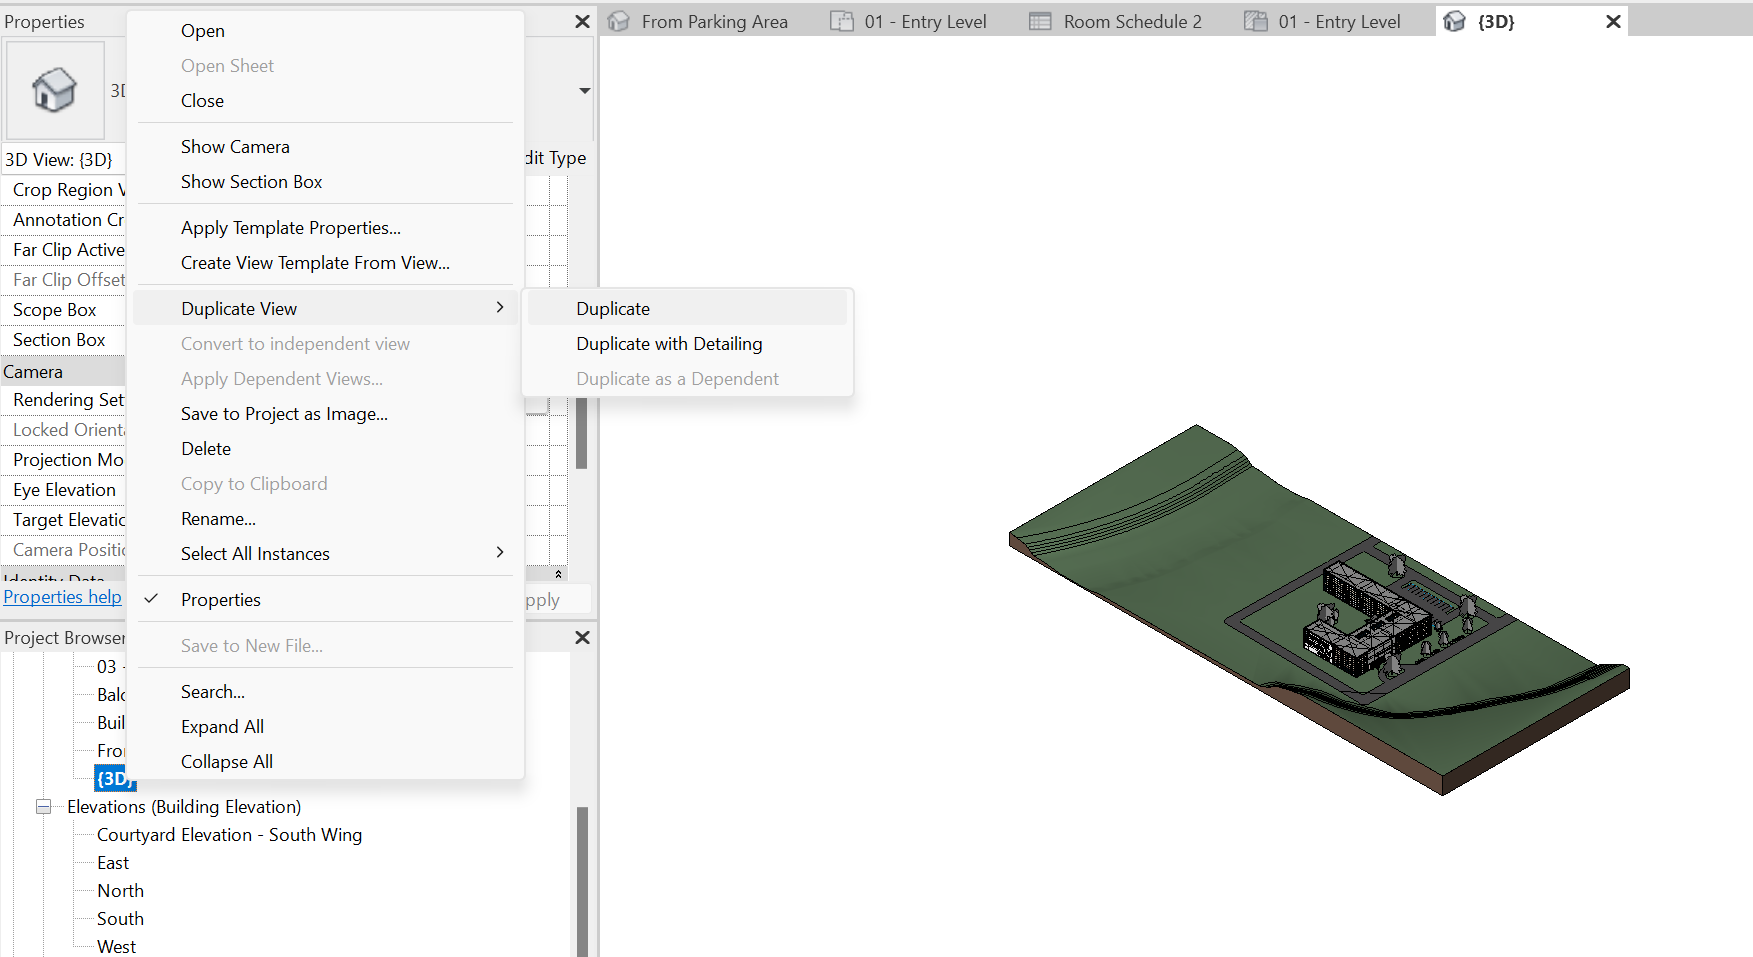
We can rename the new view IfcExport.
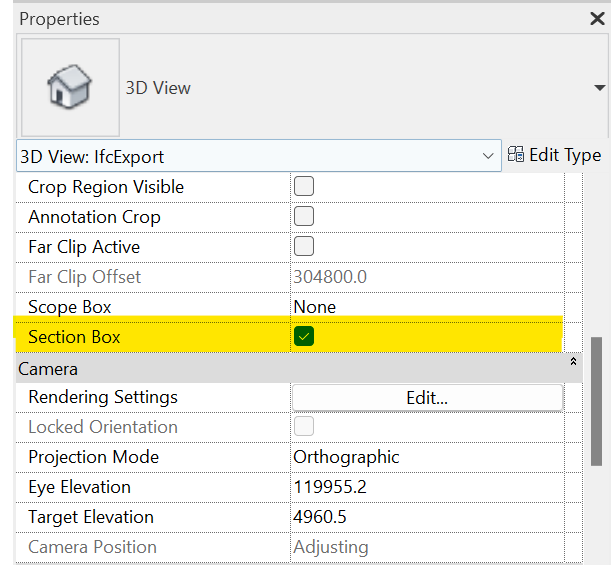
With this view active, we make sure that Section Box is checked
If the Section Box is not being displayed, use the tool Reveal Hidden Elements on the bottom left ribbon of the view window.
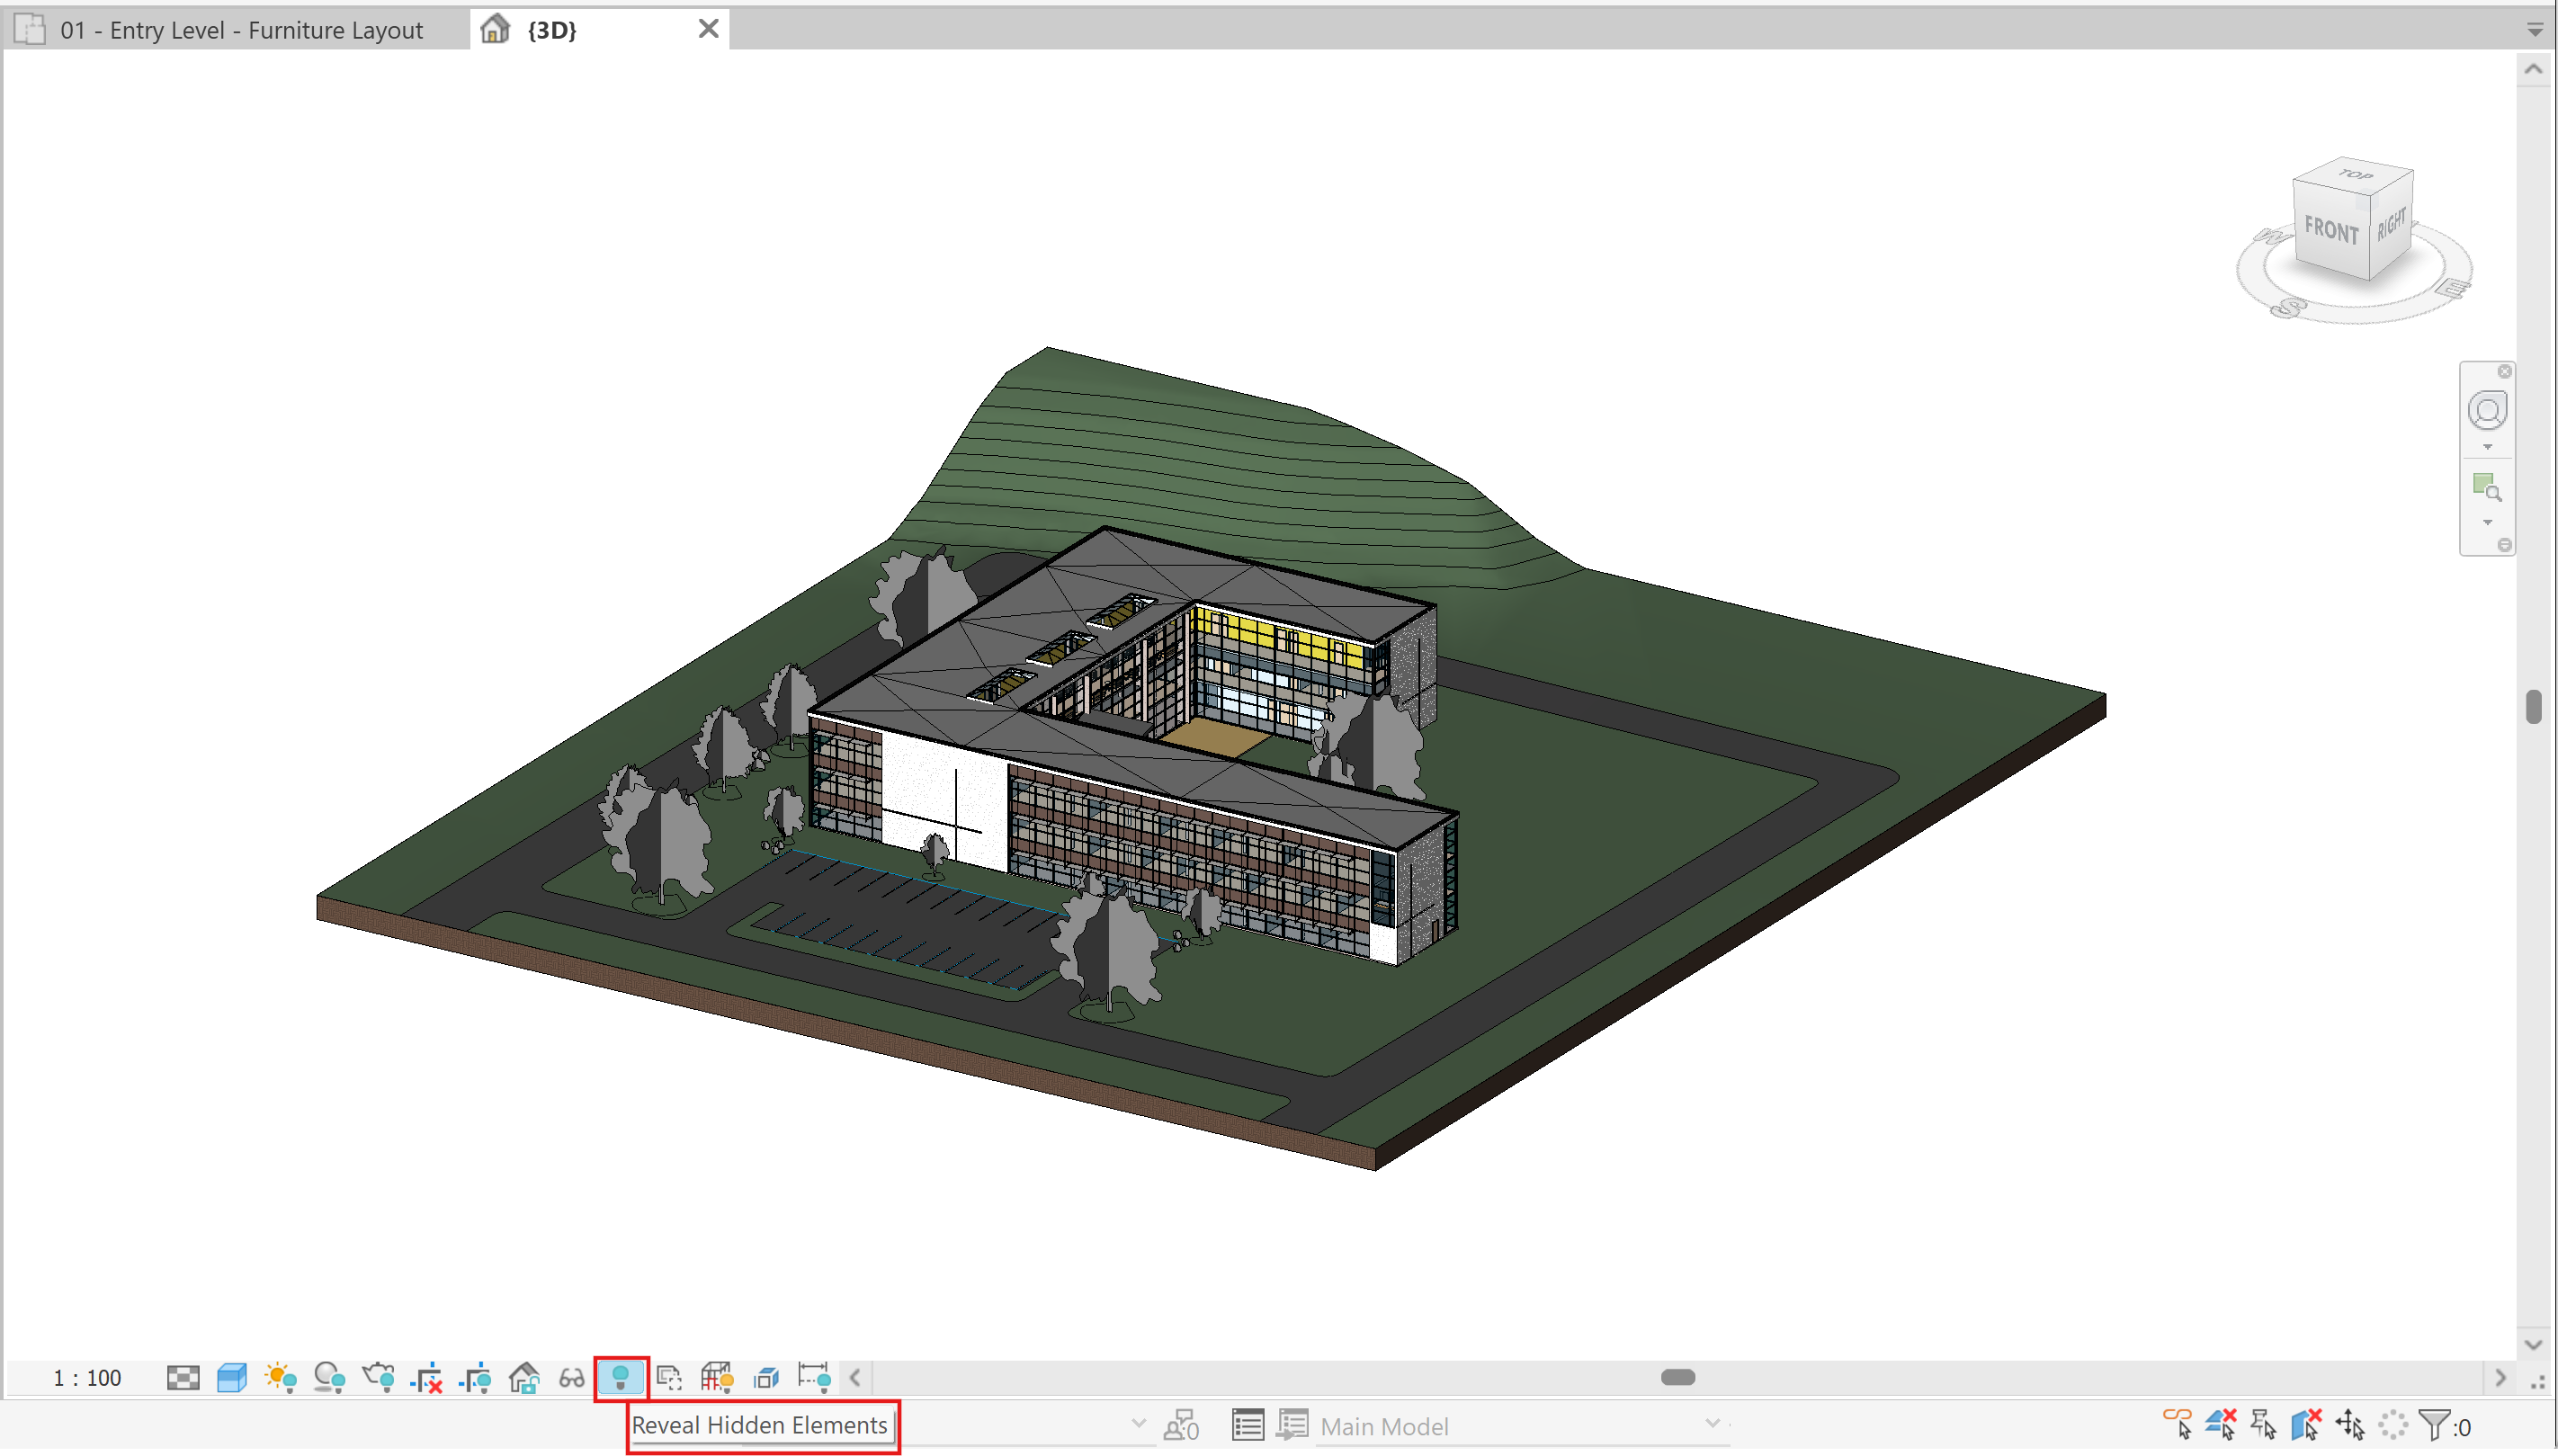
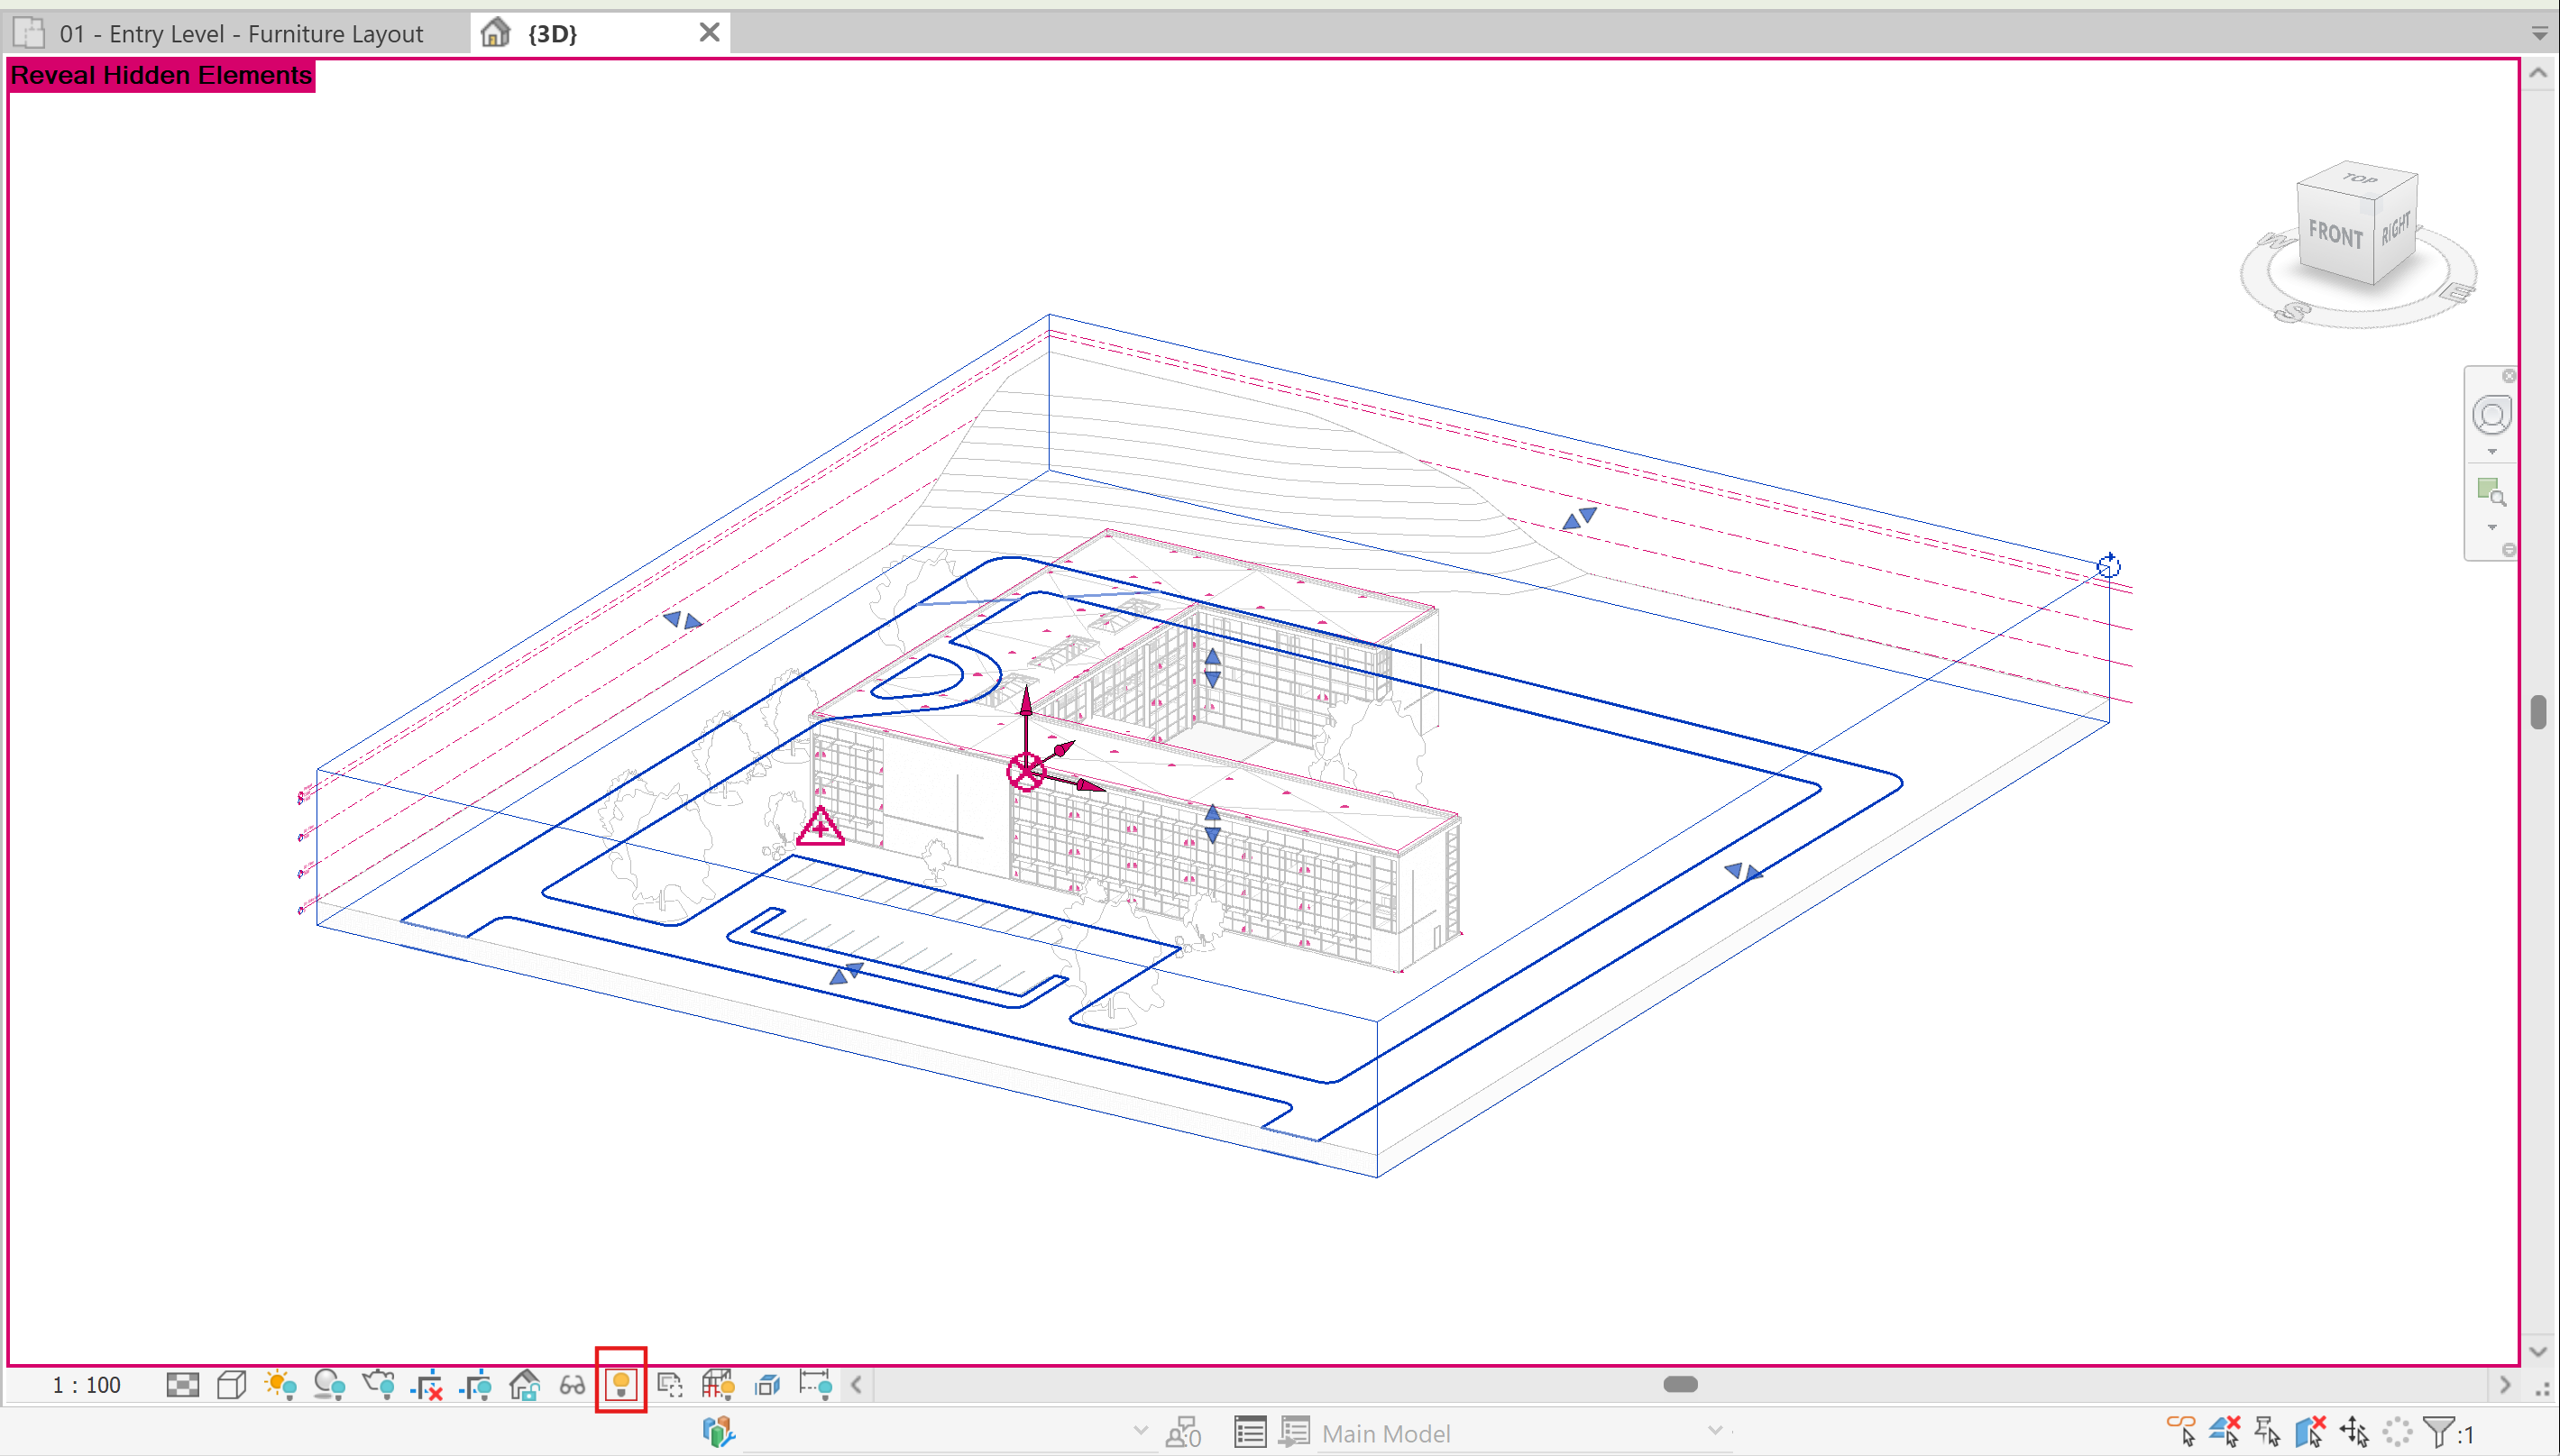
We can now adjust the boundaries of the section box to isolate a space.
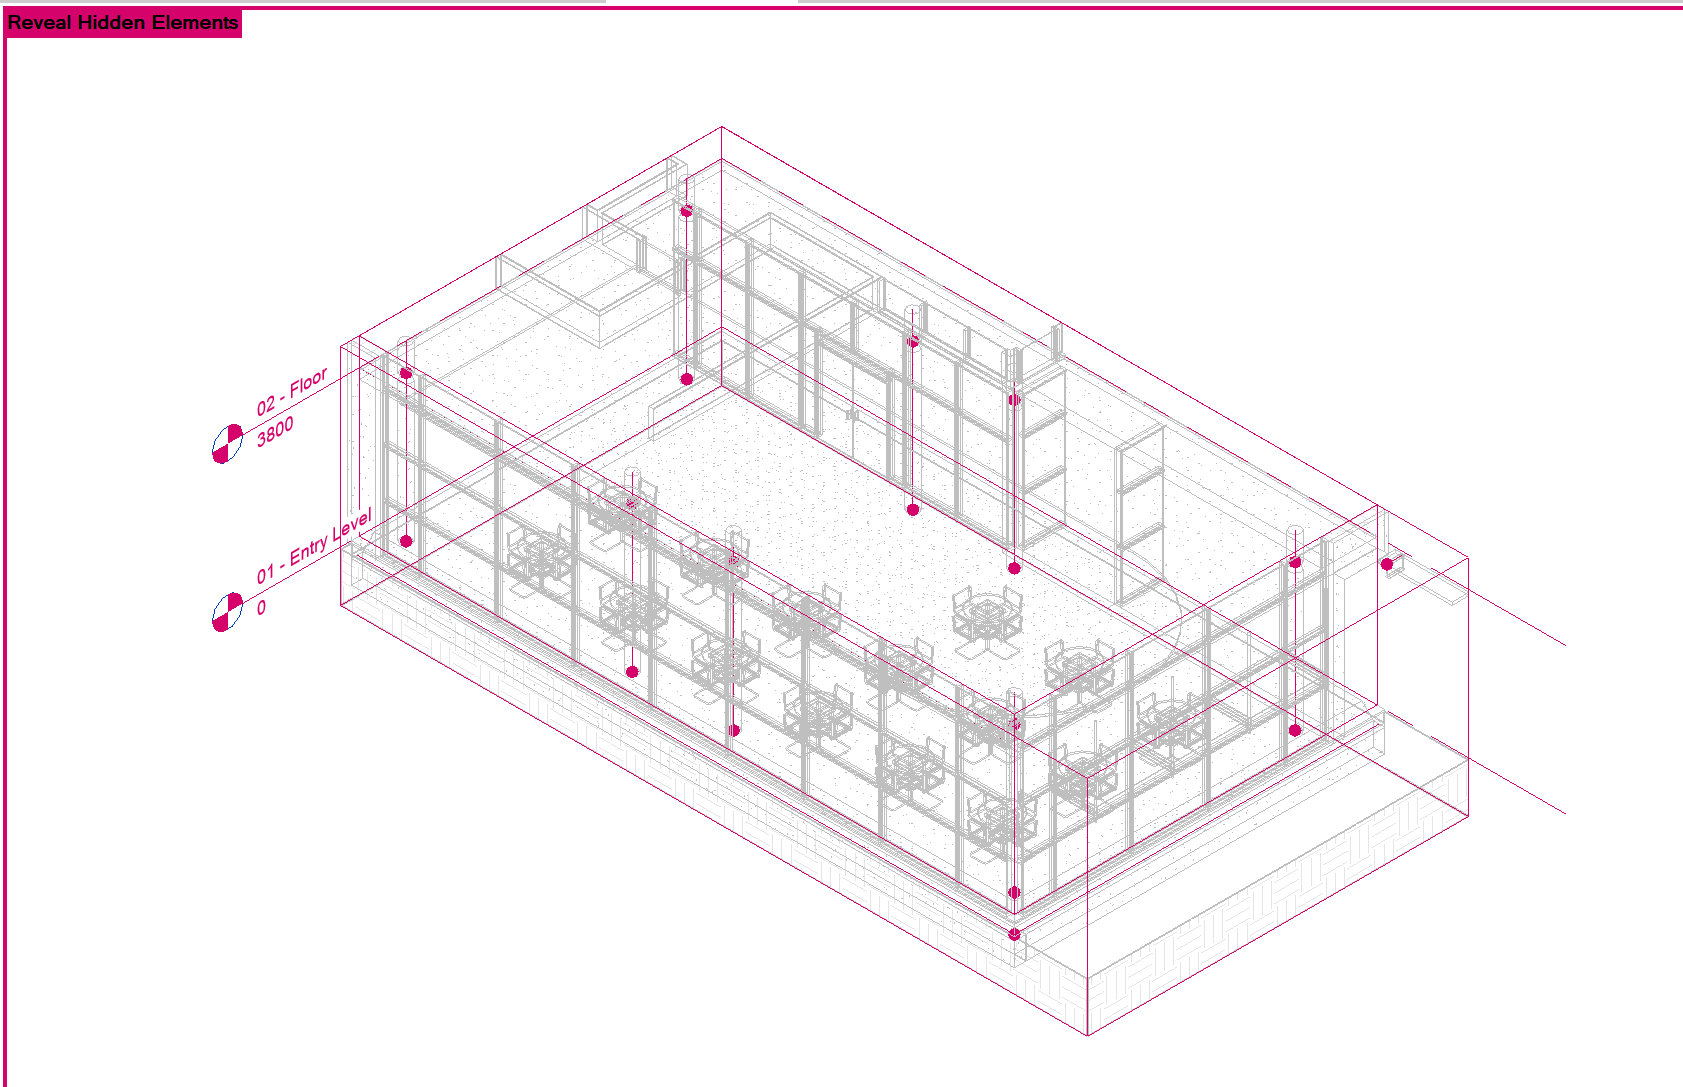
A Section Box that intersects Rooms or Areas outside the desired space causes the export of also these spaces. This is needed to export the geometry that contains the space to be simulated. In the next section, we explain how to avoid the export of adjacent rooms as IfcSpaces.
Isolating spaces using IfcExportAs
When custom selections of spaces need to be exported, it is possible to set a specific parameter that will avoid their export.
Navigate to Manage > Project Parameters

Click Add or on the New Icon, depending on your Revit version
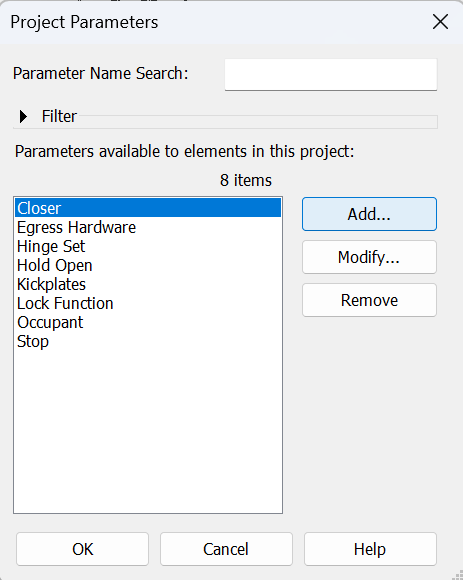
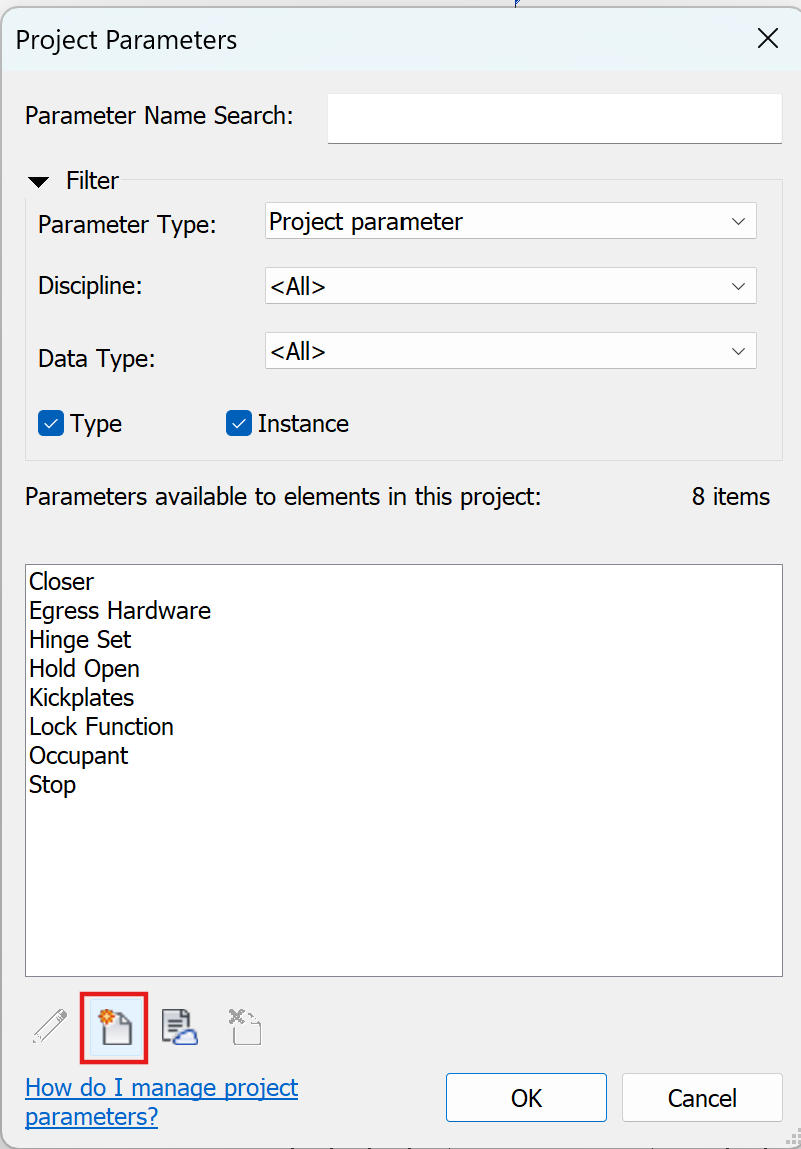
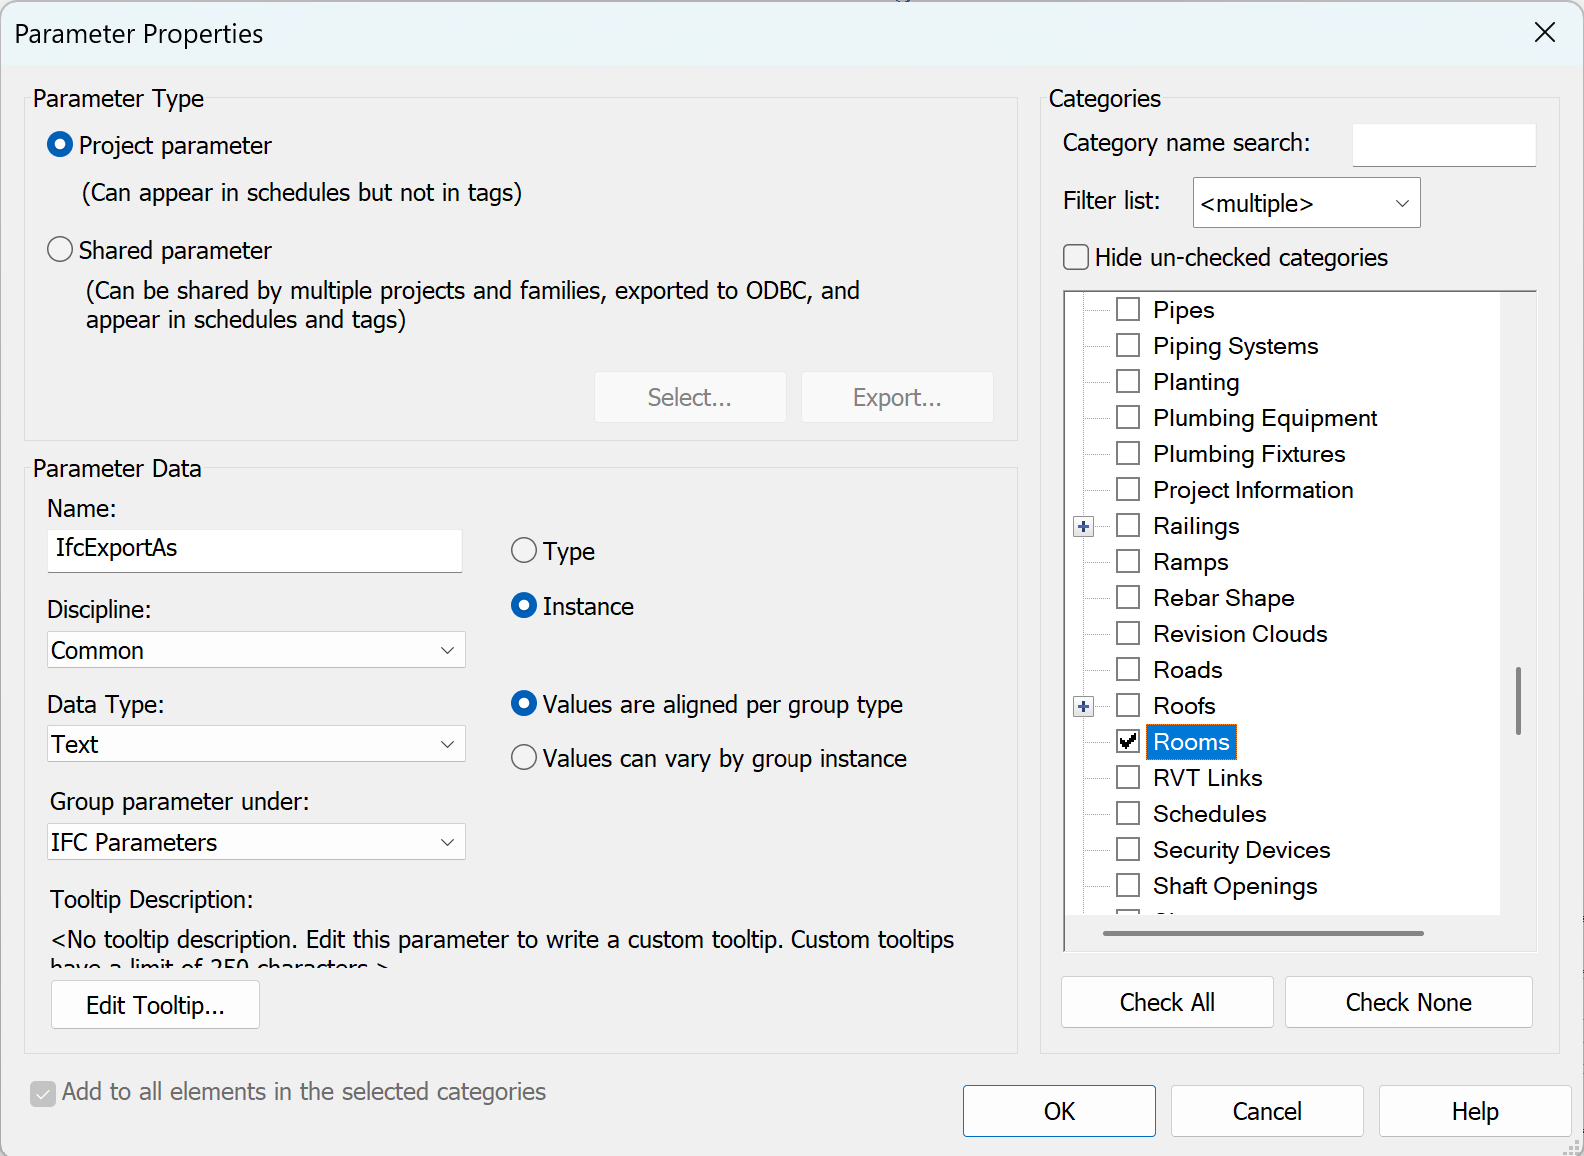
Set the dialog as displayed in the picture. The name of the parameter should be IfcExportAs. The type should be Text. Group parameter under should be set to IFC Parameters. The radio (rounded) selector should be set to Instance or it will affect all elements of the same type. Within instance, it can be chosen to align values per group type or instance. In the right panel, showing the categories, make sure that both Areas and Rooms are selected.
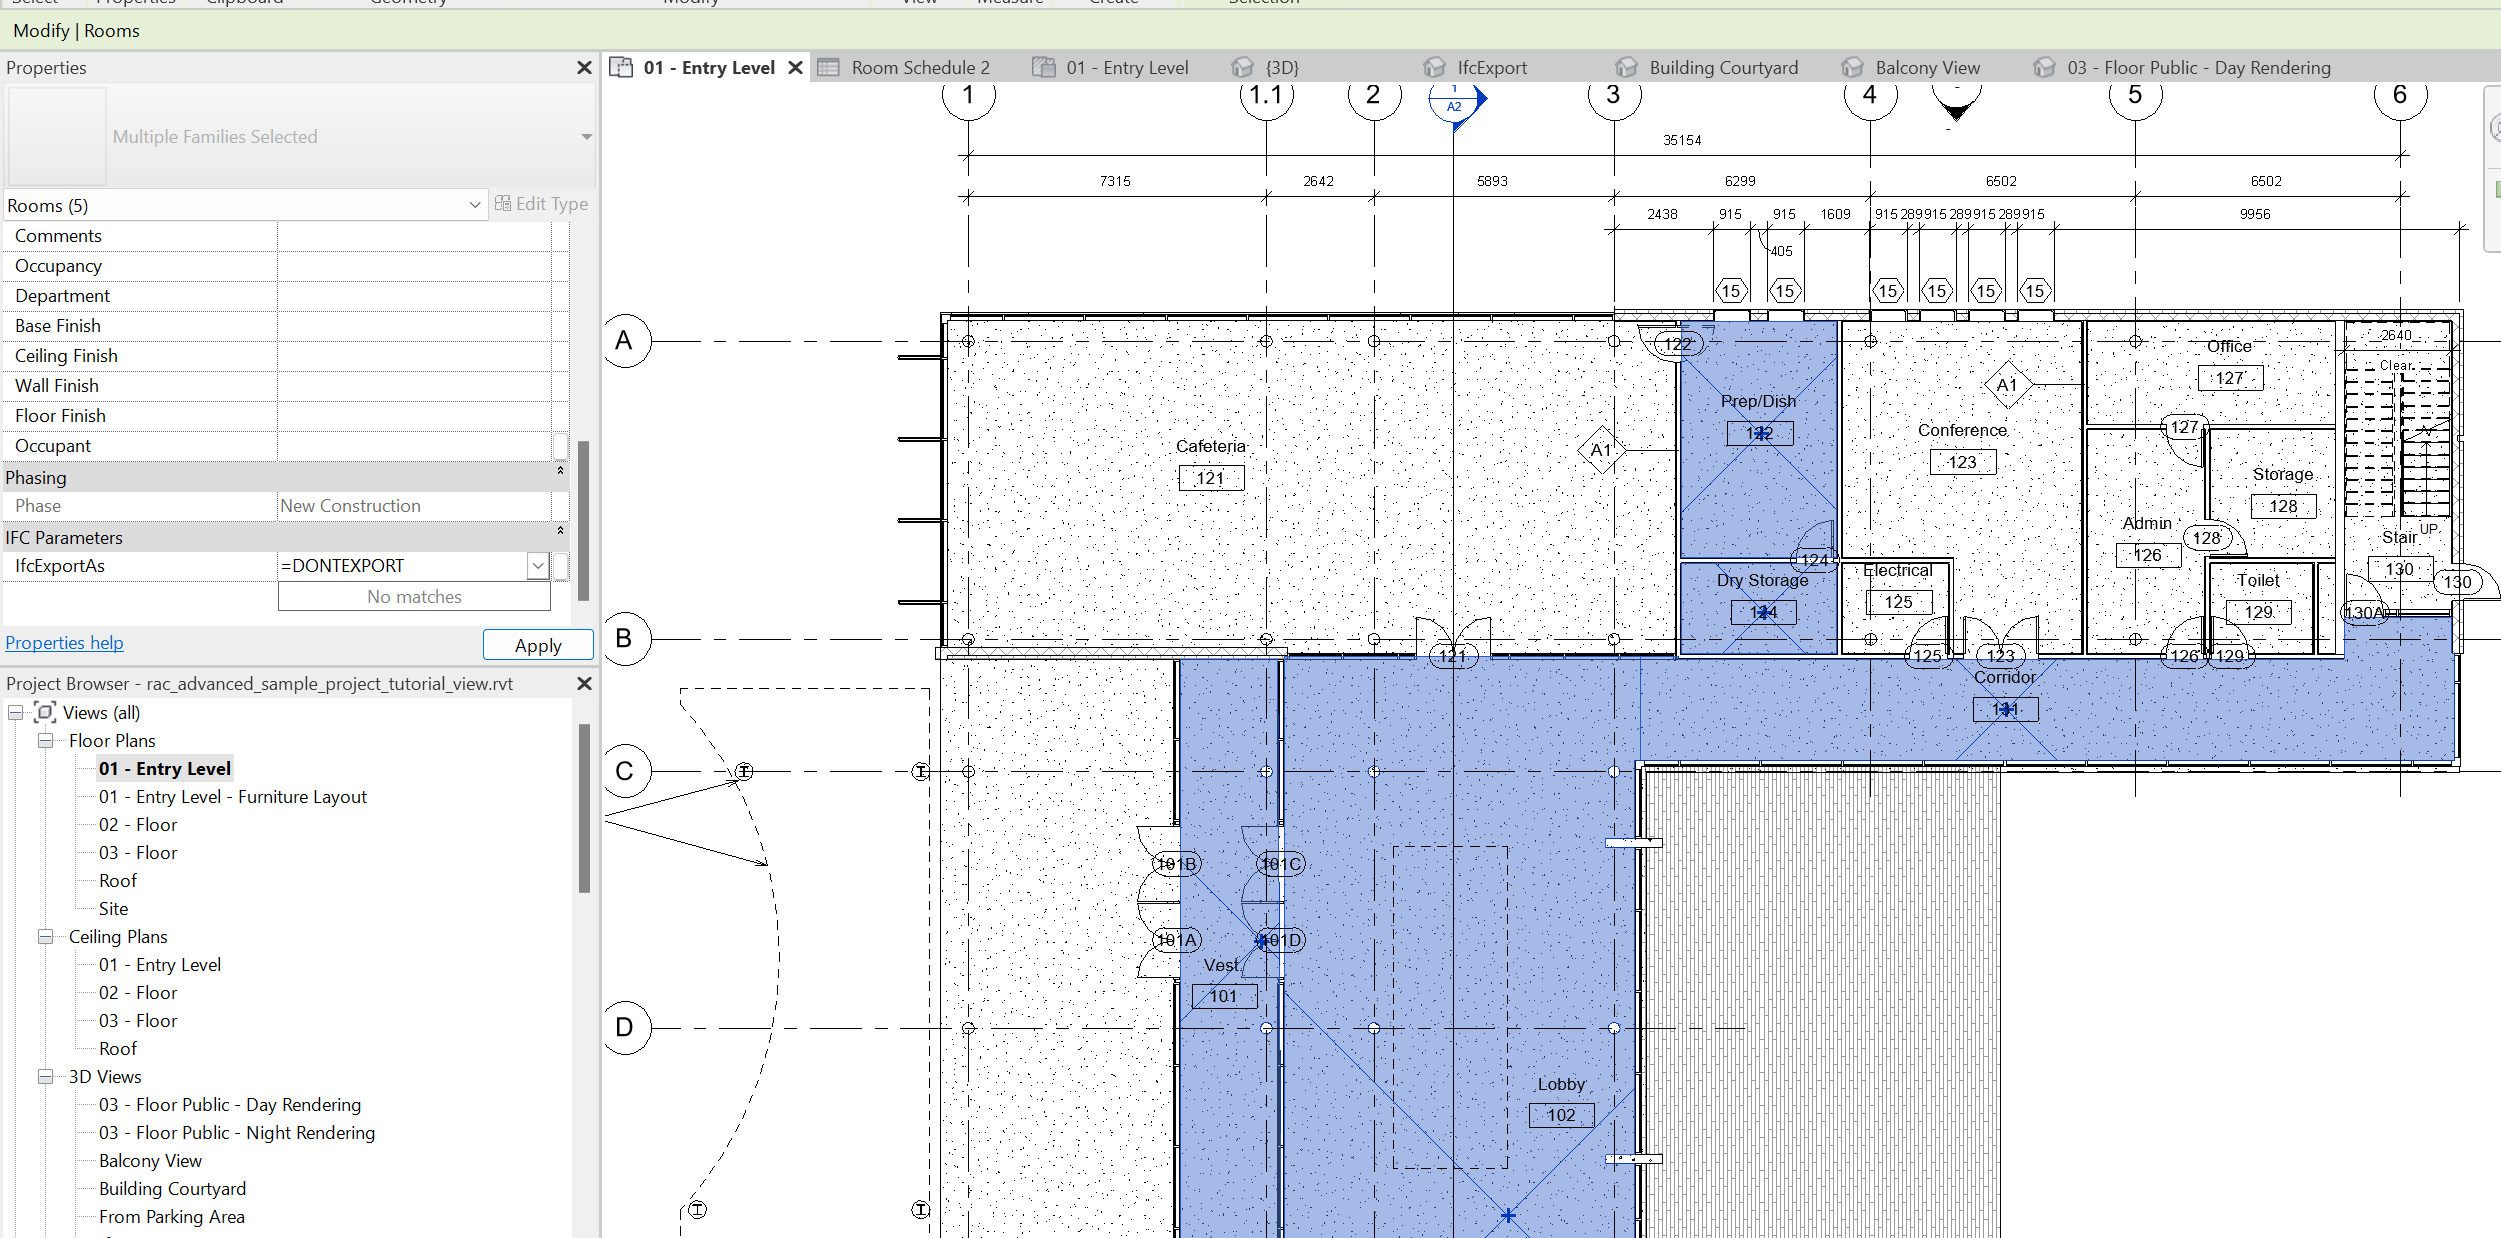
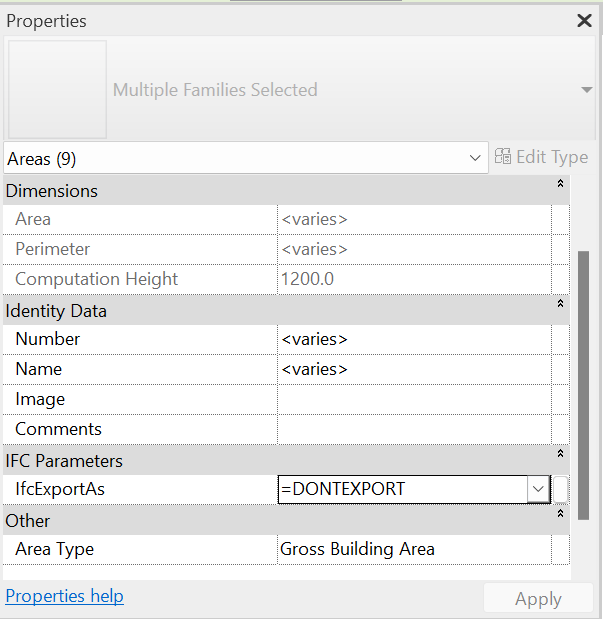
Now that the parameter is created, it will be possible to see the field at the end of the Property inspector. Select the Rooms adjacent to the cafeteria and type in the field next to IfcExportAs “=DONTEXPORT”. Click Apply. This command will ensure that the spaces adjacent to the cafeteria will not be processed.
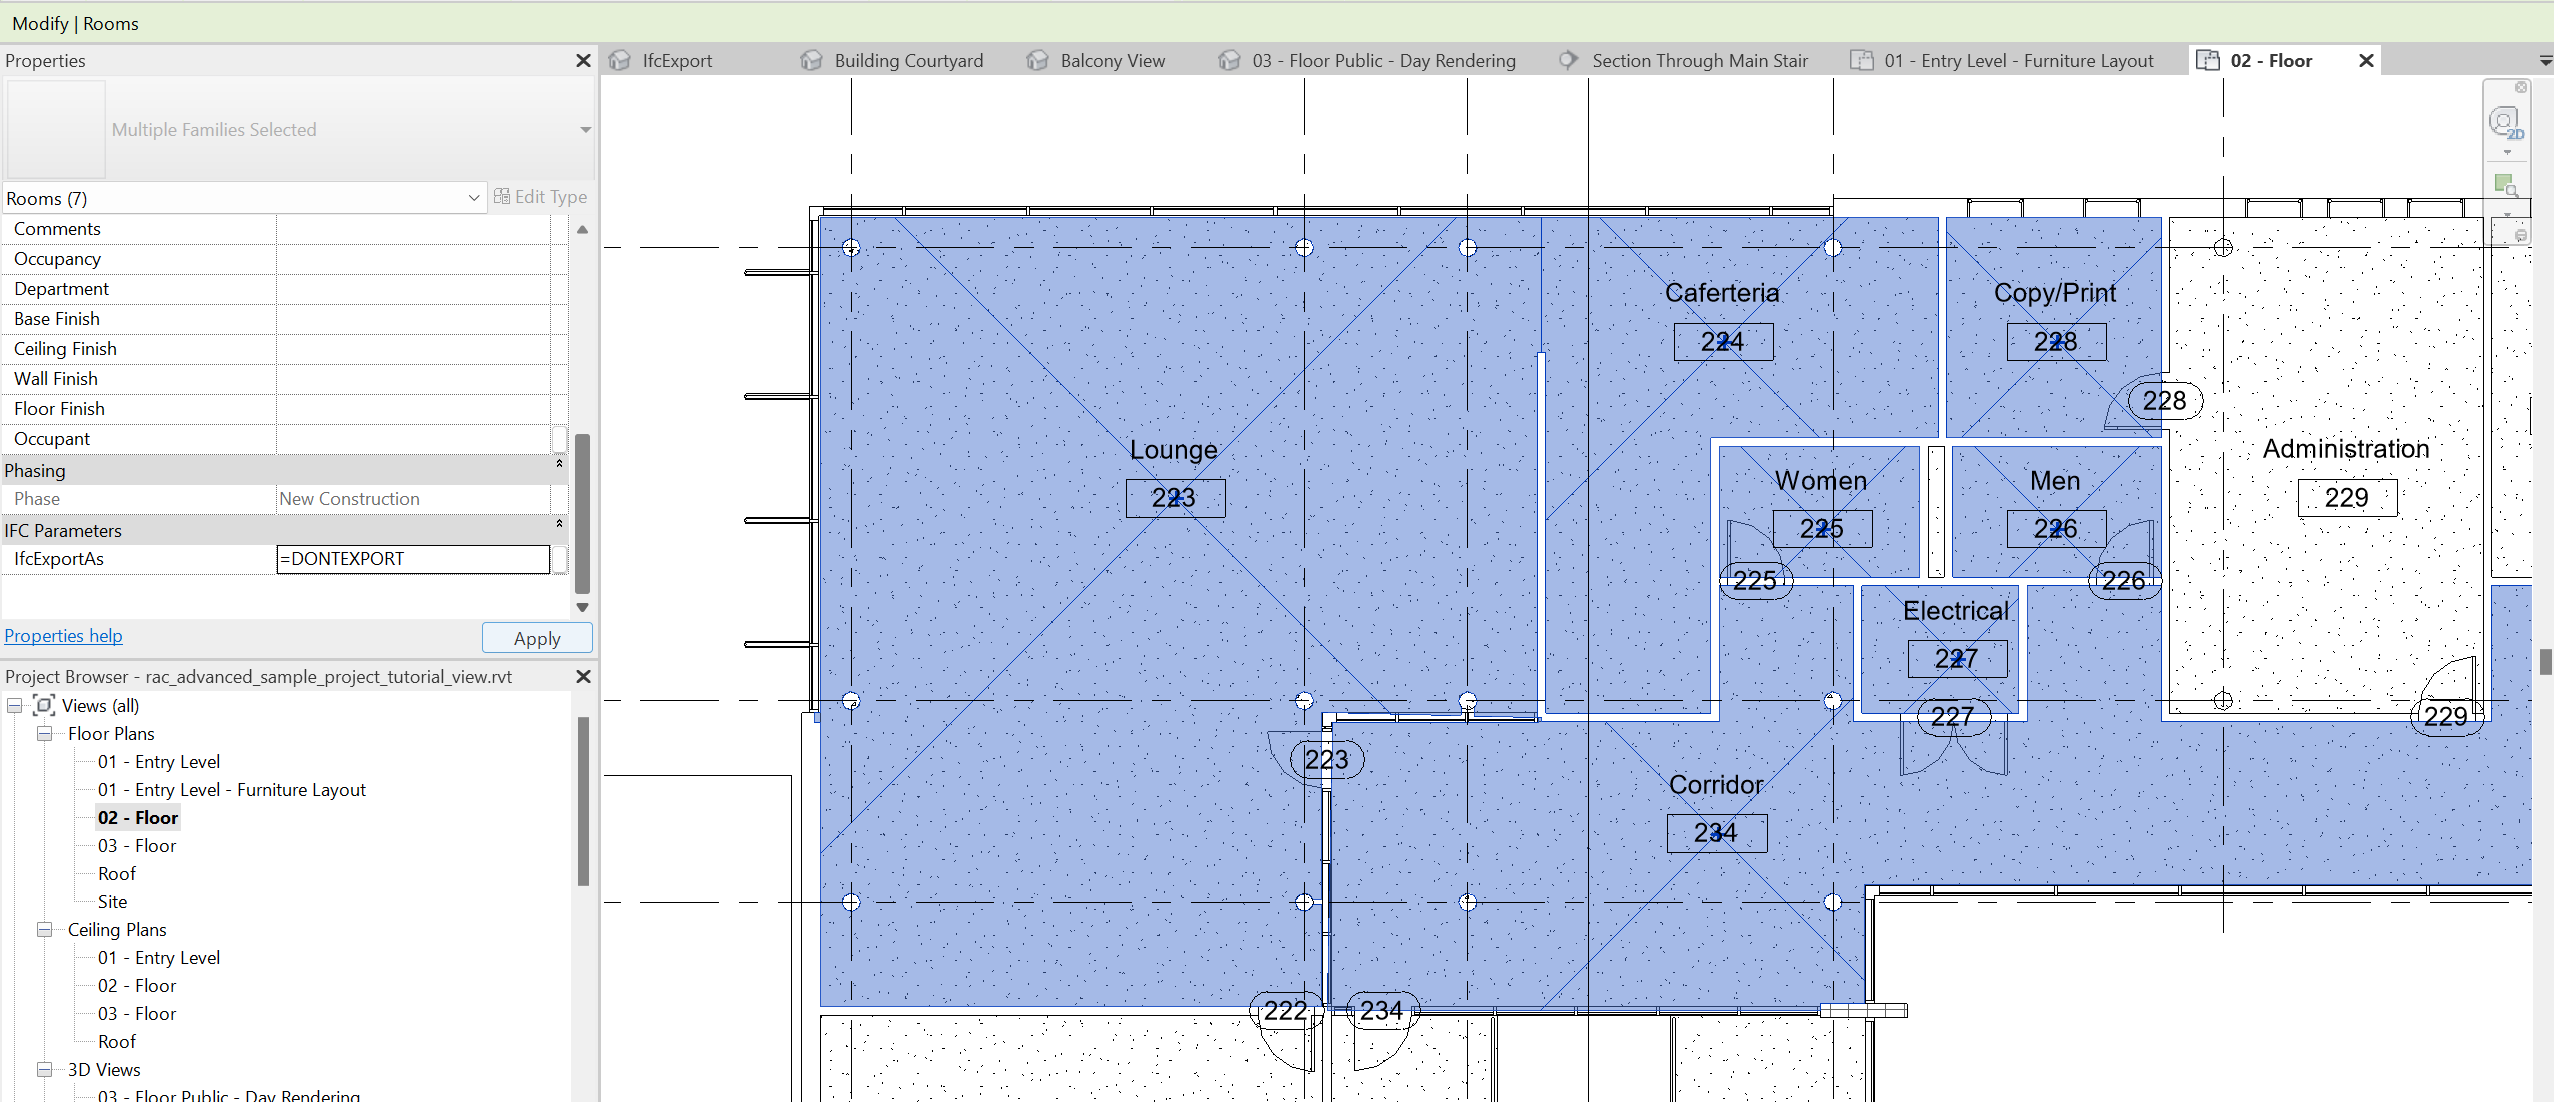
Repeat the same process for the spaces above the Cafeteria, on Floor 02, from the Floor Plan view.
Finally, go to the Area Plans views and make sure that both the area covering the cafeteria itself, and the one on the floor above have the parameter IfcExportAs assigned to “=DONTEXPORT”.
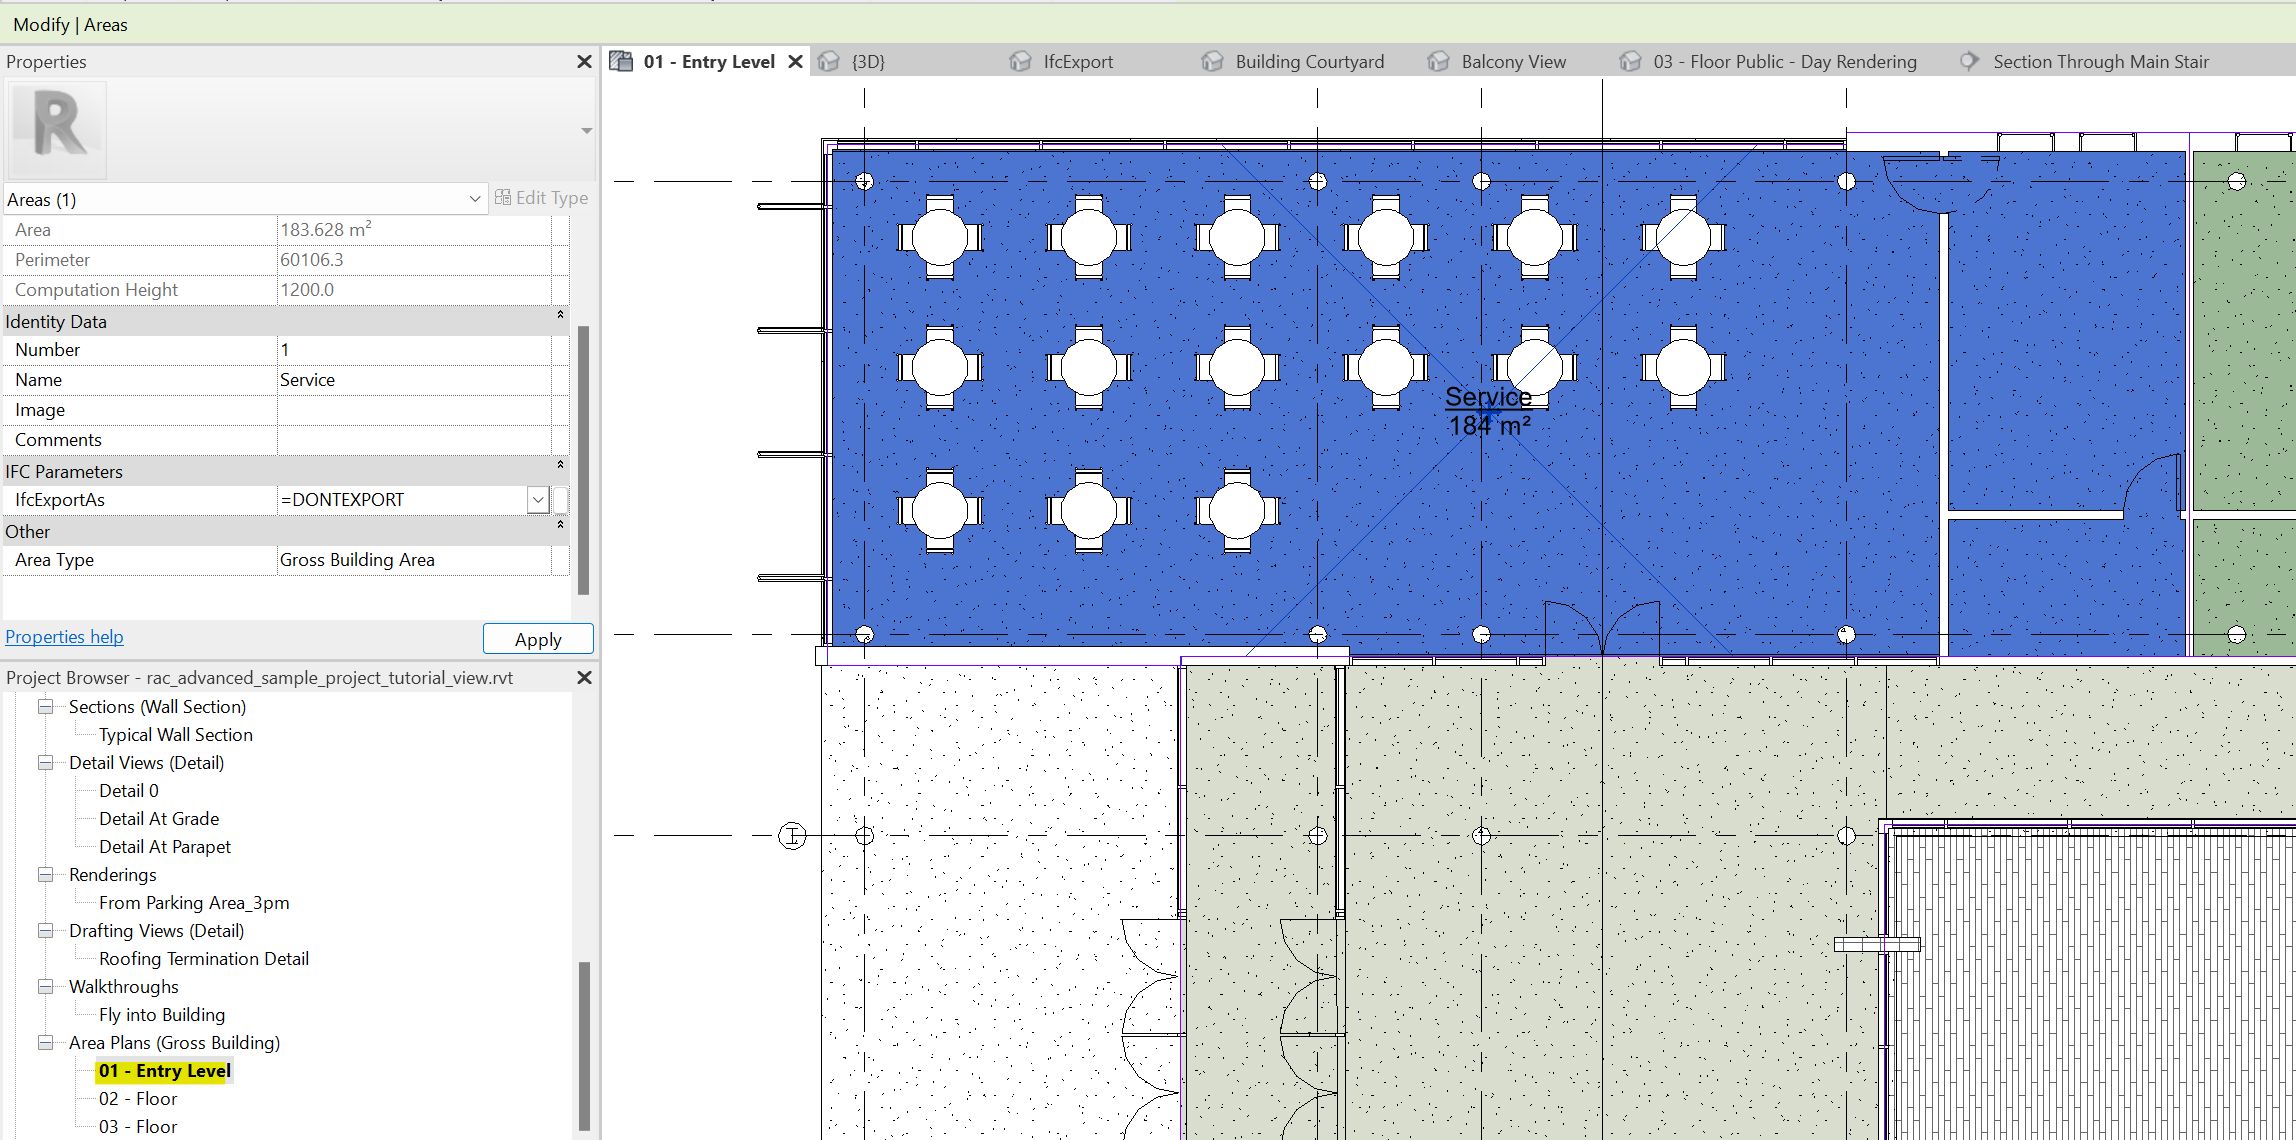
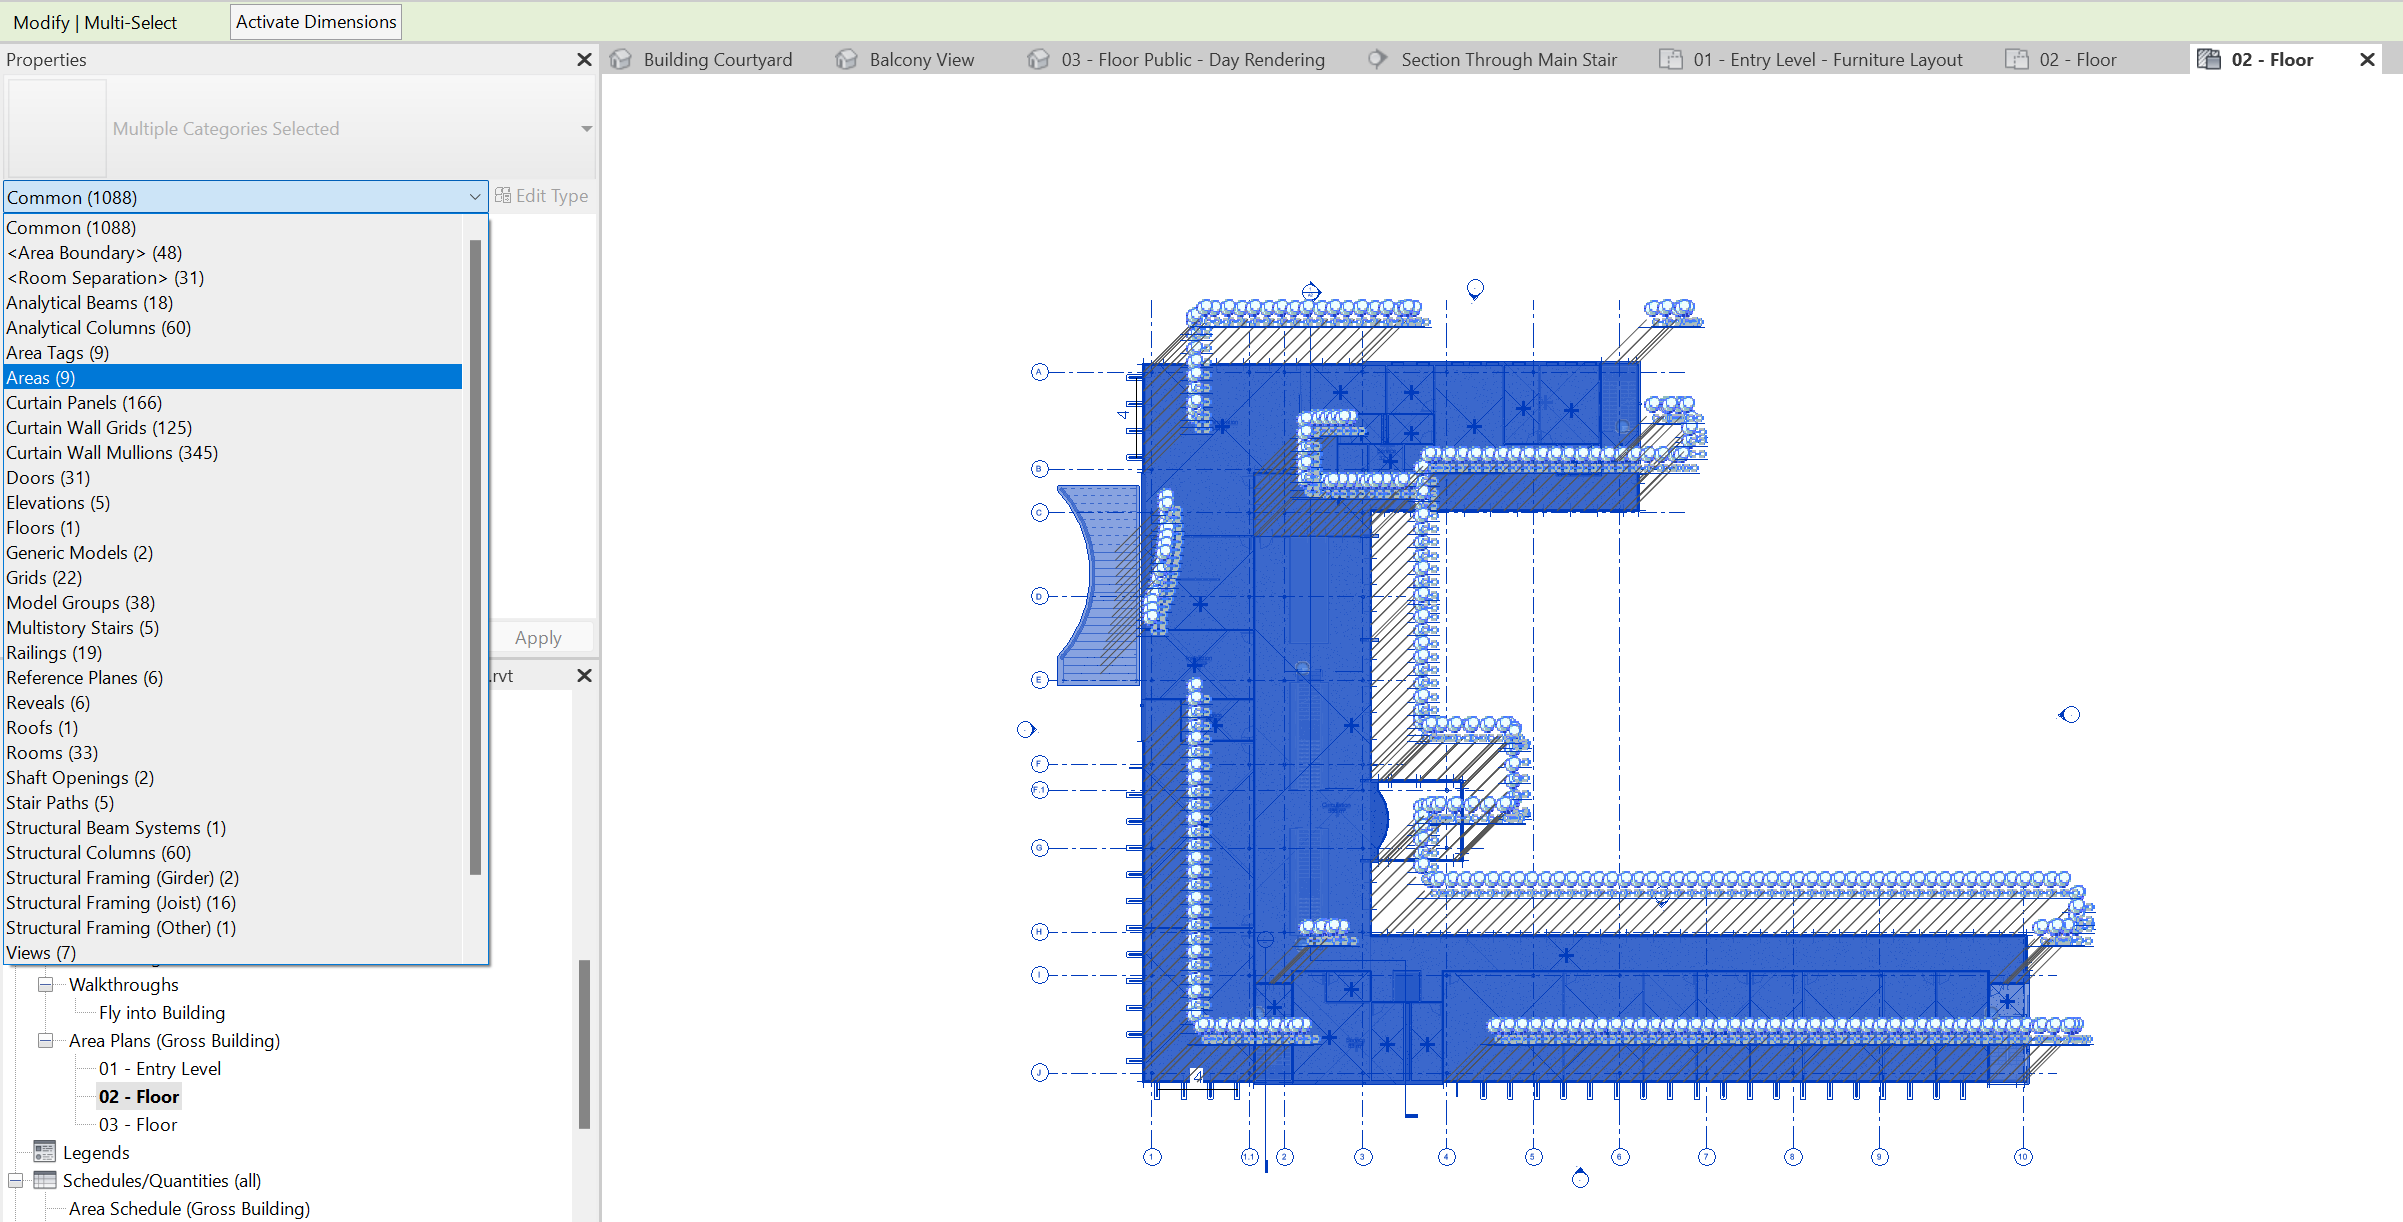
A quick way to ensure that all relevant Areas are not exported would be to select (for each floor) all the Areas from the Area Plans view. This can be done by selecting all objects and then isolating Areas by clicking them inside the dropdown on the left, in the Property inspector.
Set IfcExportAs to “=DONTEXPORT” for the relevant Areas.
Go back to the 3D Section Box view and export the IFC file with the 3D view option selected, as explained before.
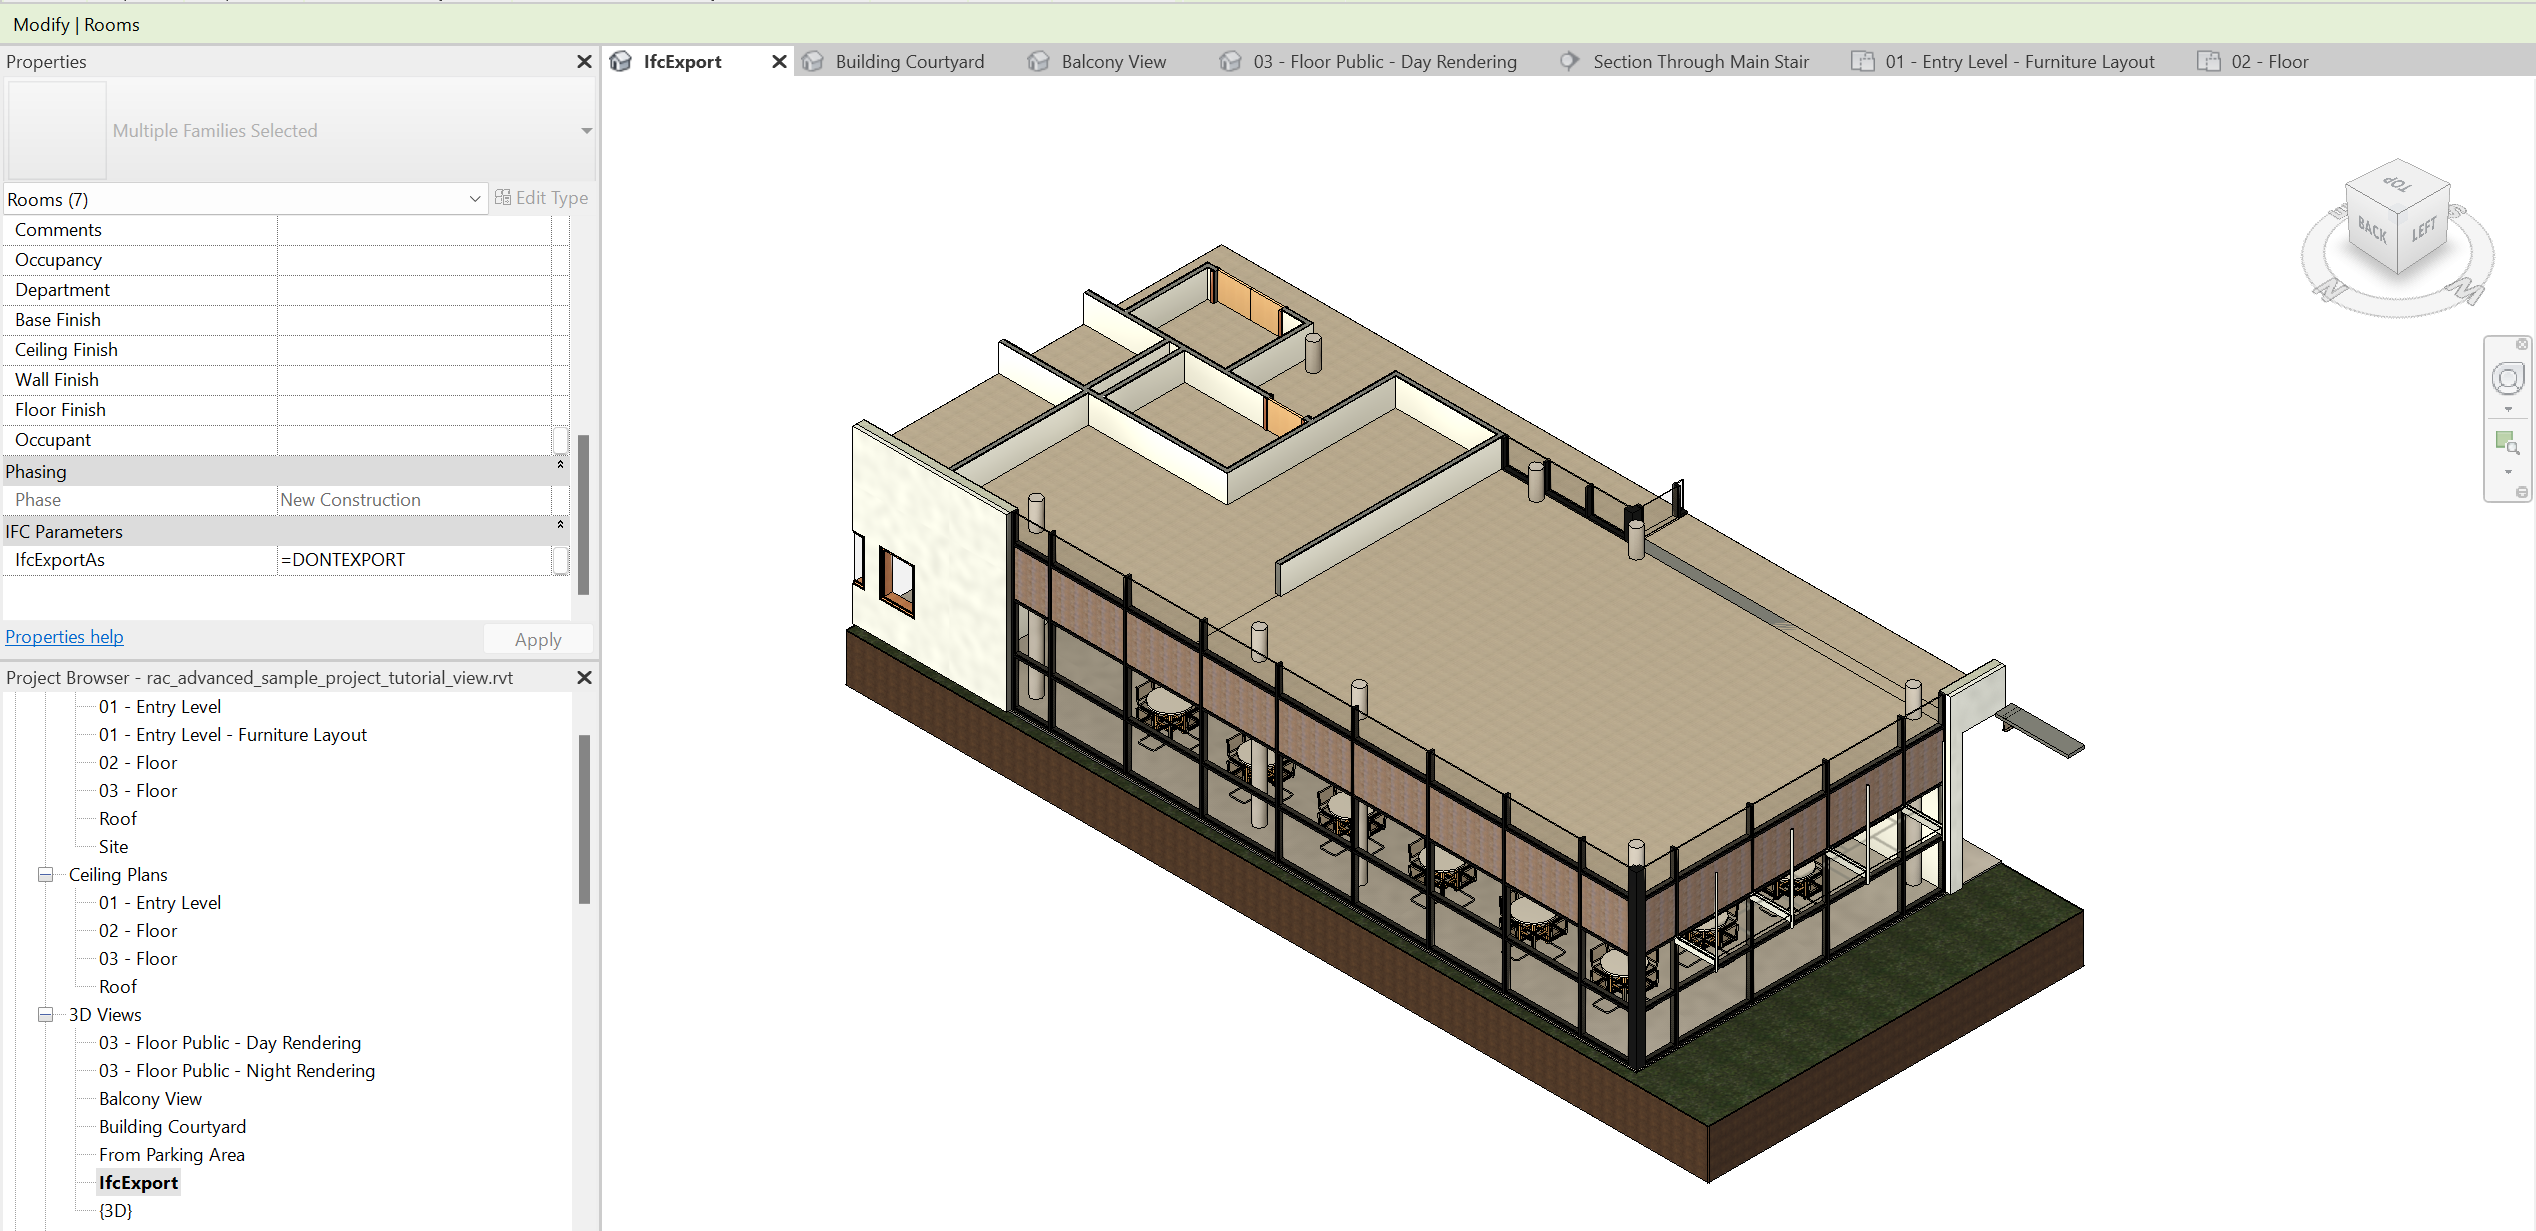
The only IfcSpace to be processed should now be the Cafeteria.
Split Walls, Columns, Ducts by Level
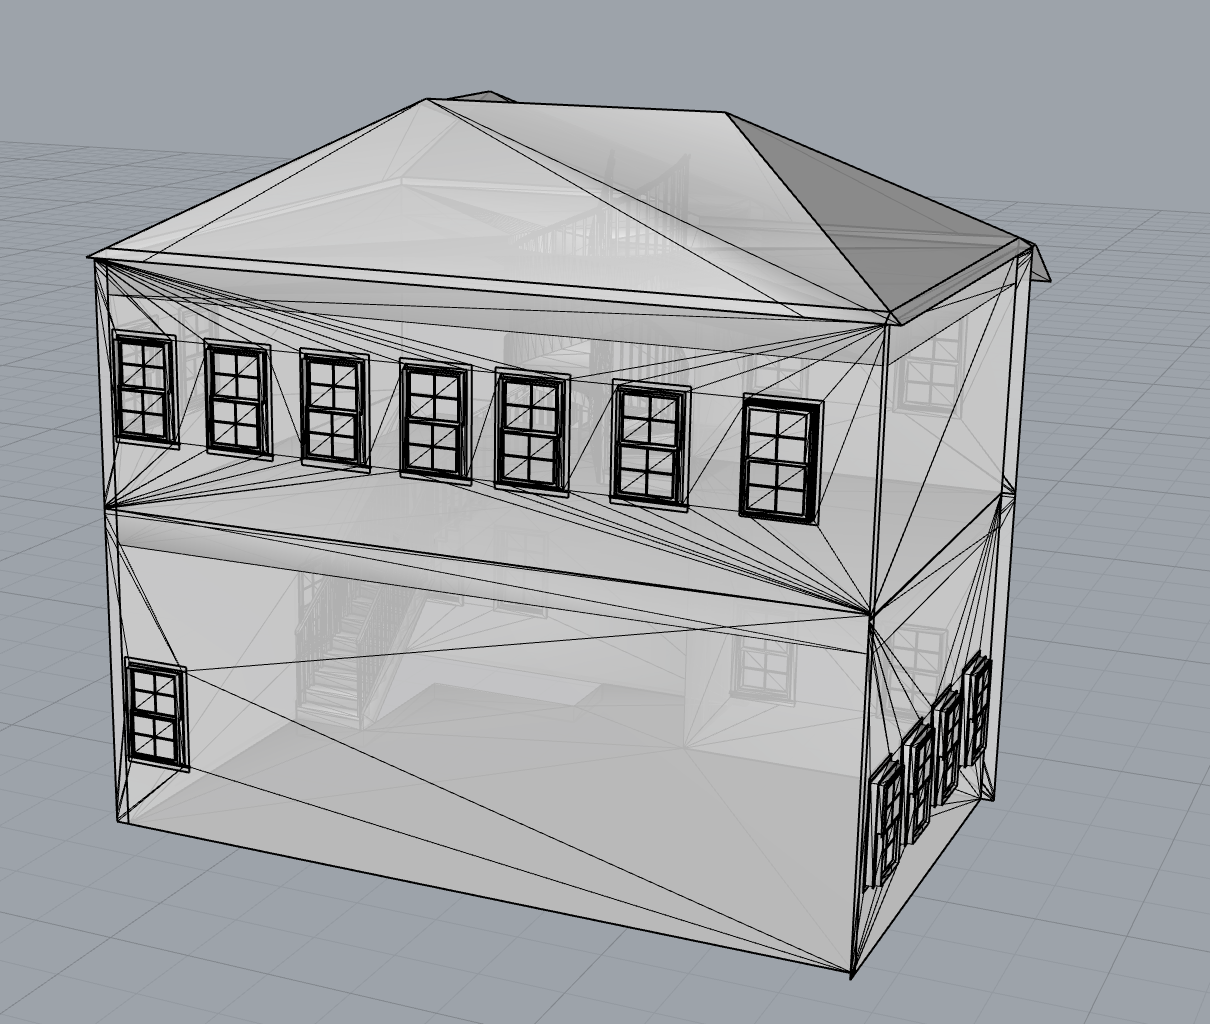
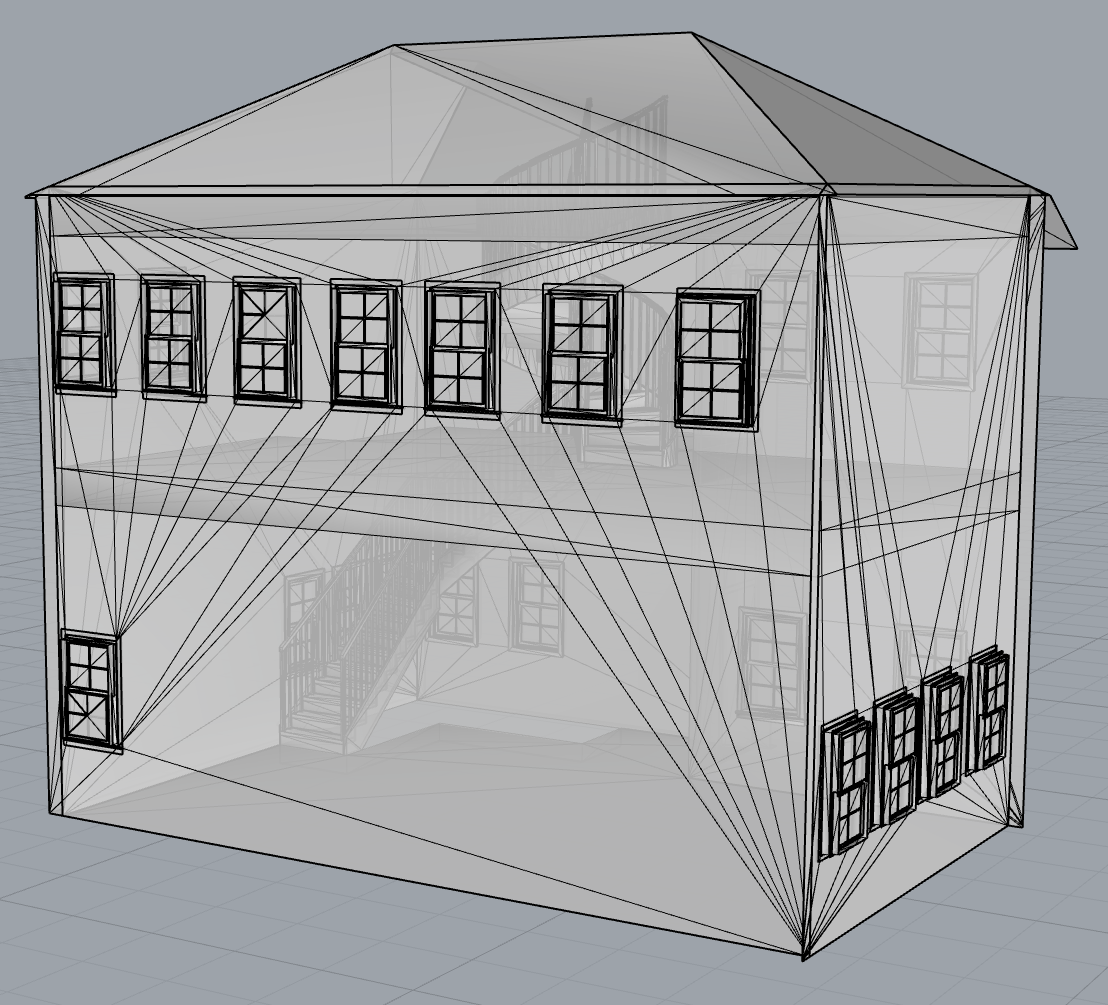
This option allows to split certain elements by level. This can be convenient when rooms next to external walls are fully separated. Note that then rooms are connected through an opening, splitting the elements by level would increase the number of mesh faces processed by the solvers.
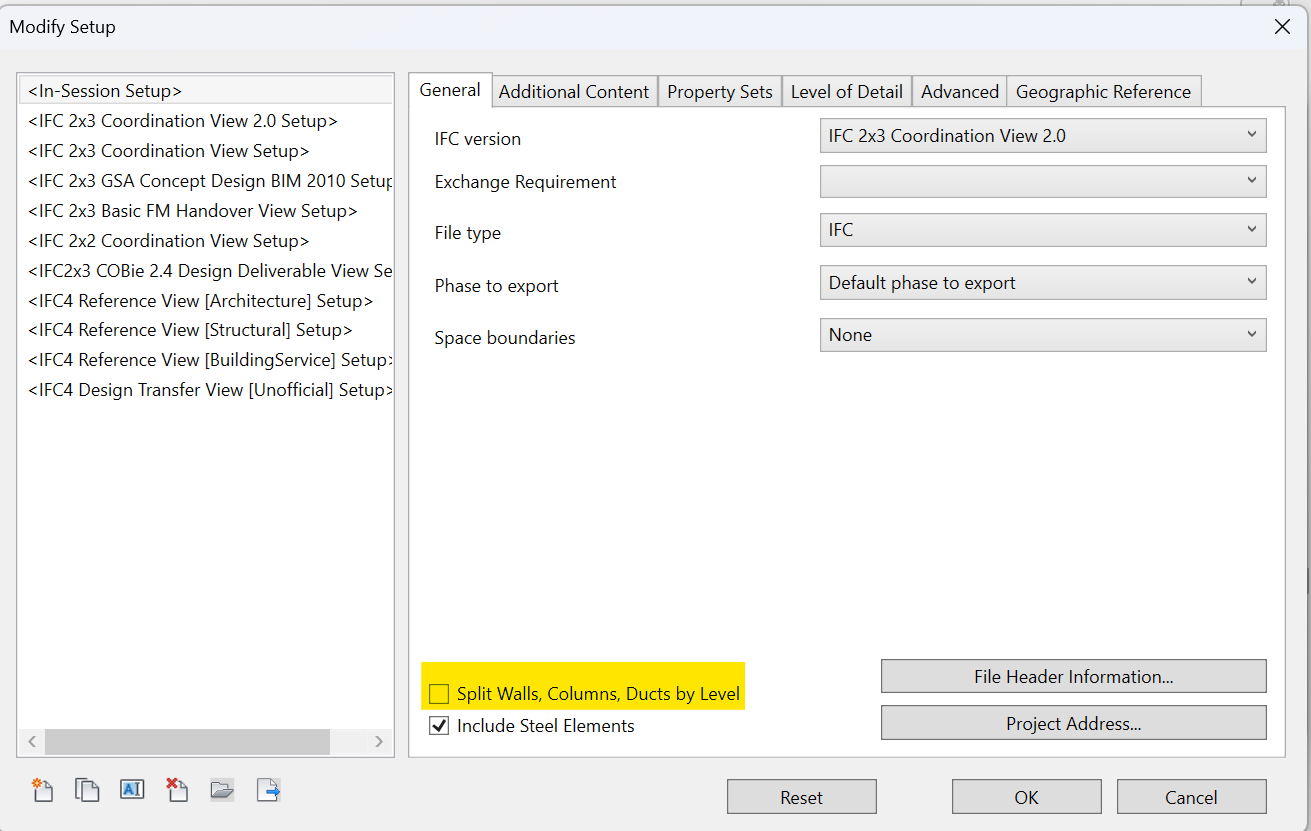
Level of detail
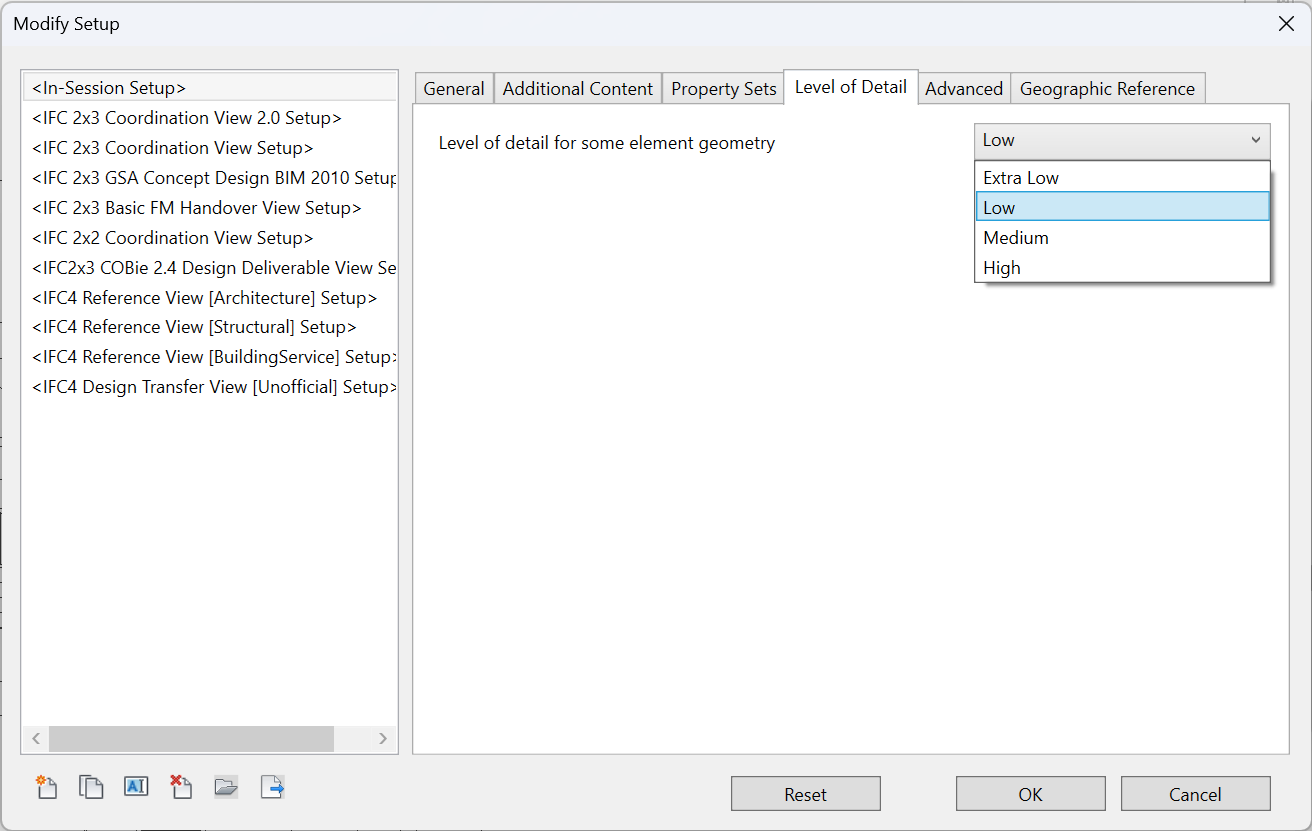
This option has an effect on certain geometries, such as ducts and railings. We recommend using Extra Low settings, that should limit the amount of mesh faces to be processed.