Importing IFC files
Motivation and overview of the feature
The chief goal of the IFC import feature is to make it easier and faster to create an acoustical model from an architectural model.
Our solution can be thought of as follows:
-
The IFC importer identifies all the spaces in an IFC model and maps them to IFC space tags where available. It will then prepare them for importing into Treble by making some geometrical simplifications that retain only those geometrical details that are relevant to acousticians.
-
Our algorithm will provide watertight spaces in as many cases as possible. The algorithm is however still in active development and at this stage not all the extracted spaces will be watertight and ready for a wave-based simulation.
-
All imported spaces can be fetched back into our Sketchup plugin for further modification, for example making the space watertight to run wave-based simulation or proceeding with further simplification.
We recommend uploading IFC files exported directly from Revit or another BIM tool. Uploading IFC files generated directly from Sketchup or other CAD tools is not optimal as those tools don’t contain the geometrical categorization required for our algorithm. Read more about exporting to IFC from Revit here.
How do we import IFC files?
The following is a brief explanation of the steps our algorithm goes through when processing an IFC file:
Simplification of the input
One of the main challenges is the sheer number of faces that one can find in the details of e.g. furniture. This detail is however often irrelevant when it comes to sound simulations . You can read more about the relevance of details in our software on our documentation here.
So, in order to bring down the simulation time, we run a simplification algorithm which helps reduce the complexity of the input model. For a detailed breakdown of how each IFC element class is simplified, see How IFC elements are simplified.
Identification of spaces
Our wave solver needs a watertight space to run a wave propagation analysis, and it is common that IFC files contain several - if not many - different enclosed spaces wherein simulations can be run.
Our algorithm will identify enclosed spaces for each IFC model and prepare them for import in Treble. If the IFC file originates in Revit it is advised that all the spaces you want to be imported into Treble are tagged with the room tag in Revit (see our guide here).
Expected workflow
At the moment, it is likely that the extracted and simplified spaces have small imperfections that prevent them from being watertight or that some undesired geometrical elements are kept. There can therefore be a need to do some manual work on some spaces before they are ready for a full wave-based sound simulation. Our Sketchup plugin has been designed with this workflow in mind as detailed here.
Note: all imported geometries can be used to run a geometrical acoustical simulation.
Upload an IFC file to Treble
The uploading of an IFC file to Treble is a two-step process.
First an IFC file is uploaded to Treble where it is processed: all the spaces are extracted and reconstructed.
Then, after the extraction process is finished, you can browse all the spaces found in the IFC model and choose which spaces to import into your Treble project.
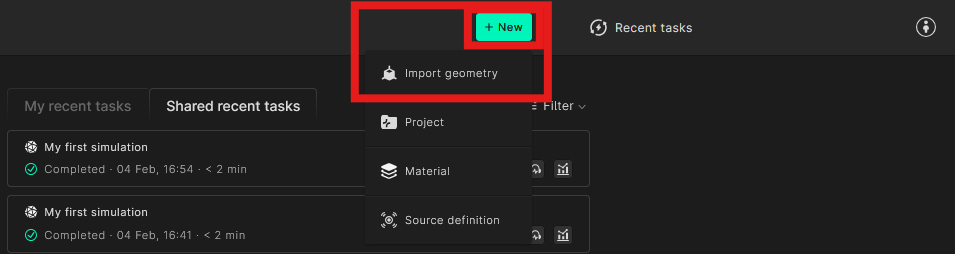
Open the upload window
The import of the IFC file is initiated by clicking on the +New green button, followed by clicking on Import geometry.
Content of the upload window
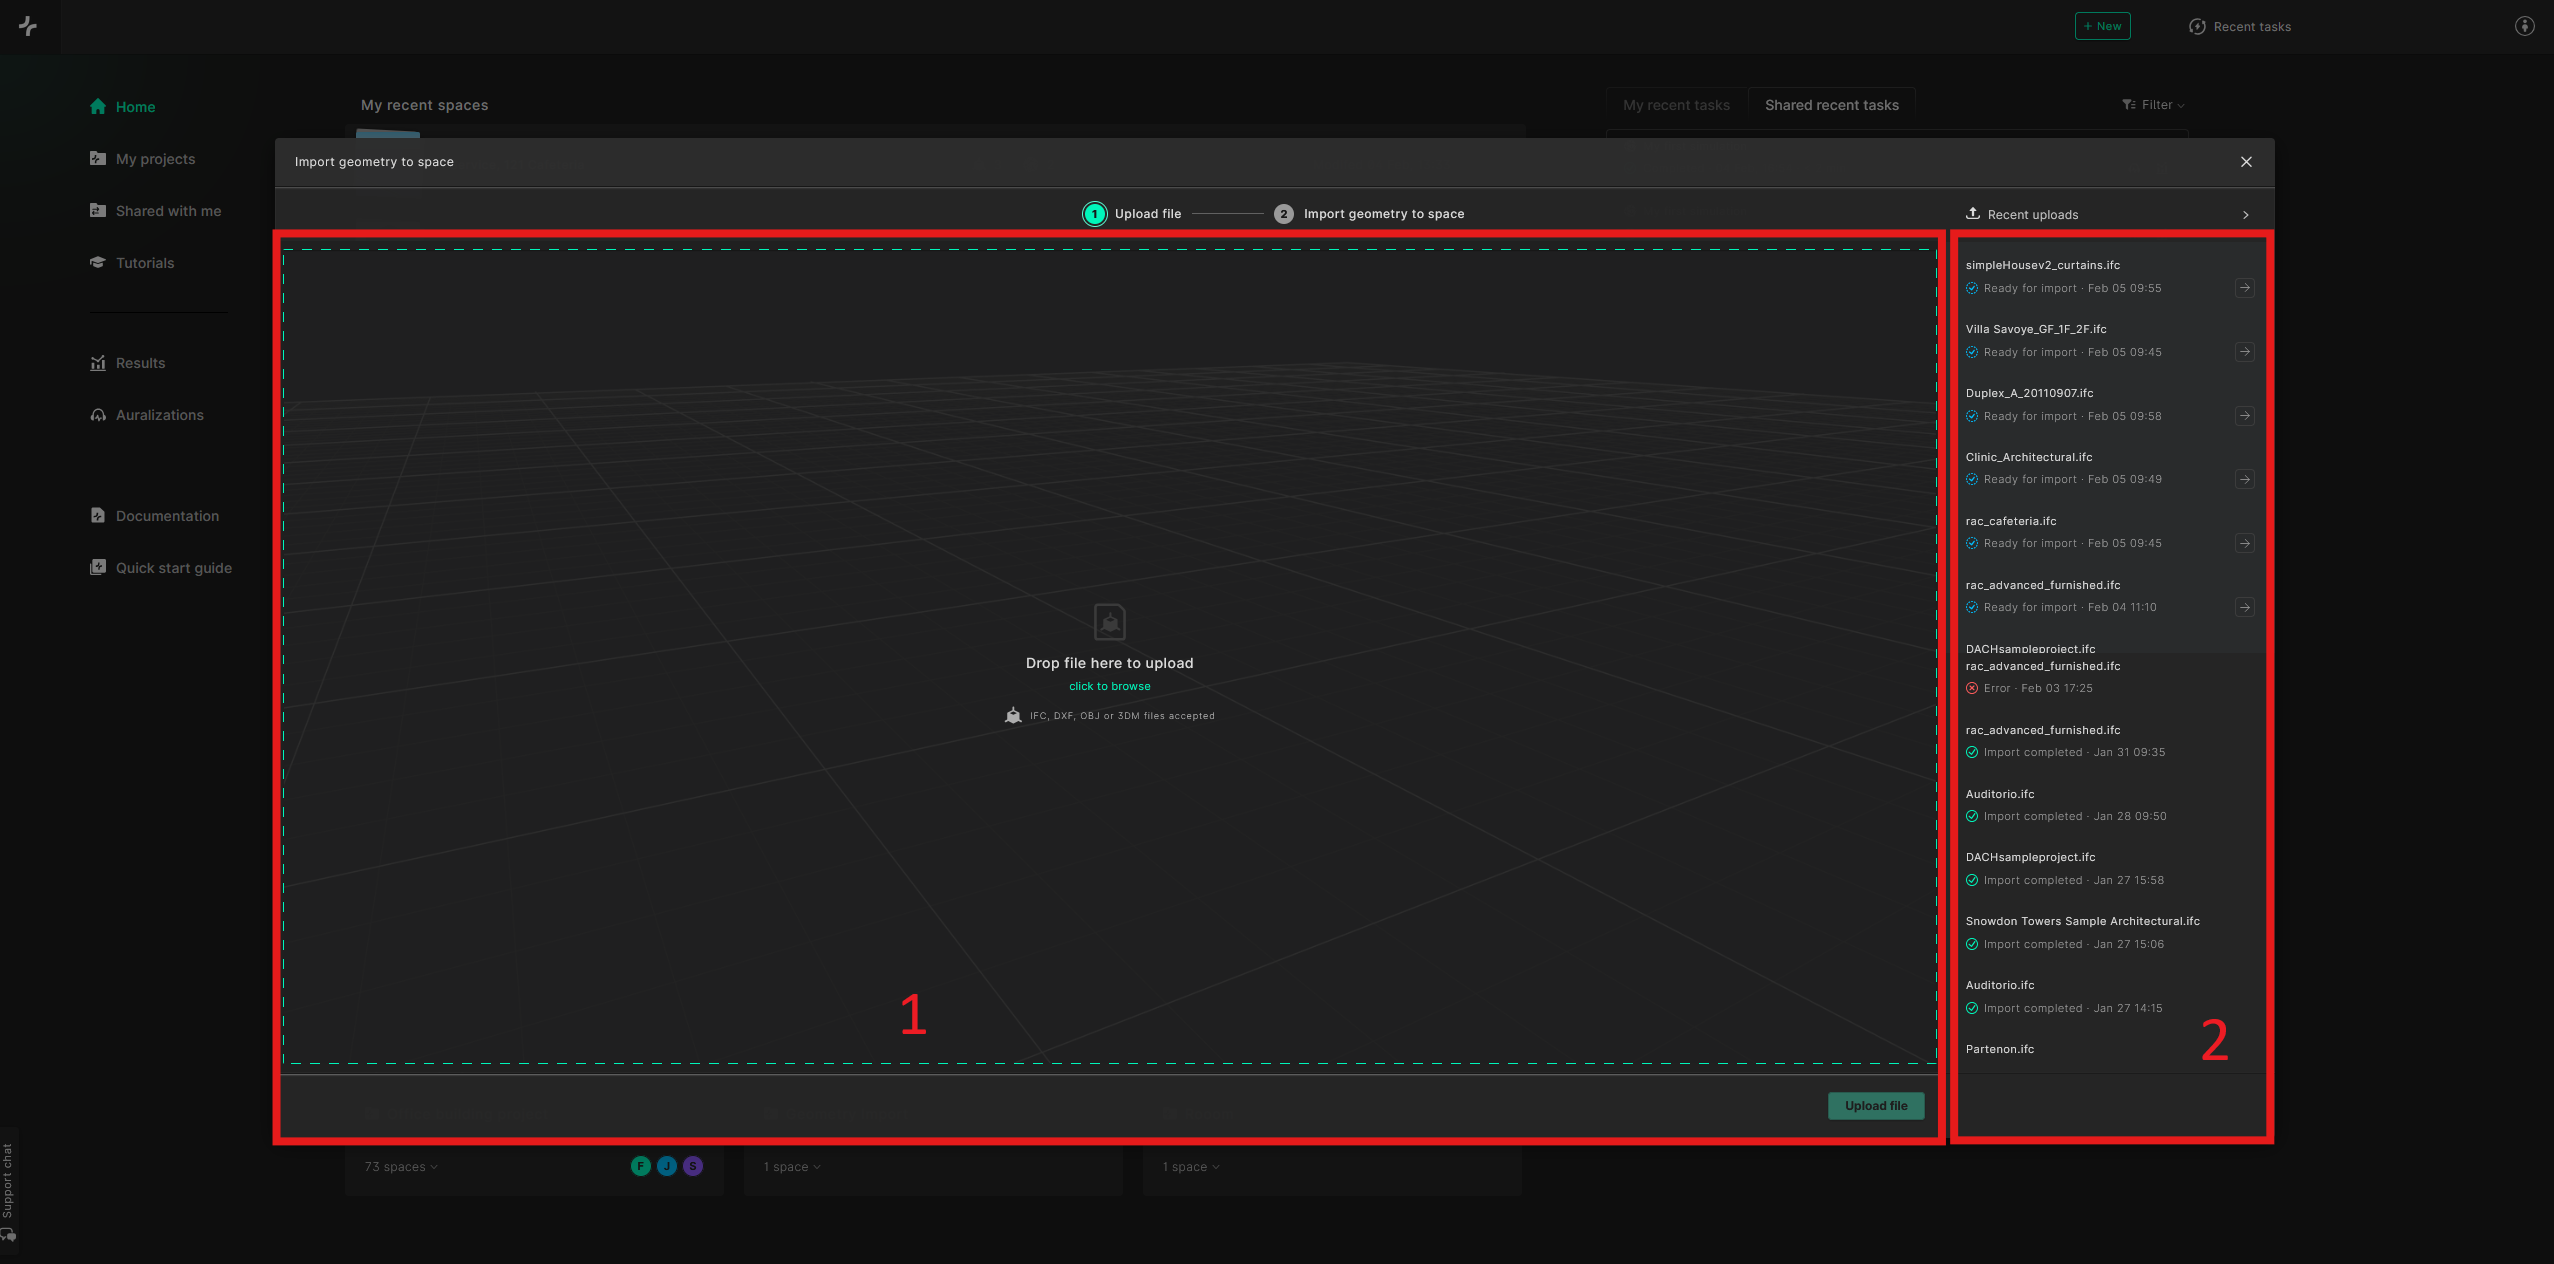
Once the upload window is open, you can drag-and-drop (or select) an IFC file into the left part of the screen (area 1), like in the normal import.
The upload window also has a panel on the right-hand side, the area 2 on the screenshot that is accessed by pressing the Recent uploads icon. This section of the window will be detailed in the Monitor the imports section below.
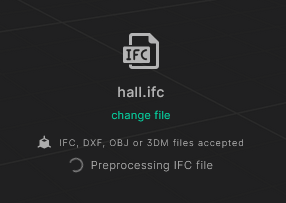
Pre-processing the IFC file
Once you selected an IFC file, it will be validated by checking that it contains relevant building elements.
Two types of warning can currently be shown:
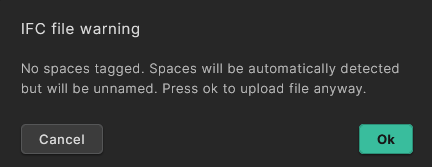
No space warning
If your IFC file does not contain IfcSpaces (e.g. if you did not tag any Rooms in Revit), a message will warn that spaces will be detected automatically and they will be unnamed. You can choose to continue or edit your file before uploading it.
Only proxy elements warning
If your IFC file was not created through a BIM modelling tool such as Revit or Archicad, it will miss some important information about its internal relationships and building elements. This can happen for example if the model was exported as an IFC file for example from Sketchup (without applying further classification of the internal building elements).
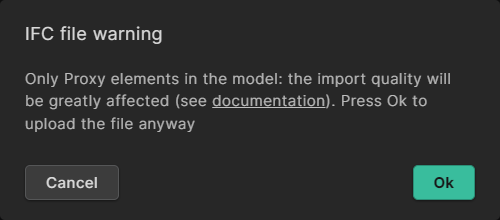
In this case, a message will be prompted, warning you that only "Proxy" elements are contained in the file. You can still upload the file, but the extracted spaces are likely to be unsuitable for acoustic simulation:
- all elements (including terrain, tree and other irrelevant things) will be imported
- no simplification will occur and it is highly unlikely that the wave solver can be used on the extracted spaces
- no layer name will be available when setting the materials
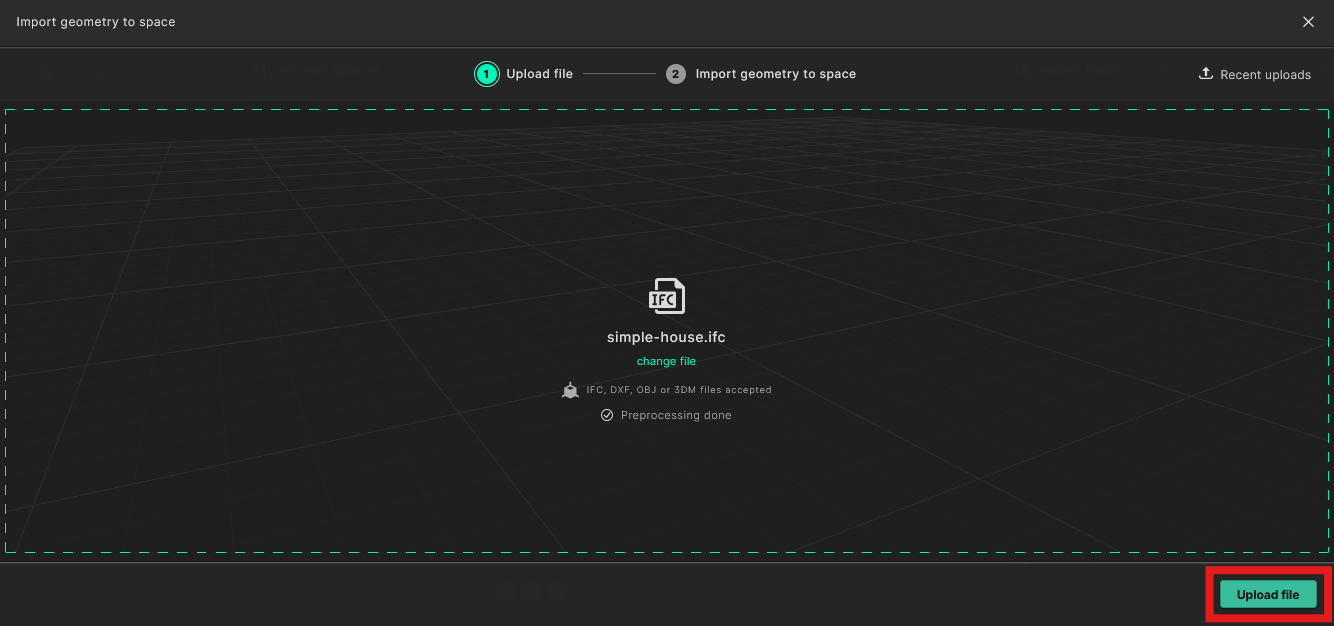
Upload the IFC file
Once the preprocessing is done and is successful you can upload the IFC file by pressing the Upload file button.
Note: If you close the window during preprocessing or before you start uploading the file, the import will canceled.
Once you initiated the upload of a file, the status of the window changes to Uploading file, and a little toast appears at the top
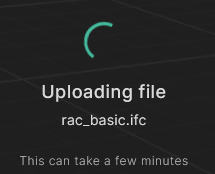

At this point, you should also see the file on the right-hand side of the upload window, and it is possible to close the upload window and do other tasks in Treble without canceling the import.
Processing of the IFC file
Once the file has been uploaded, our IFC importer starts to process the file. The status in the window change to Processing file.
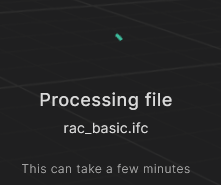

The time to process the whole directly depends on its size and the general complexity of the input. A simple IFC model like a residential complex with four three-storey buildings but not a lot of details in the furnishing might take 10 to 15 minutes, while a more complex building might take a few hours. As previously stated, after the upload of a file has started, you can leave the window by pressing the '-' icon in the upper right corner and do other tasks in Treble.
Monitor the imports
An IFC import can be in four different states:
- In progress: when the space extraction is in progress

- Ready for import: when the space extraction completed and the spaces can be imported

- Error: when the import failed

- Cancelled: when the processing has been aborted on the user side

Browse the extracted spaces
Access the list of extracted spaces
Once the extraction process has finished, your IFC model will be visible among the other tasks in My recent tasks panel, with a blue checkmark, marking that it is ready for import.
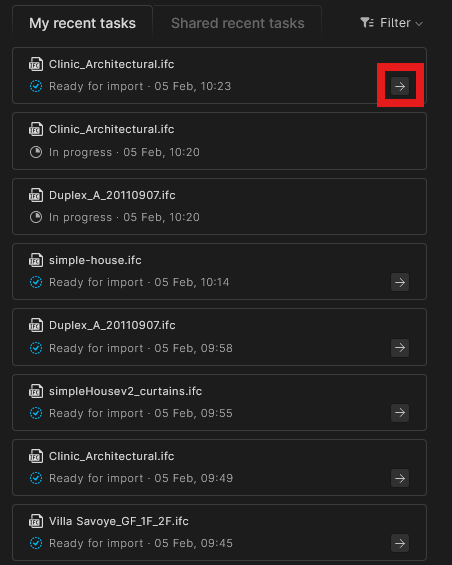
By pressing the arrow highlighted on the image below you will be presented with the list of spaces extracted from the input model. You can then choose which spaces to import into a Treble project as explained further below.
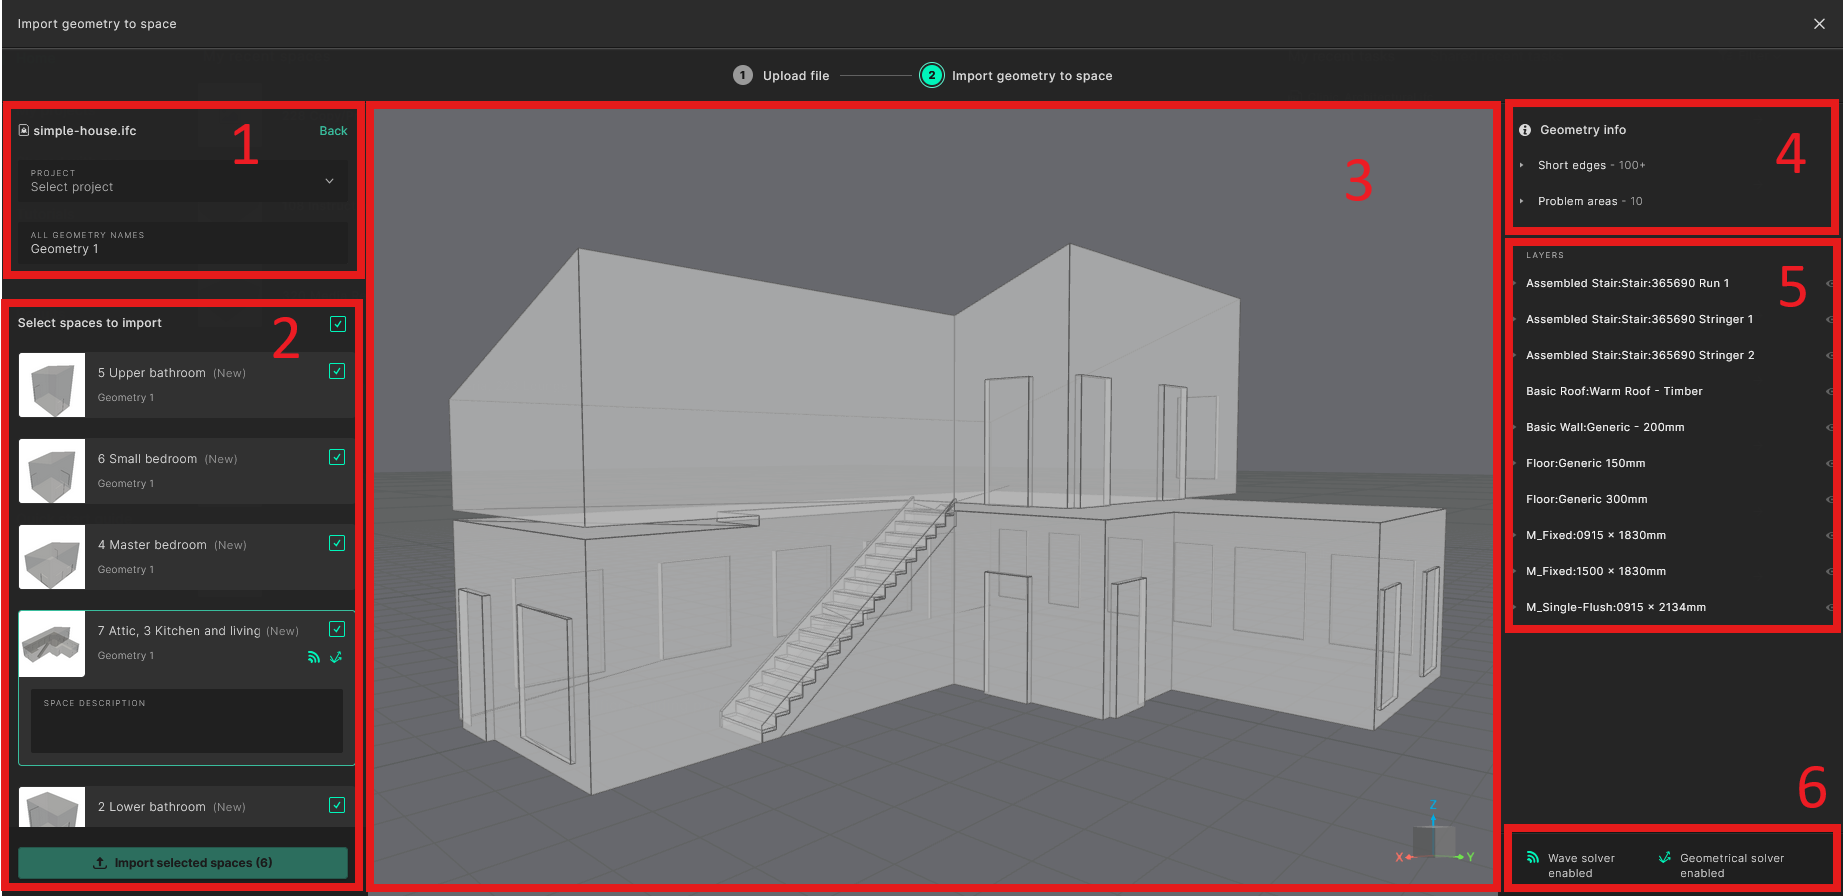
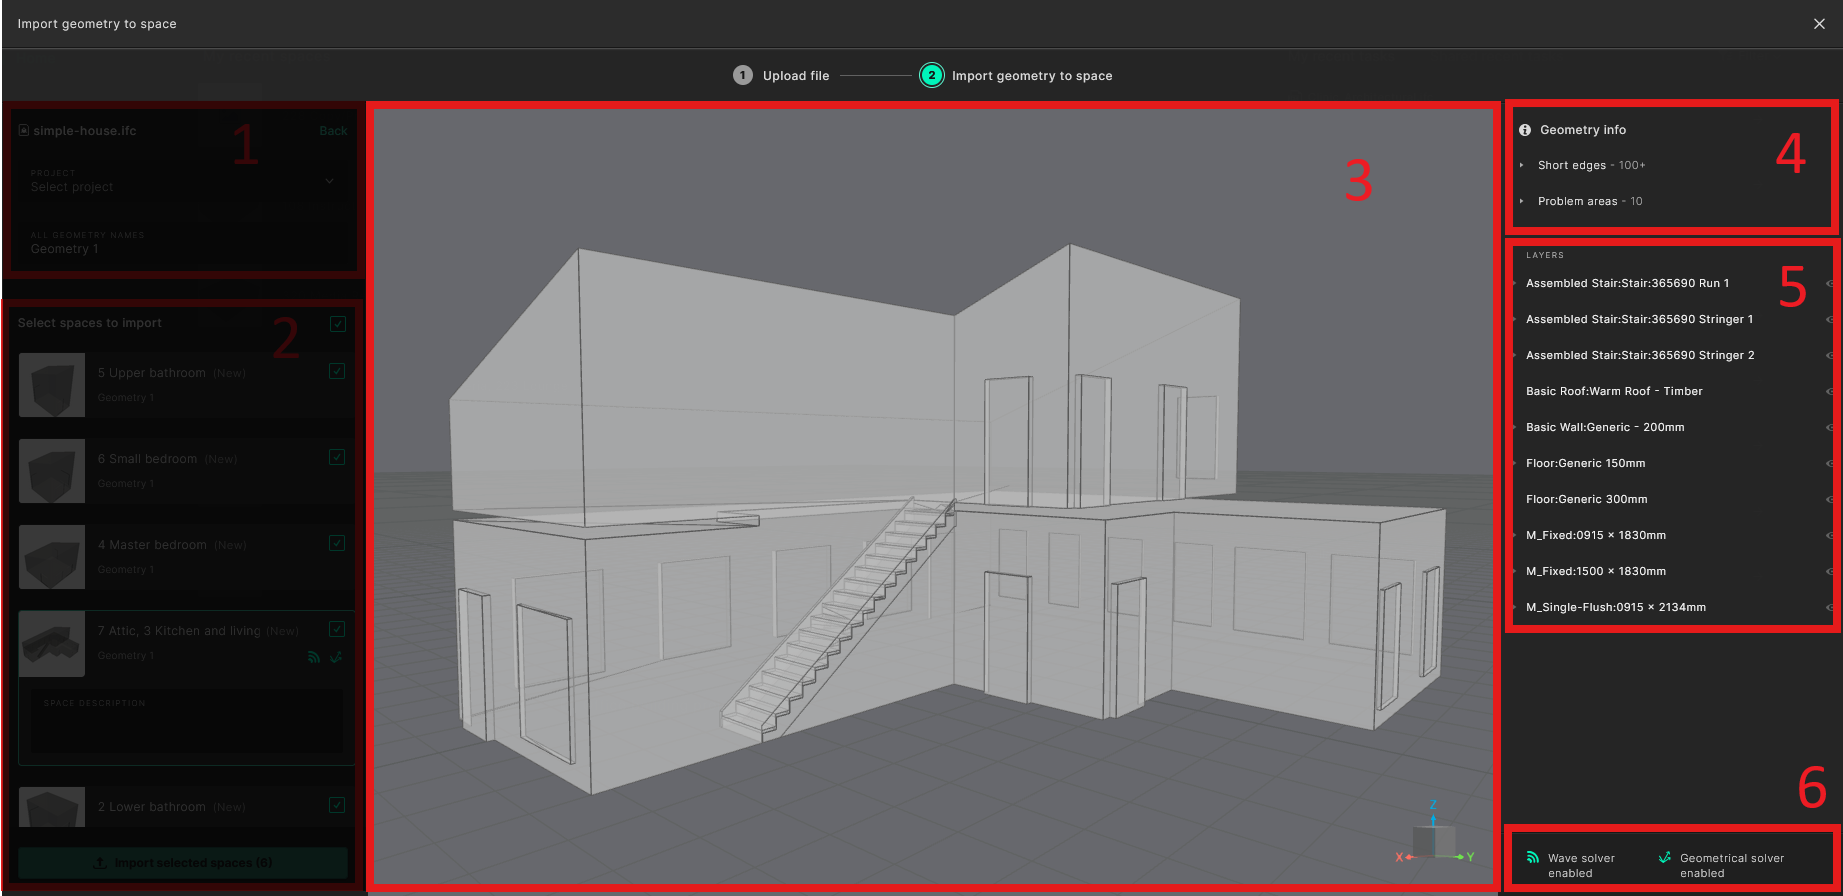
IFC Import window
After pressing the arrow you are now in the importing window. The window can be broken into 6 different parts which we will go through in the next sections.
-
Import location
-
List of spaces
-
Viewport showing the 3D rendering of the geometry of the space
-
Warnings and errors
-
Layer information
-
Feedback
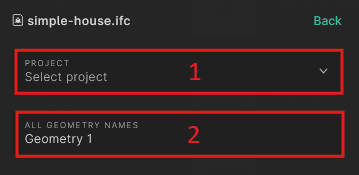
1: Import location
You can choose here where the spaces are going to be imported:
-
Here you choose in which project the spaces are going to be imported. As a general guideline, we recommend to create one project for one IFC model, and if need be, have several import iterations in the same project: if the spaces are the same, a new iteration of the geometry will be added to that space, making it easy to compare two iterations.
-
Here you can set a default name that will be applied to all of the geometries that have been selected for import - for example, Initial import for the first import. Note that you can change the name of the geometry of a space individually in the space list if you wish (see below).
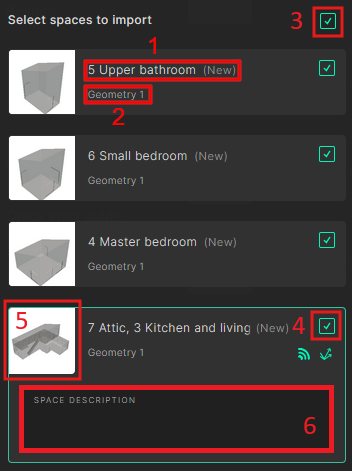
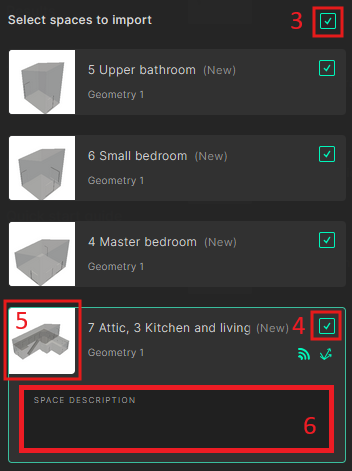
2: List of spaces
This section contains the list of spaces extracted from the IFC file and gives you control over what spaces are imported, how they are named, and where they are imported.
-
Space name (editable) This is the name of the extracted space, based on the IFC spaces that were included in the detected closed volume. If several IFC spaces were enclosed in one detected volume, the names will be concatenated (e.g. “Kitchen, Living room”).
-
Geometry name (editable) This is the name of the geometry to be added into the space: if the space already exists, the geometry will be added to the existing space. As a reminder, each project contains spaces, which themselves can contain several geometry iterations, to follow the design process. In the web app, when you are in the space view you will be able to see both iterations.
-
Use this check mark to select or deselect all the spaces
-
Use this check mark to select or deselect this space for import
-
Thumbnail of the geometry of the space.
-
Field to add a description to the space.
Note: The editable fields can be edited by clicking on the text.
Thumbnails types:
When hovering on the spaces, two icons will appear.
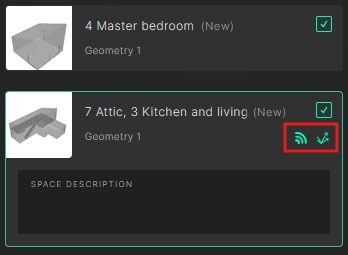
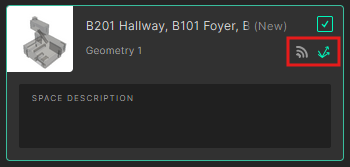
If the geometry of the space is watertight, the first icon will be green, showing that it is already possible to run simulations on this geometry using the wave solver.


On all imported spaces it will be possible to run geometrical acoustical simulations.
3: Viewport
This section allows you to observe the geometry, with few functionalities:
-
Left-click and drag: move the camera around the view centre
-
Right-click and drag: move the camera and the view centre
-
Mouse wheel and drag: zoom in and out
You can control what you see in the viewport from the space list (select a different space to show) or on the right side (hide, show or select layers).
4 to 6: Warnings, Layers and General information
You can find a detailed explanation on the whole right section from our web app import documentation here.
Import the spaces
Once you have provided a destination project and curated the list of spaces whose geometry you want to import, you can proceed by clicking on the Import selected space (X).

The importing process is then started. It usually takes from few seconds to a couple of minutes to process the whole list.
Important: Once you click this button, you cannot return to this window and import another selection of spaces from this IFC space extraction (this might change in the future).

Inspect the spaces after import
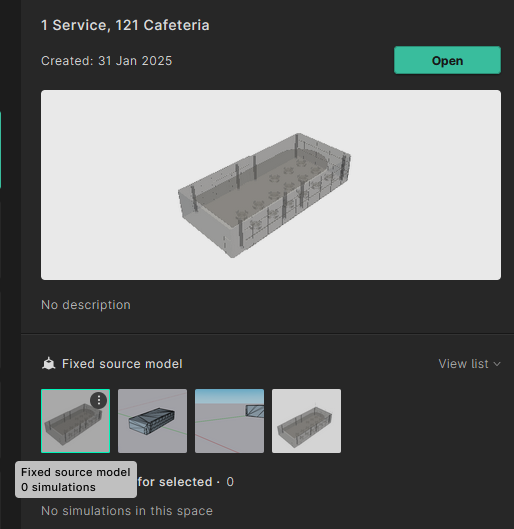
Project view
After importing the extracted spaces, they are all available in the main view, within the chosen project. In our case, we imported the 73 spaces of another input model, so we have a whole list of spaces displayed in the project view below. You can use the search function on the top of the window to search for project or spaces.

You can click on a space to open its view, and see the list of its geometry iterations.
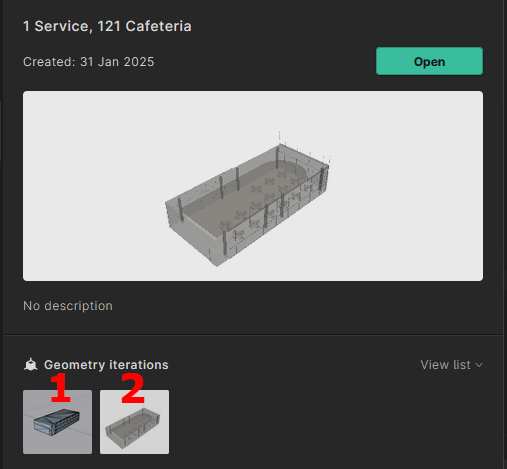
In this first example, there is only one geometry iteration of the space, visible in the information panel on the right. You can then click on Open to open its view.
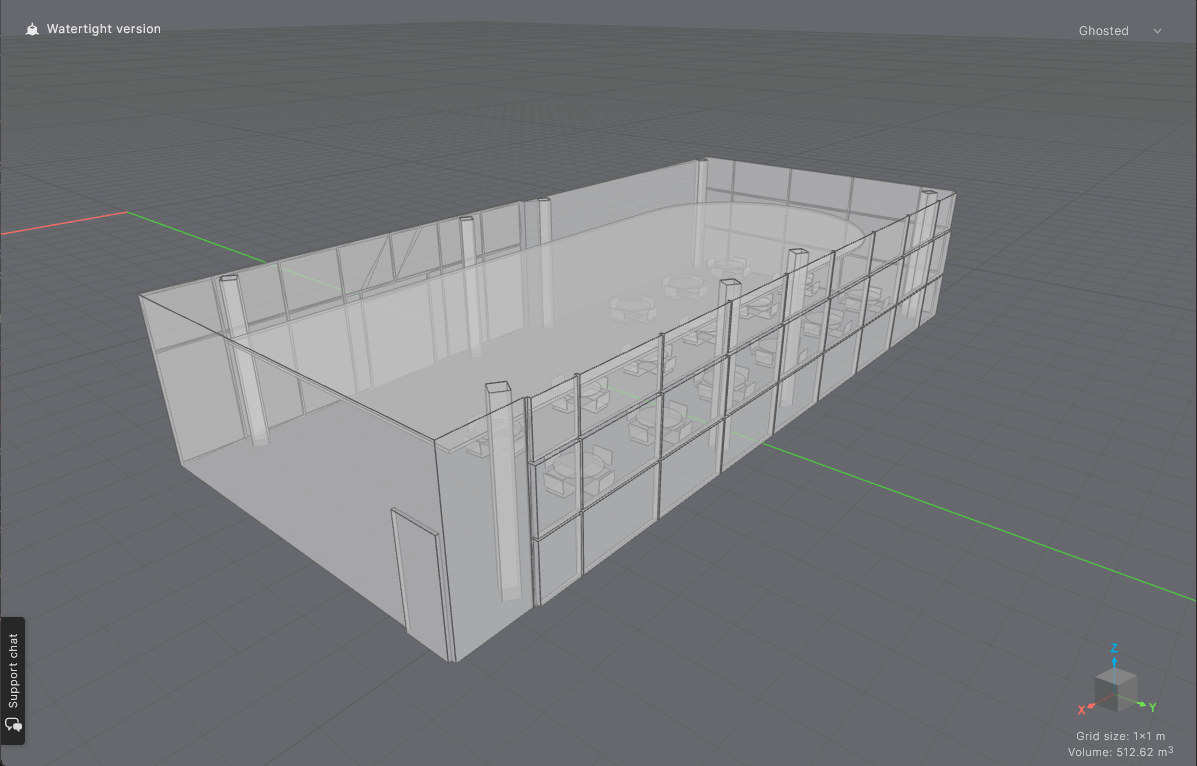
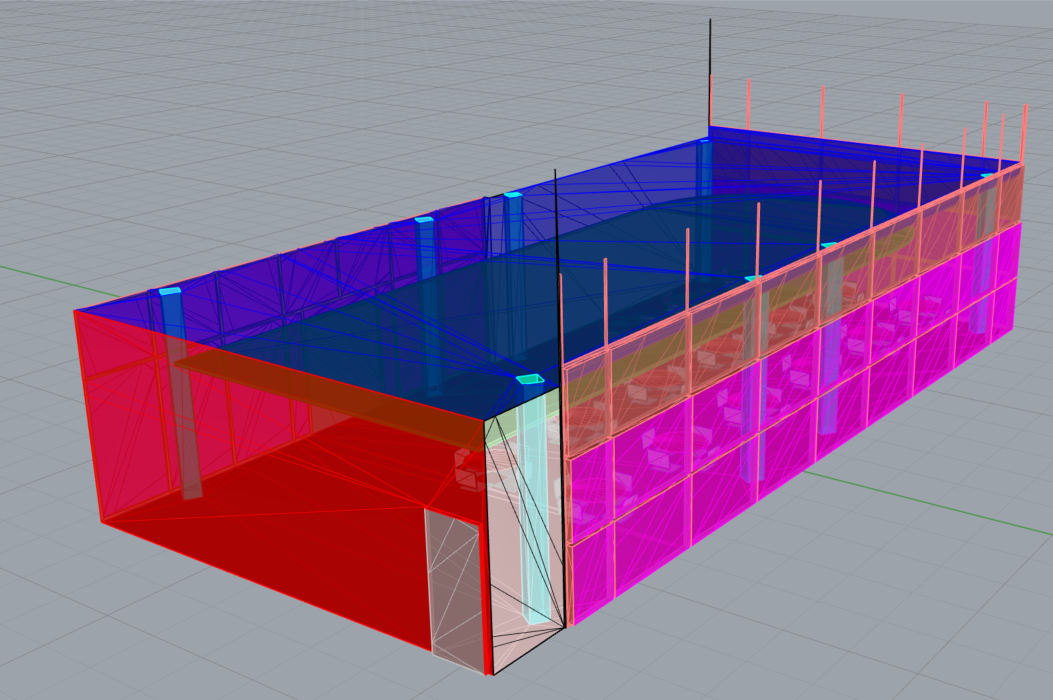
Model view
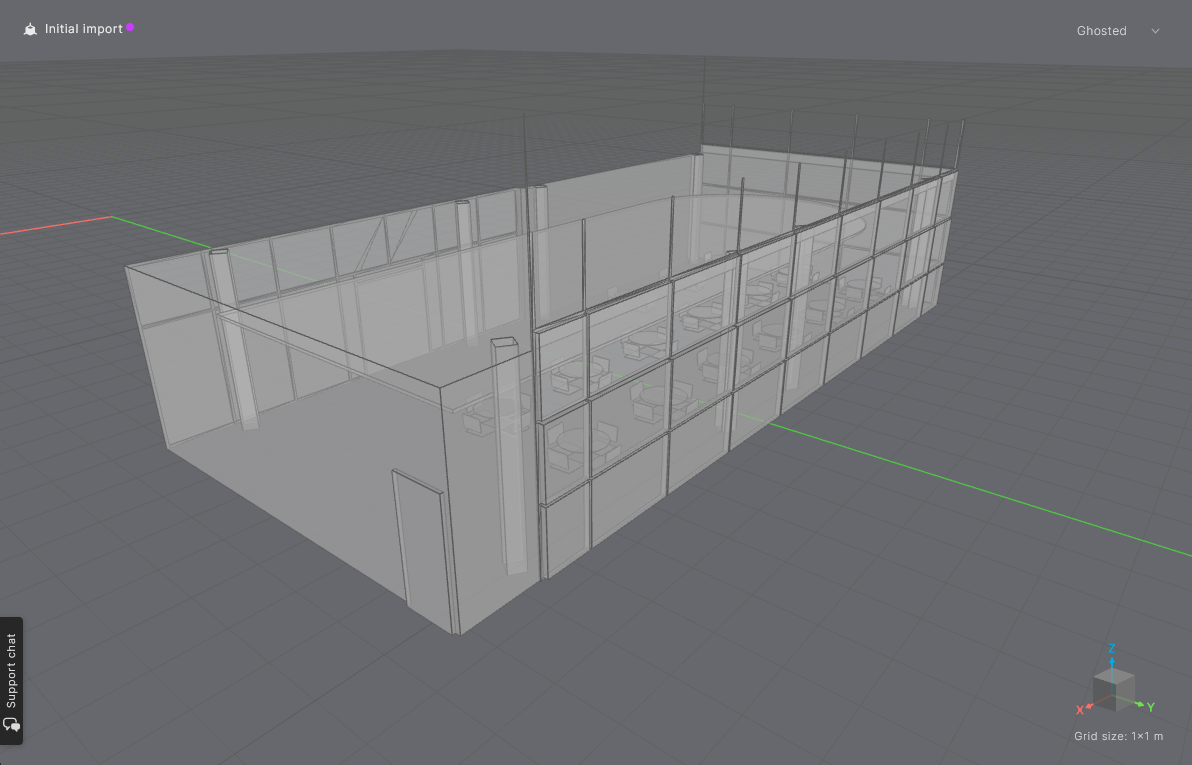
Here the model is not watertight because the top of the wall, where the extra bits have been picked, it not properly joined with the ceiling. The vertical stripes stickings out of the walls are the sort of artifacts that are expected, and that we are currently focusing on solving.
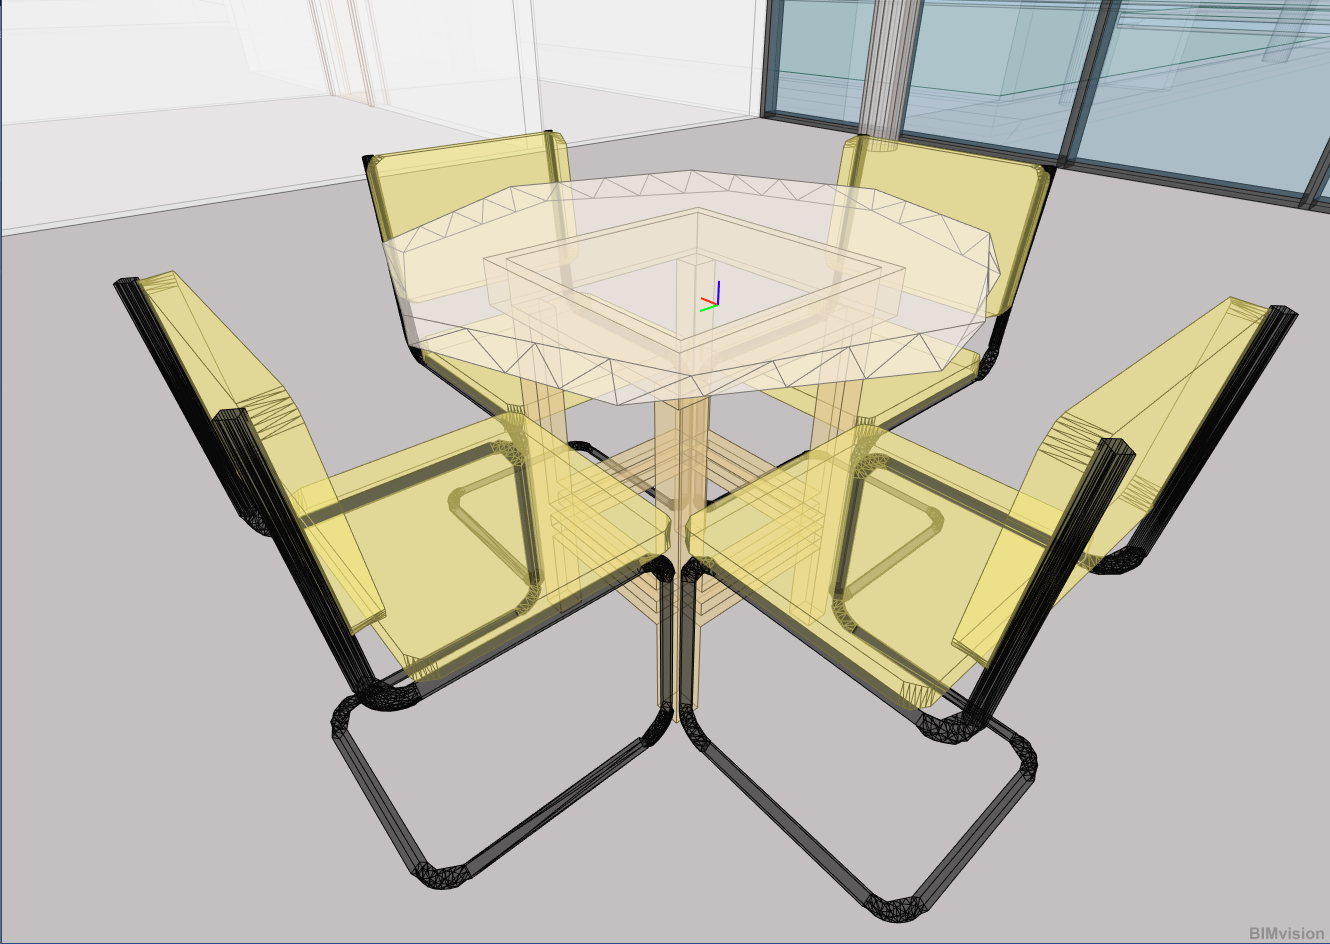
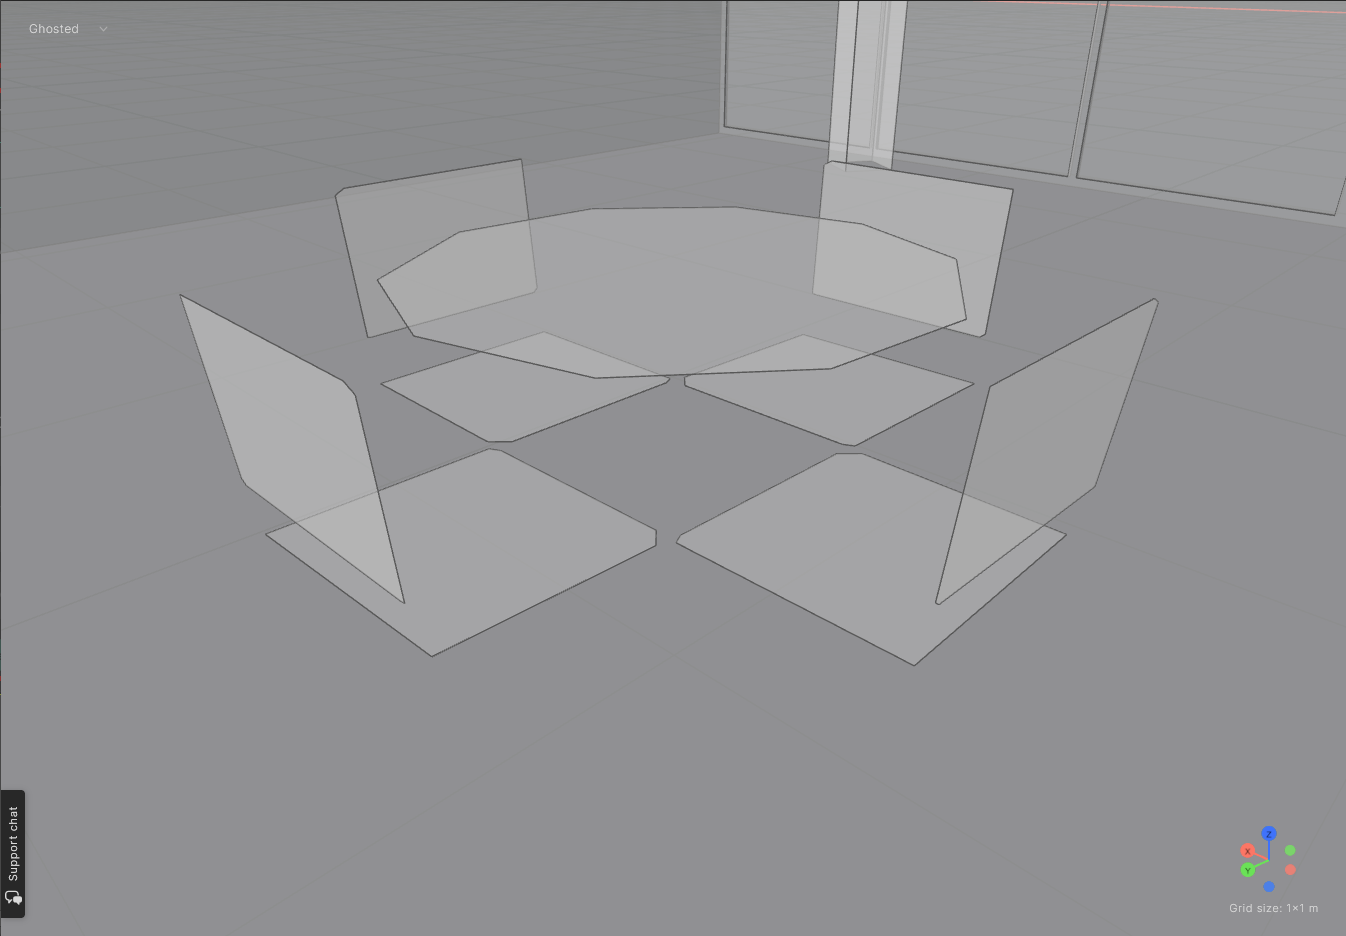
Below is a comparison between the furniture in the IFC file and the imported geometry: only the acoustically relevant parts of the chairs and the table have been kept, which decreases the simulation's runtime.
Make a non-watertight geometry watertight
Using SketchUp
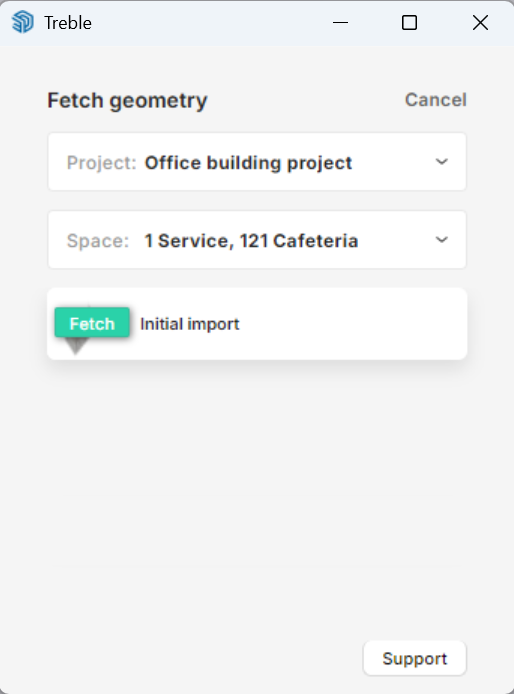
If you have a SketchUp license, you can fetch the geometry that you imported in Treble using our SketchUp plugin:
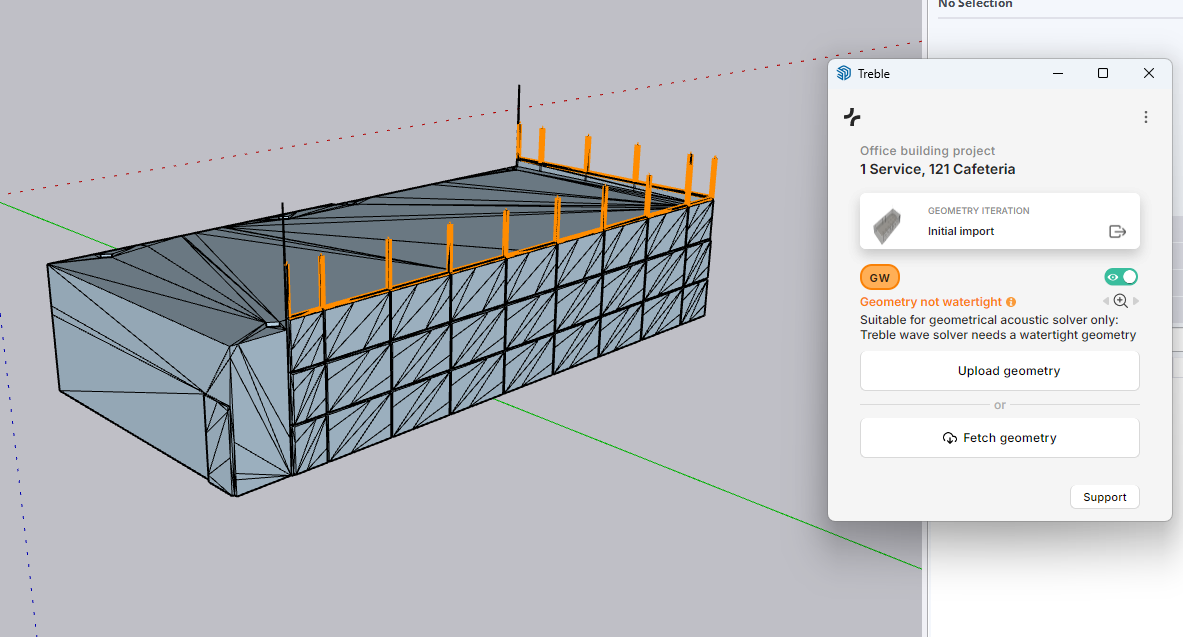
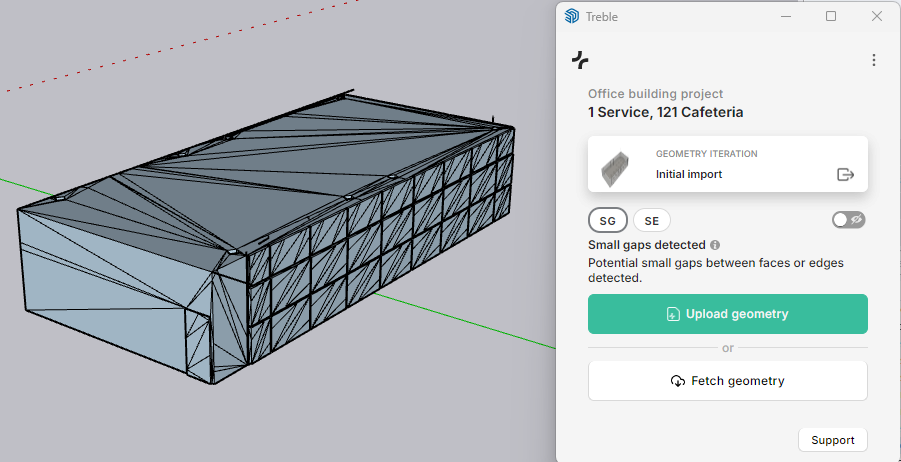
You can use the regular SketchUp workflow and our Geometry Checking Service to fix the problems and upload a new iteration of the space geometry.
In this case, the fix was relatively simple and took around 3 minutes:
- select the tag of the ceiling as default tag
- drag a rectangle from top left corner to cut through the whole building
- use Right click > Intersect with model on the created rectangle
- clean up a bit the faces outside the now-closed volume (for this screenshot)
You can now upload it to Treble cloud and open it in Treble web app:
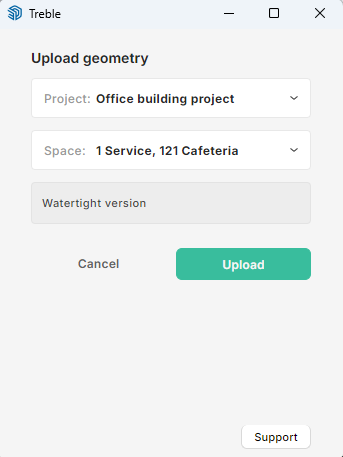
You can see that the upload of the new iteration of the geometry (1) is now alongside the initial geometry (1).
Using the downloaded source model
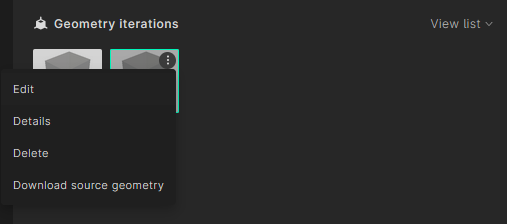
In the space view, you can also choose to download the source model file, which is the geometry of the space that has been extracted from the IFC file and imported into Treble. You can do so by clicking on the three dots on the right side of the geometry thumbnail, and select Download source model.
Once you have downloaded the source model, you can open it in the 3D model editor of your choice.
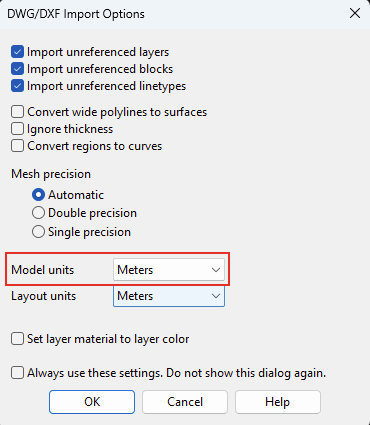
Note: Should your modelling software ask, the unit of the DXF model is meters:
Here is the geometry open in Rhino:
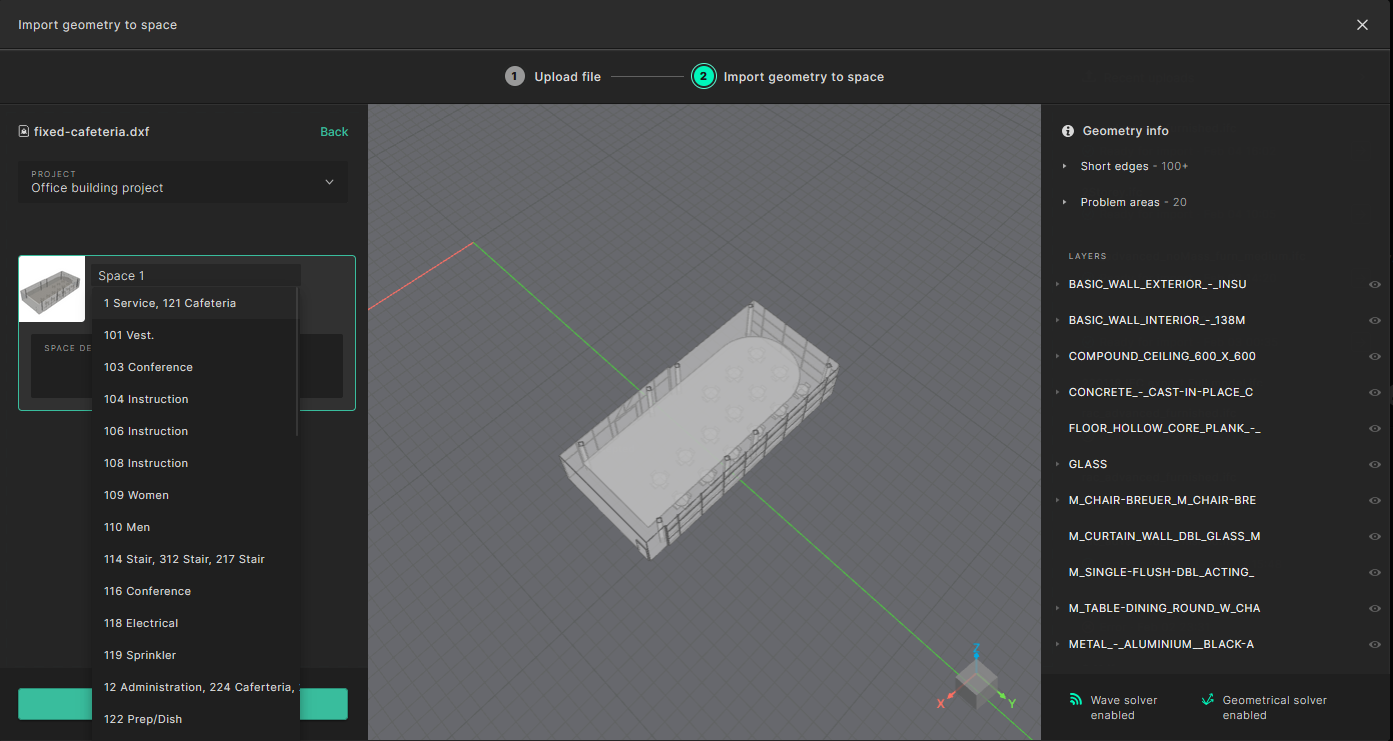
Once you have completed the fixing of the geometry, you can export it as DXF, 3DM or OBJ and import it through the standard import button in the web app New > Import geometry:

After the model has been processed, you can import it as a new iteration of the space:
- choose the Project wherein you imported the IFC file
- if you click in the name of the space, the list of existing spaces for this projects pops out, and you can select there the space where you pulled the source model from (here, 1 Service, 121 Cafeteria)
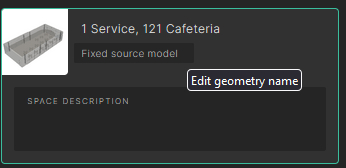
You can then edit the name of the model to a name that makes sense for this iteration. In this case, Fixed source model.
Click on Import at the bottom and you are set: this iteration has been added as a model of the space, and can be selected for running simulations in the space.