Managing projects and spaces
On the home page of the app, users can view all the projects they have access to and their associated spaces. Within each project header, the following information is available:
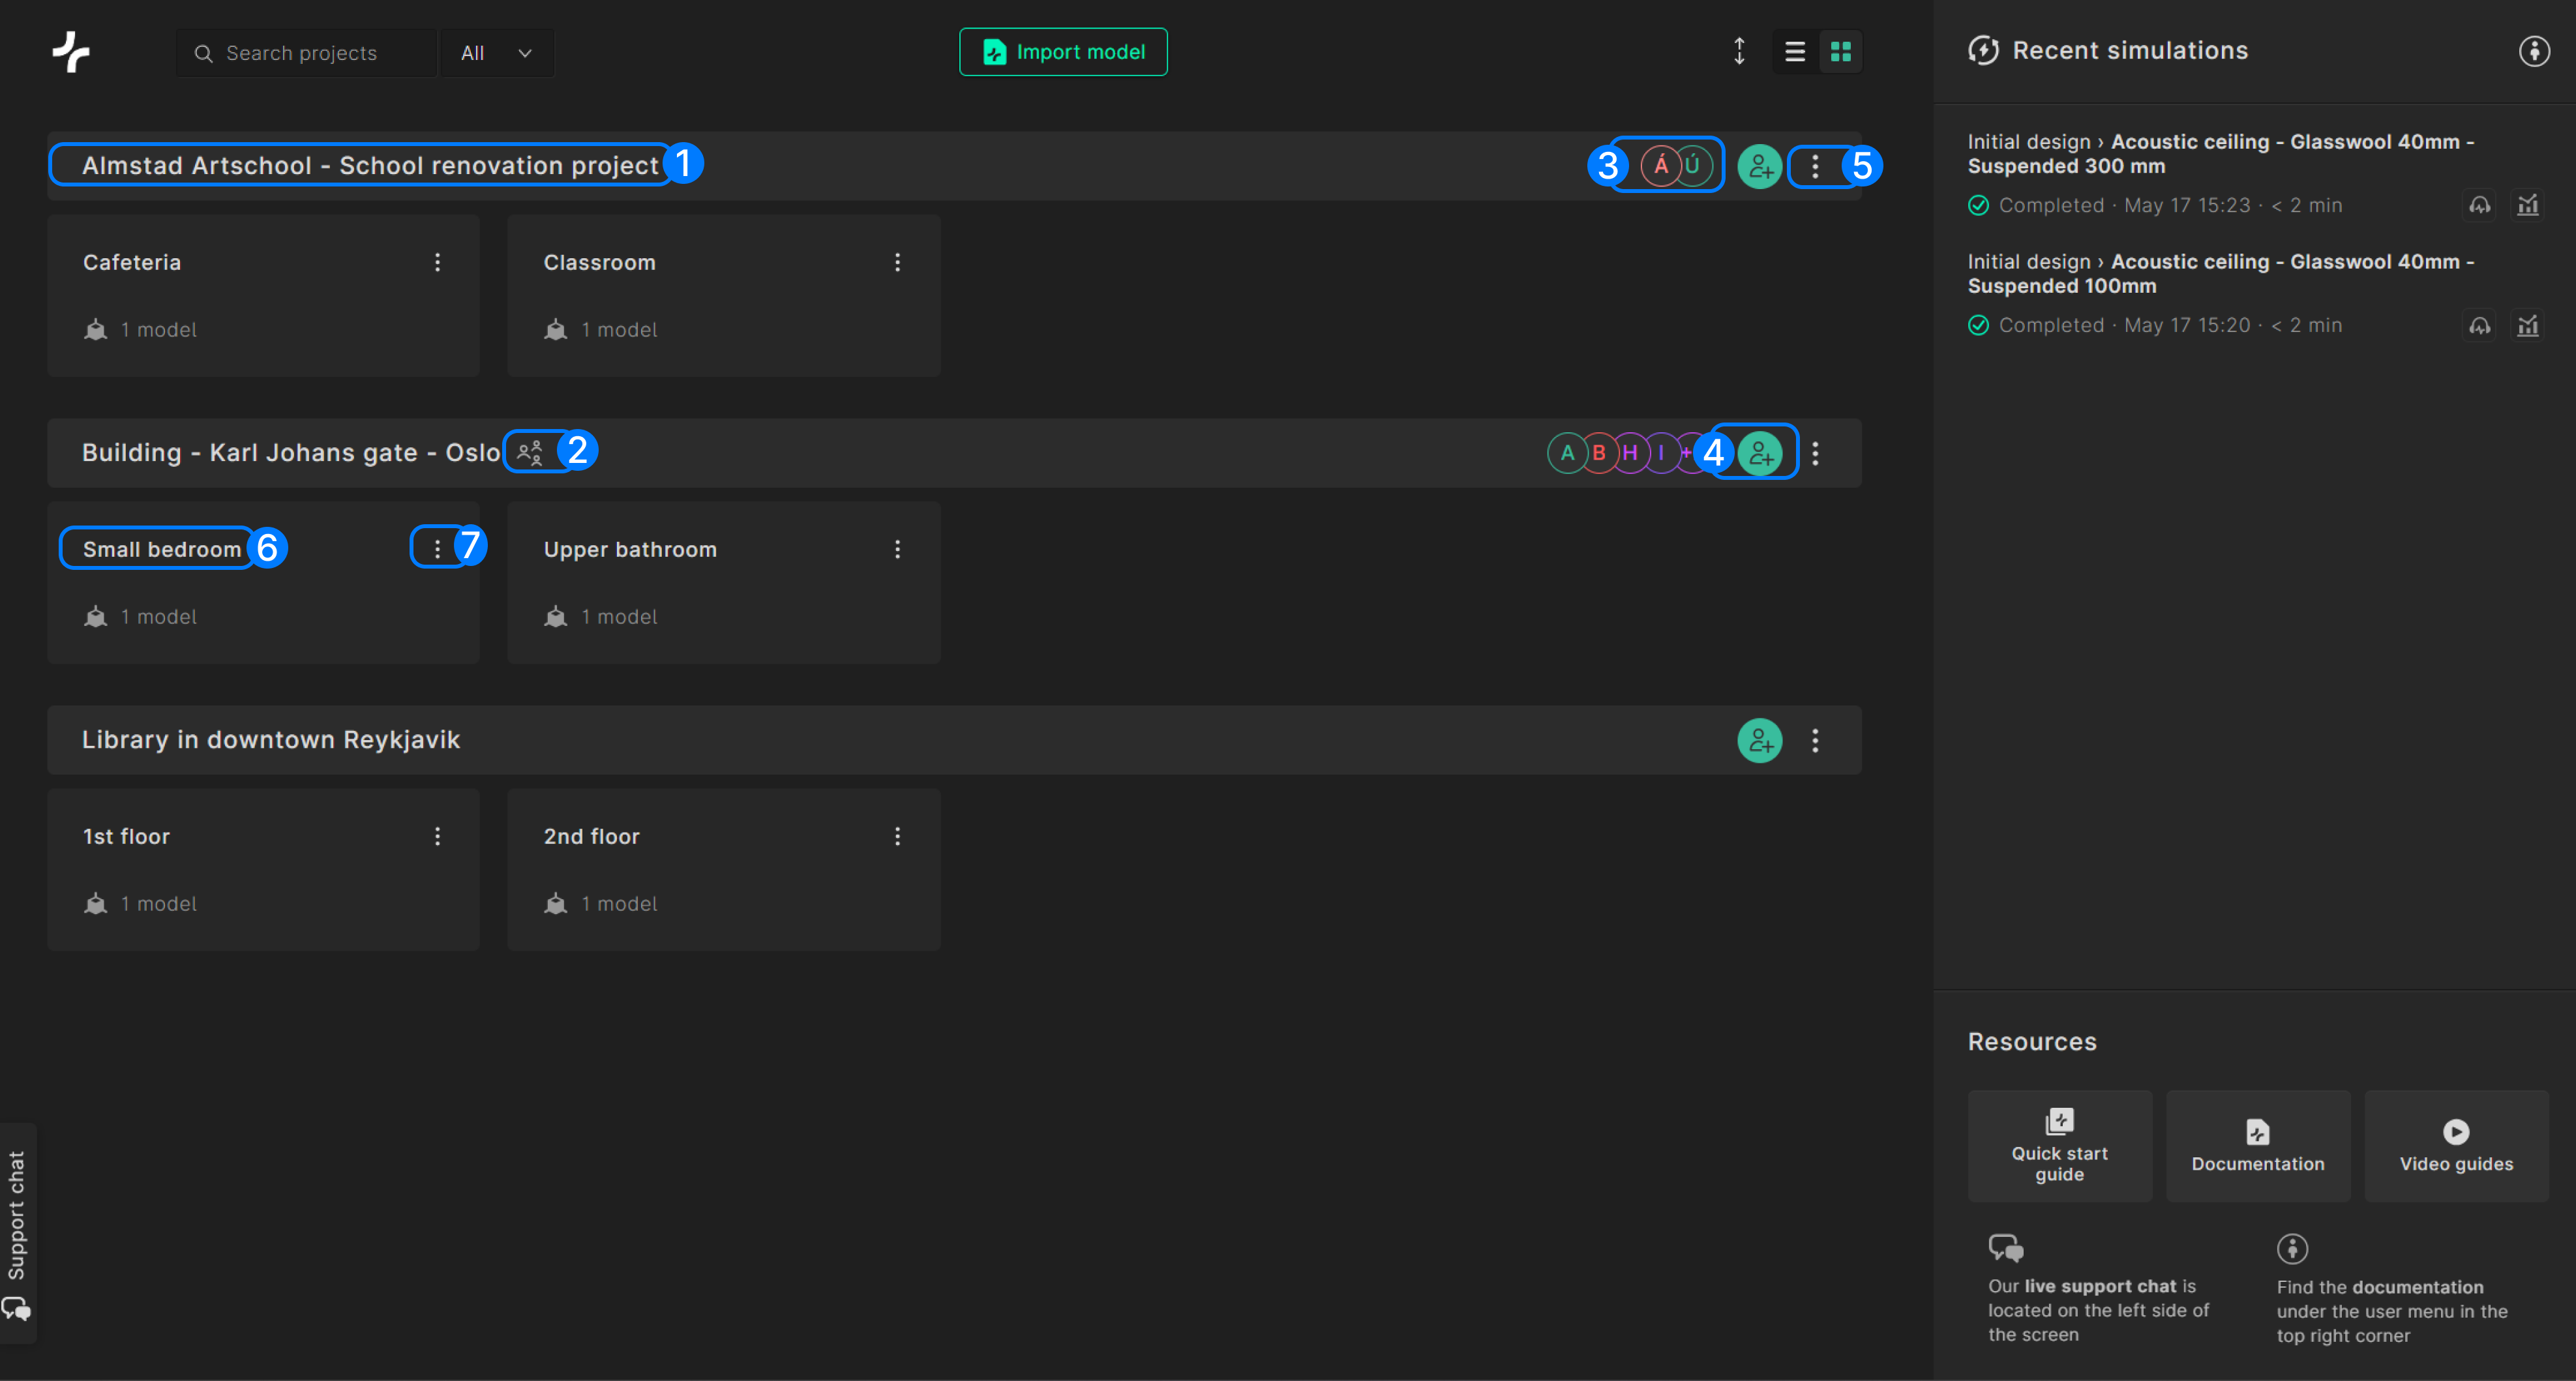
- Project name: The name of the project, can be clicked to open the project overview page.
- 'Shared with you' icon: If this icon is present it means that someone within you organization created this project and has shared it with you.
- Project members: Indication of the other members of the project (name / email displayed on hover).
- Share project: Opens up the dialog from which you can share your project
- Other project actions: Opens up a menu from which you can edit the project details (name and description) or delete the project.
- Space name: The name of a project's space
- Space actions: Opens up a menu from which you can edit the space details (name and description) or delete the space.
Managing a project
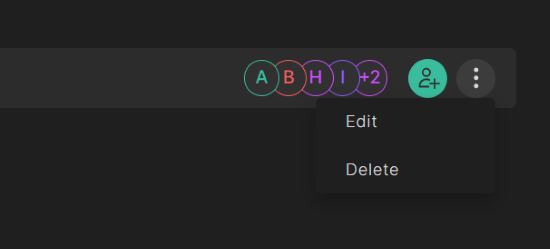
You can manage your project by clicking the three dots in the project header (5):
-
Edit: Opens a popup where you can update the project's name and description.
-
Delete: Opens a confirmation dialog. Once confirmed, the project will be deleted and no longer accessible to any members of the project.
Managing a space
You can manage your space by pressing the three dots in the space card (7) and selecting the desired action:
-
Edit: Opens a popup where you can update the space name and description.
-
Delete: Opens a confirmation dialog. Once confirmed, the space will be deleted and no longer accessible to any members of the project.

Adding new projects or spaces
If you wish to create a new project or space, you can only do so while importing a new model, either in the app or via the SketchUp plugin. During the import process, you will have the option to upload a model into an existing project or space, or to create new ones.