Assigning materials
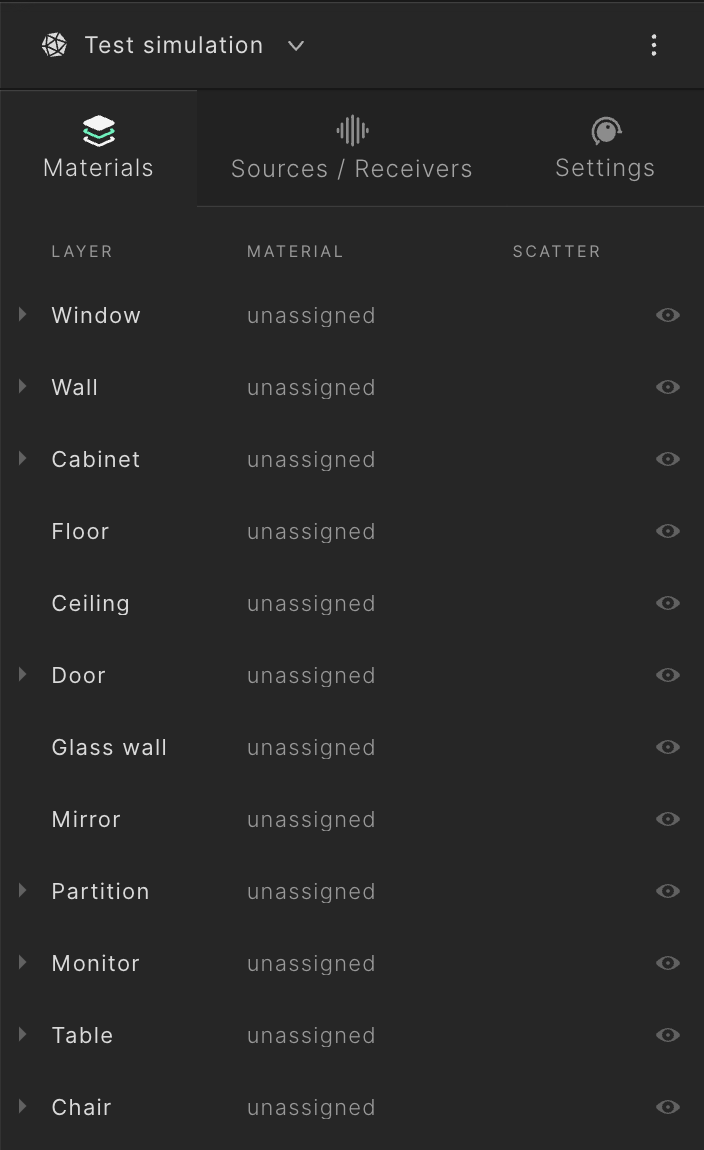
After you have created a simulation the list of layers in the geometry will appear in the Materials tab. These layers are where acoustic materials can be assigned.
Material library
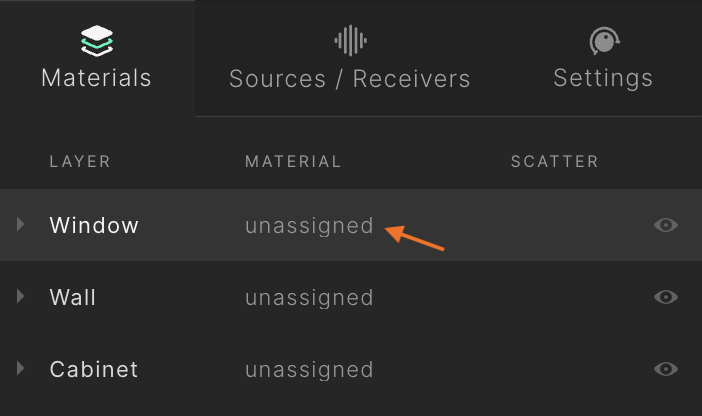
To open the material library, click on the material name of a layer or surface under the Material column. You can also double click on the row.
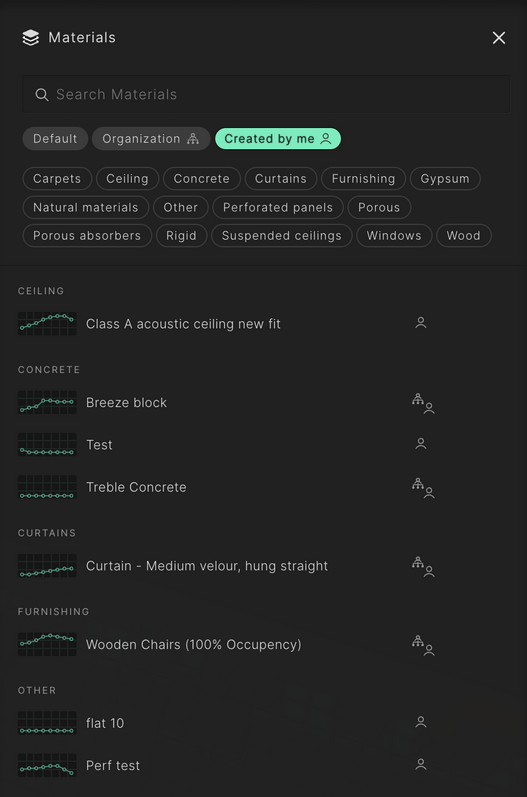
The material library will appear to the left of the list of layers. The library comprises around 450 different materials generated with the Treble material engine. Additionally, you have the option to create custom materials.
Filtering and searching the material library
At the top of the material library are the searching and filtering functionalities. You can filter for material categories, as well as utilize these three specific filters:
- Default: Filters for all materials that come built-in with Treble.
- Organization: Filters for all materials shared within your organization.
- Created by me: Filters for all materials you have personally created.
Assigning a material
To assign a material to a layer or surface, click on its material name, which will open the material library and highlight the corresponding surfaces in the 3D view in red. You can also select a layer or surface by clicking on the surface in the 3D view.

In the material library an Assign button will appear when hovering over a material. Click the 'Assign' button to assign the relevant material to the selected layer or surface. The material will then appear as selected.
Multi-selecting layers and surfaces
If you want to assign the same material to multiple layers or surfaces at the same time you can multi-select by holding "Ctrl" or "Command" key while selecting with your mouse. Additionally you can also select surfaces in the 3D model view by holding "Ctrl" or "Command" key while clicking the surface.
At the bottom of the list of layers you can find the reverberation time estimates (T60 [s]) that are computed using Sabine's formula once all layers have been assigned a material. The estimate can help you quickly dial in your designs, but to get accurate and reliable results you should run the full simulation.

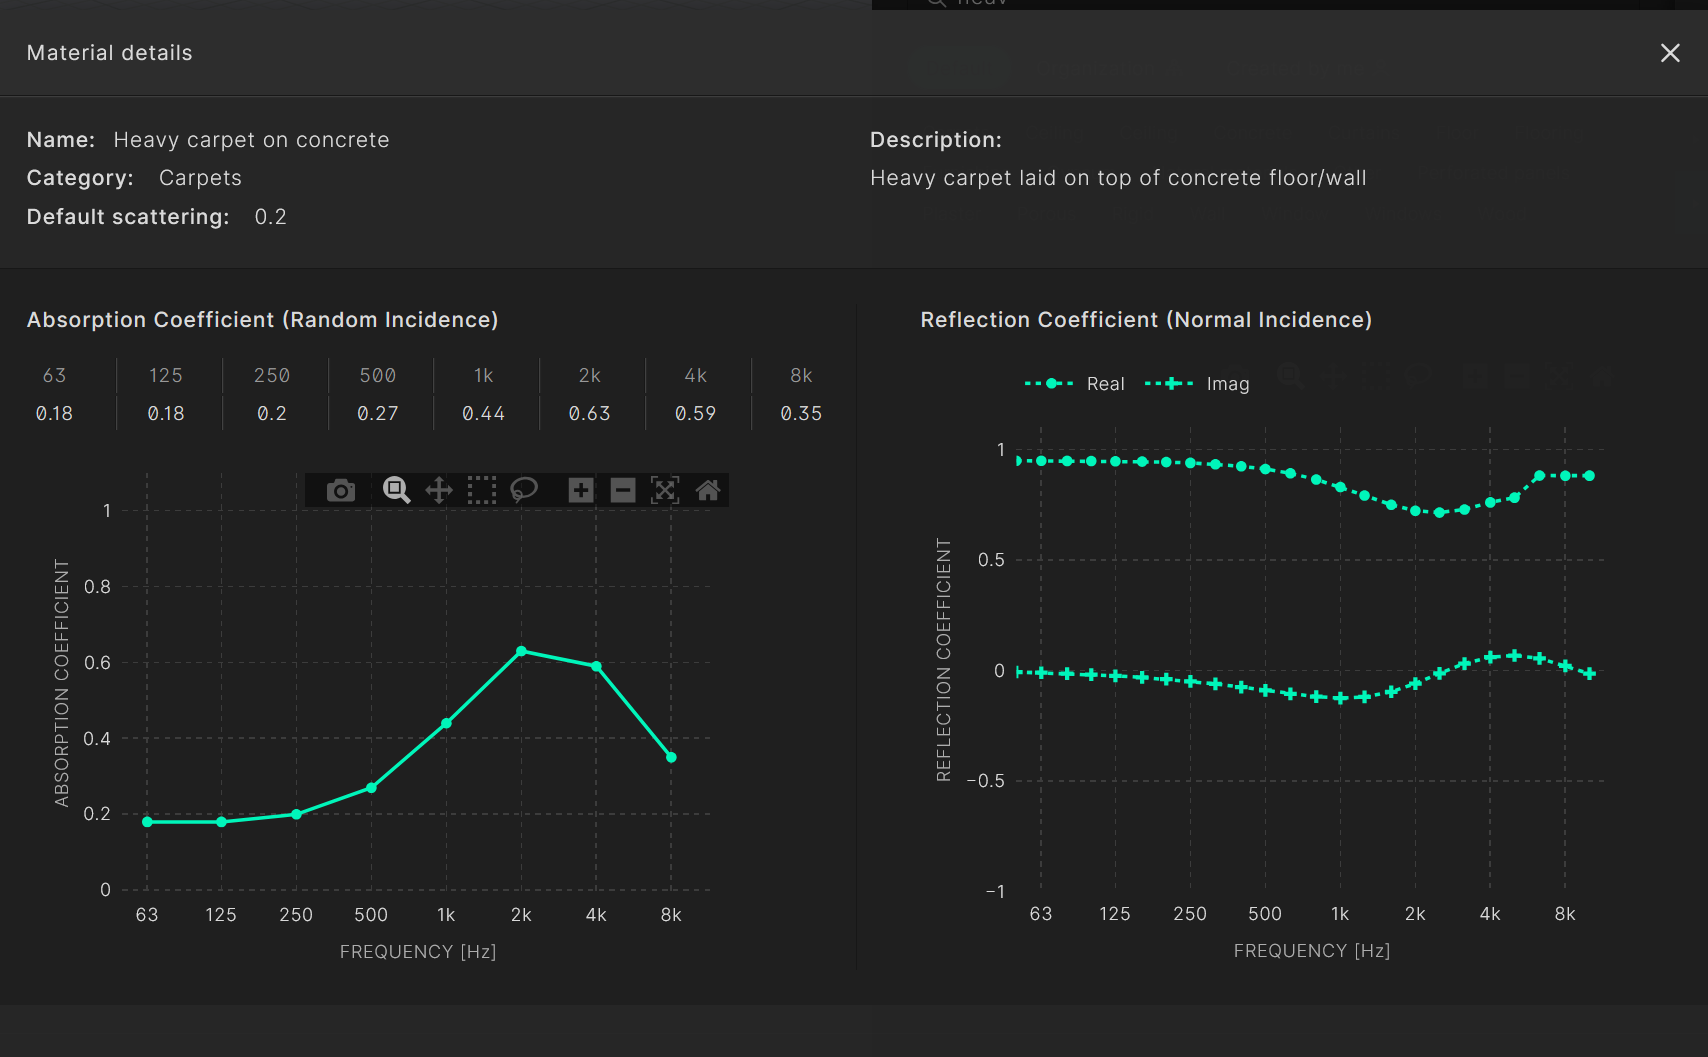
Material details
At the bottom of the material library, you can inspect the set of absorption coefficients for each material, as well as the default scattering and what category this material belongs to.
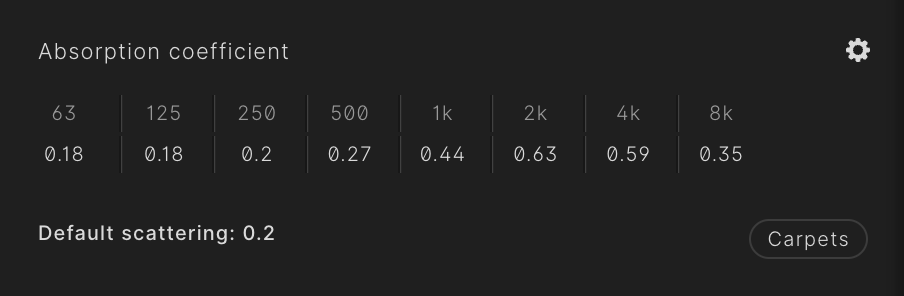
You can open the Material details by clicking the cogwheel in the upper right corner. There, you'll find the absorption coefficients for each octave band, ranging from 63 Hz to 8 KHz, along with the reflection coefficients.
Assigning a scattering coefficient
The scattering coefficient is used in Treble's geometrical acoustic solver, where it determines the proportion of the scattered vs. specularly reflected acoustical energy when a ray hits a surface. The scattering effect in the wave based solver solely depends on the geometrical details of the model in question
You can assign a scattering coefficient on a layer level or to each of its sub-surfaces. Each material has a default scattering value. This scattering value can however be freely edited. Note that it is generally not recommended to use a lower scattering value than 0.1. This is to make sure that rays don't get trapped in specular reflections between parallel walls and to ensure a diffuse sound field, so the principle of the geometrical acoustic solver upholds.
Read more about recommended scattering values and the theory behind scattering here and here here.
Single value scattering
Click on the number in the Scatter column, input the number of your choice from 0.00 to 1.00. Note that it is generally not recommended to use a lower scattering value than 0.1. The scattering coefficient chosen will be mapped onto a frequency dependent curve shown here.
Scattering per octave band
If you want more control over the scattering value per octave band in the simulation you can click the :::: icon that pops up when you click the scattering value field.
Here you can freely choose which scattering coefficient is used in each band in the GA simulation.
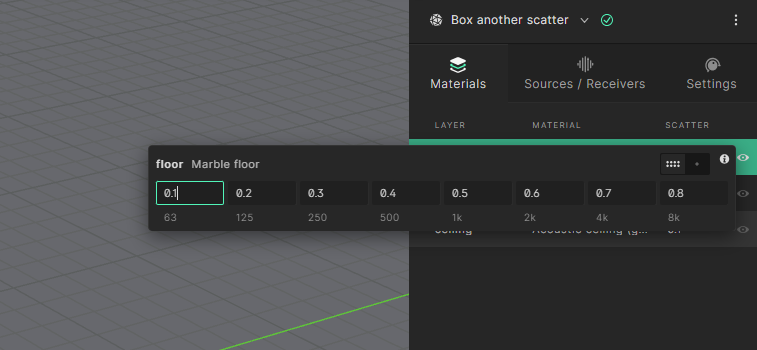
If you decide to go back to a single value input, just click the single dot to switch back to a single value input.
Suggested values for scattering
For guidelines on scattering values see the following table:
| Surface type | Scattering coefficient | Examples |
|---|---|---|
| Audience area | 0.7 – 0.8 | Audience area with people in attendance |
| Furniture | 0.4 – 0.7 | Chairs Desks |
| Uneven surfaces | 0.3 – 0.5 | Exposed brickwork Corrugated iron Slat absorbers |
| Slightly uneven surfaces | 0.2 – 0.3 | Rough concrete Typical suspended acoustic ceiling |
| Smooth surfaces | 0.1 - 0.2 | Smooth painted concrete Smooth gypsum walls |
Note that since scattering accounts for both surface roughness and the geometric detail in the simulated model it can vary from simulation to simulation. E.g. when working with a heavily simplified geometry it can be suitable to increase the scattering to compensate. For more recommendation on scattering values, read here.