Device fit
Our mannequin library has heads of different shapes and sizes, and a wearable device often won't fit all of them perfectly. The arms of a pair of glasses can cut into the head, for example. A real pair of glasses adapts to the wearer: the arms spread a little to fit around the head. The fit tool in the device import widget does the same on a mannequin. It treats the device as a solid, elastic body, like a plastic frame, and slightly moves and bends it until it rests on the mannequin instead of going into it or floating above it.
The fit only changes the assembly you fit. The mannequin and every other assembly keep their shape. Points on the fitted assembly, for example the microphones, move with it.
Before you start, import your device and a mannequin. See Import a device with the widget.
A device from a CAD file often has long, thin triangles, for example along the arms of glasses. Long triangles can make the placement less precise and the bending more pronounced. Remeshing the device to even triangles before you import it gives a smoother fit. See Prepare device geometry.
Place the device before the fit
The device doesn't need an exact placement before the fit. You only need to put it roughly where it should sit.
For a pair of glasses, a rough placement means:
- The bridge is on or near the nose.
- The front of the frame and the lenses are in front of the face.
- The arms are at about ear height. They can go into the side of the head, which is what the fit fixes.
- The frame is roughly level when you look from the front and from the side.
To move or rotate the device, use the gizmo. See Move and rotate a part.
After the fit, turn on the Deformation overlay. If the front of the frame has moved more than you expected, move the device closer to where it should sit and fit again.
Basic examples
Fit glasses to a mannequin
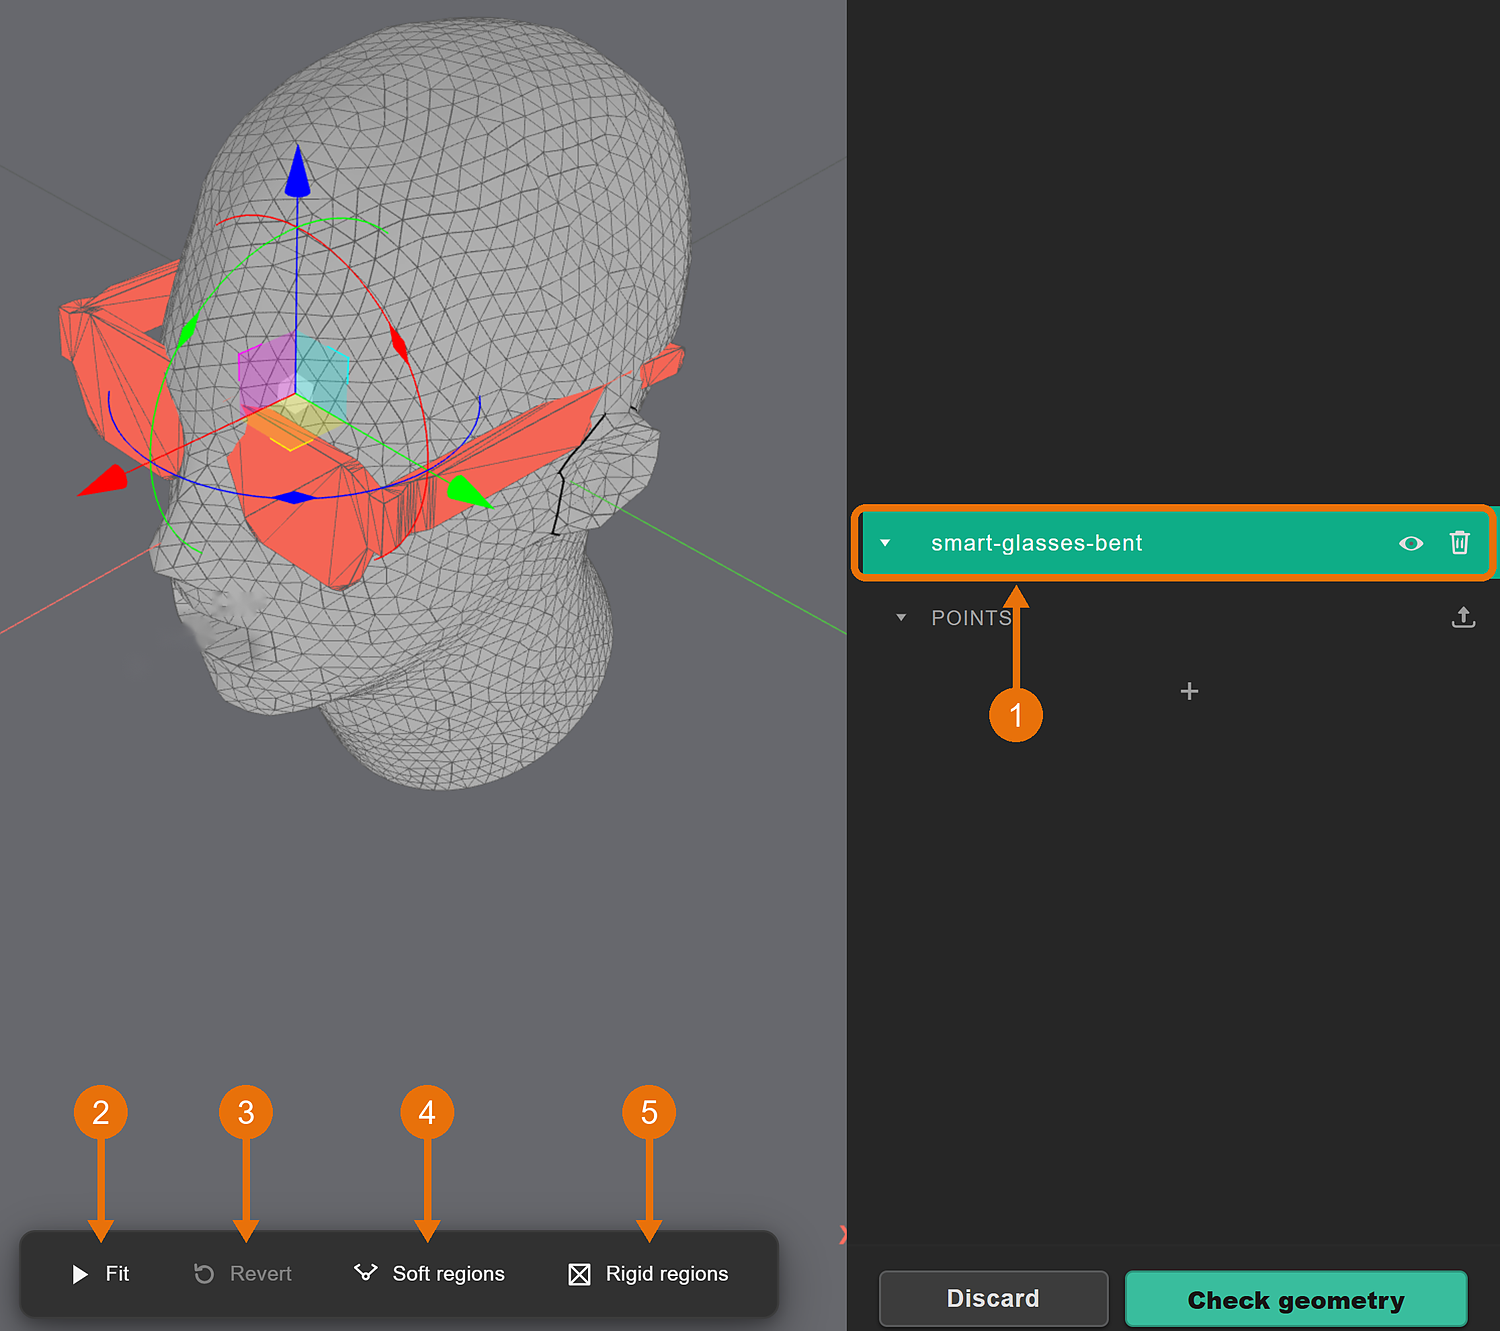
- In the side panel, click your device (1) to select it. The fit toolbar opens at the bottom of the 3D view.
- Click Fit (2). You can watch the fitting as it happens.
- When the fit is done, look at the result from a few sides.
The other buttons on the toolbar:
- Revert (3) undoes the fit
- Soft regions (4) and Rigid regions (5) make parts of the device bend more or less, see Set soft and rigid regions
While the fit runs, Fit turns into Stop. Click it to stop the fit where it is.
If the device doesn't touch the mannequin, the fit leaves it as it is.
See what the fit changed
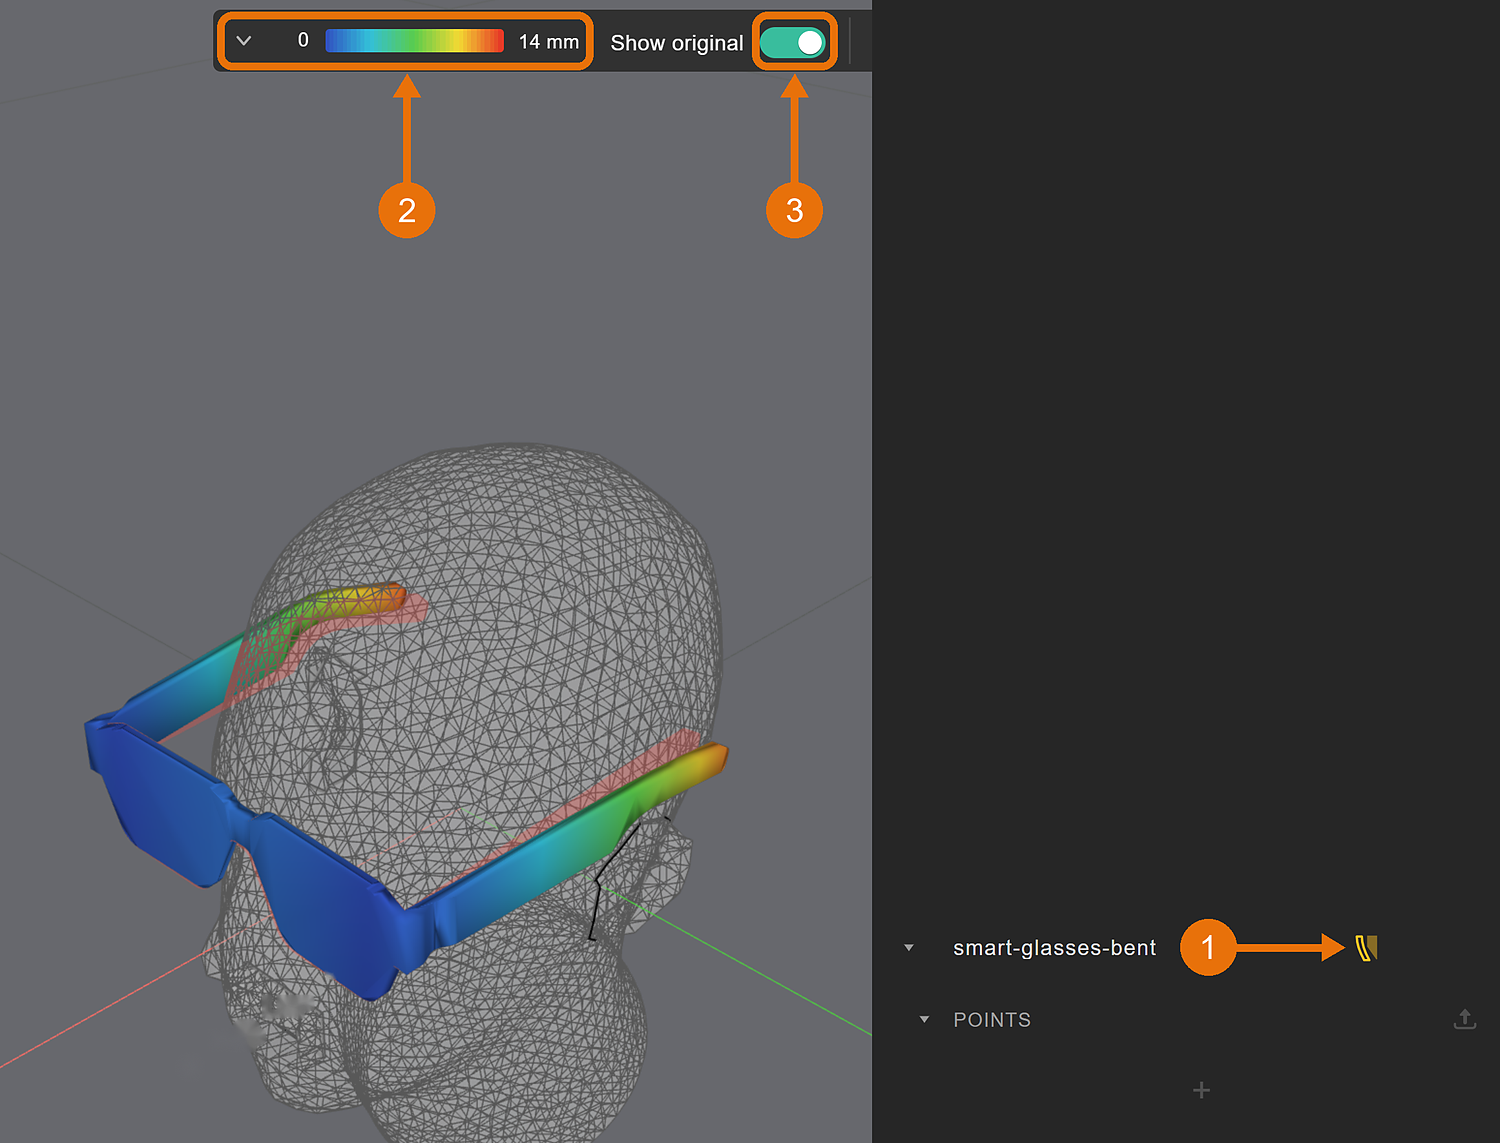
- The fit marker (1) next to your device in the side panel shows that it's fitted.
- The overlay menu (2) colors the device by how far the fit moved each point (Deformation), or by how much the material is stretched or squashed (Strain). The scale shows the largest value.
- Show original (3) shows the unfitted shape in red, so you can compare the two.
In this example the fit bent the ends of the arms up to 14 mm outward and left the front of the frame where it was.
Move a fitted device
You can still move and rotate a fitted assembly with the gizmo. The device keeps its fitted shape as it moves. If the new place pushes it into the mannequin again, click Re-fit.
Undo a fit
Click Revert to bring back the device's original shape. Its points go back to where they were before the fit. You can also undo a fit with Ctrl+Z.
Set soft and rigid regions
The fit treats the whole device as one material, but that isn't always right: glasses have hinges that bend more easily than the frame, and can have a battery pod that doesn't bend at all. With regions, you can make parts of the device softer or stiffer than the rest.
Regions can only be applied before fitting the assembly. If the device is fitted, click Revert first.
You can't add points to a fitted assembly, because they wouldn't follow the shape the fit gave it. Add the points before the fit, or click Revert, add them and fit again.
Let a hinge bend
-
Select the device's assembly, zoom in on it with Zoom to selection, and click Soft regions. The widget switches to face selection and hides everything else in the scene.
-
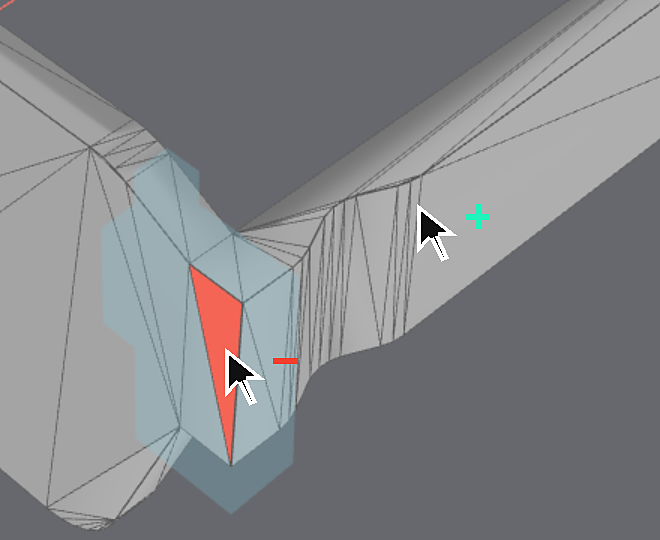
Click the triangles you want in the region. The cursor shows a plus over a triangle you can add, and a minus over one that's already picked: click it to remove it. The cells of the region show in blue on the device.
-
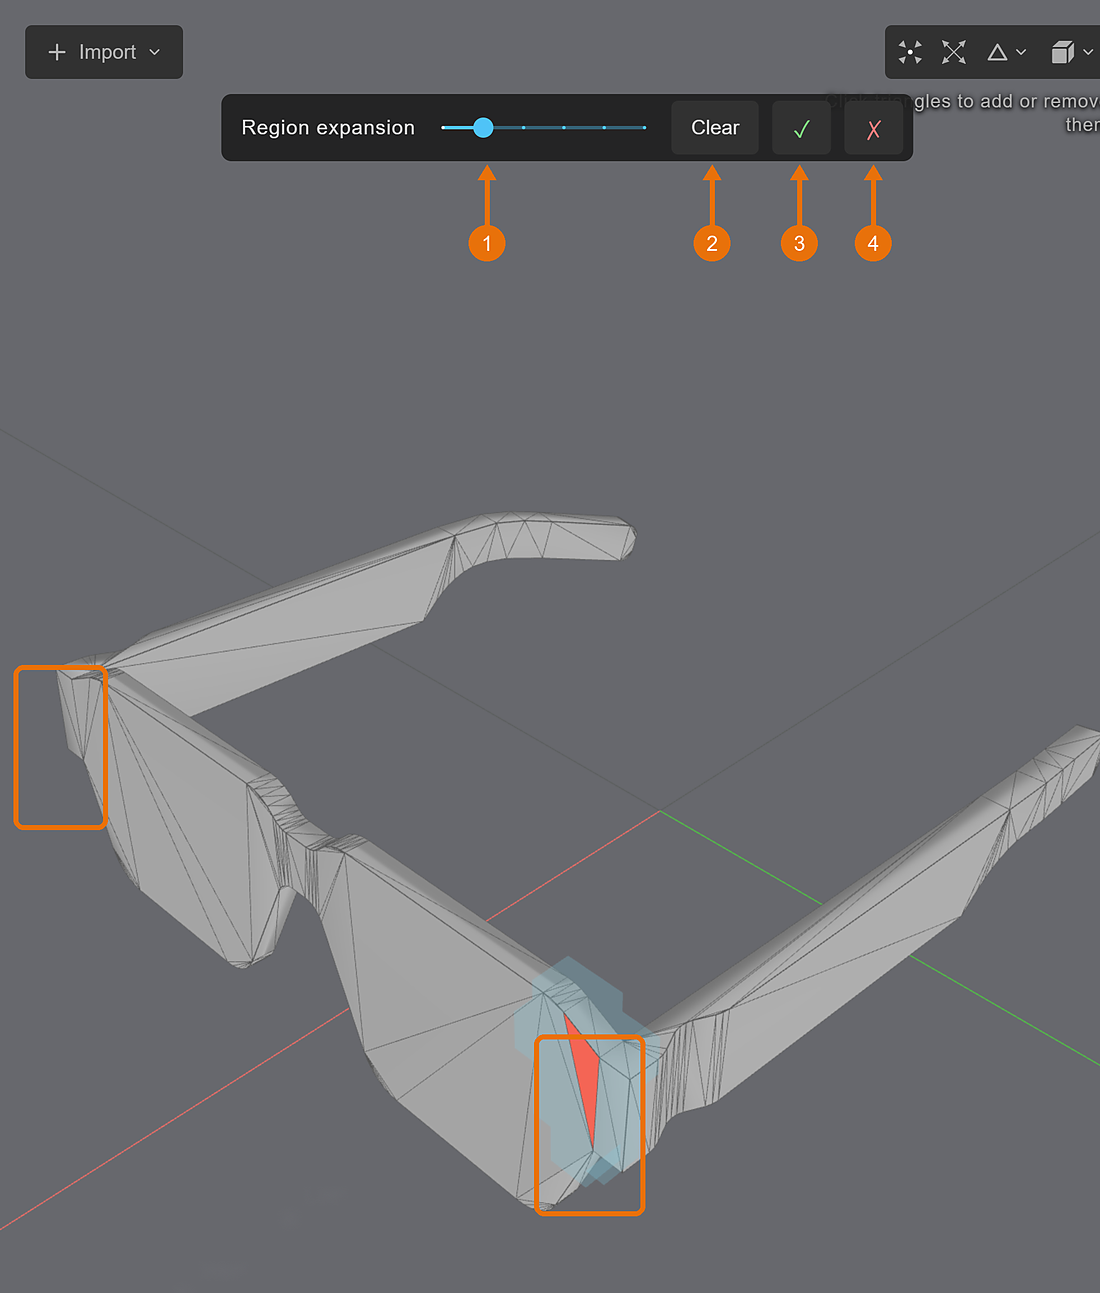
To grow the region past the triangles you picked, drag the Region expansion slider (1). It grows the region by 0 to 5 cells.
-
To start over, click Clear (2).
-
Click the check mark (3) to keep the region, or the cross (4) to throw away your changes.
-
Click Fit.
A CAD file often has long, thin triangles. One click picks all of it, so the region can reach further along the arm than you meant. Check the blue cells before you keep the region.
Keep a part rigid
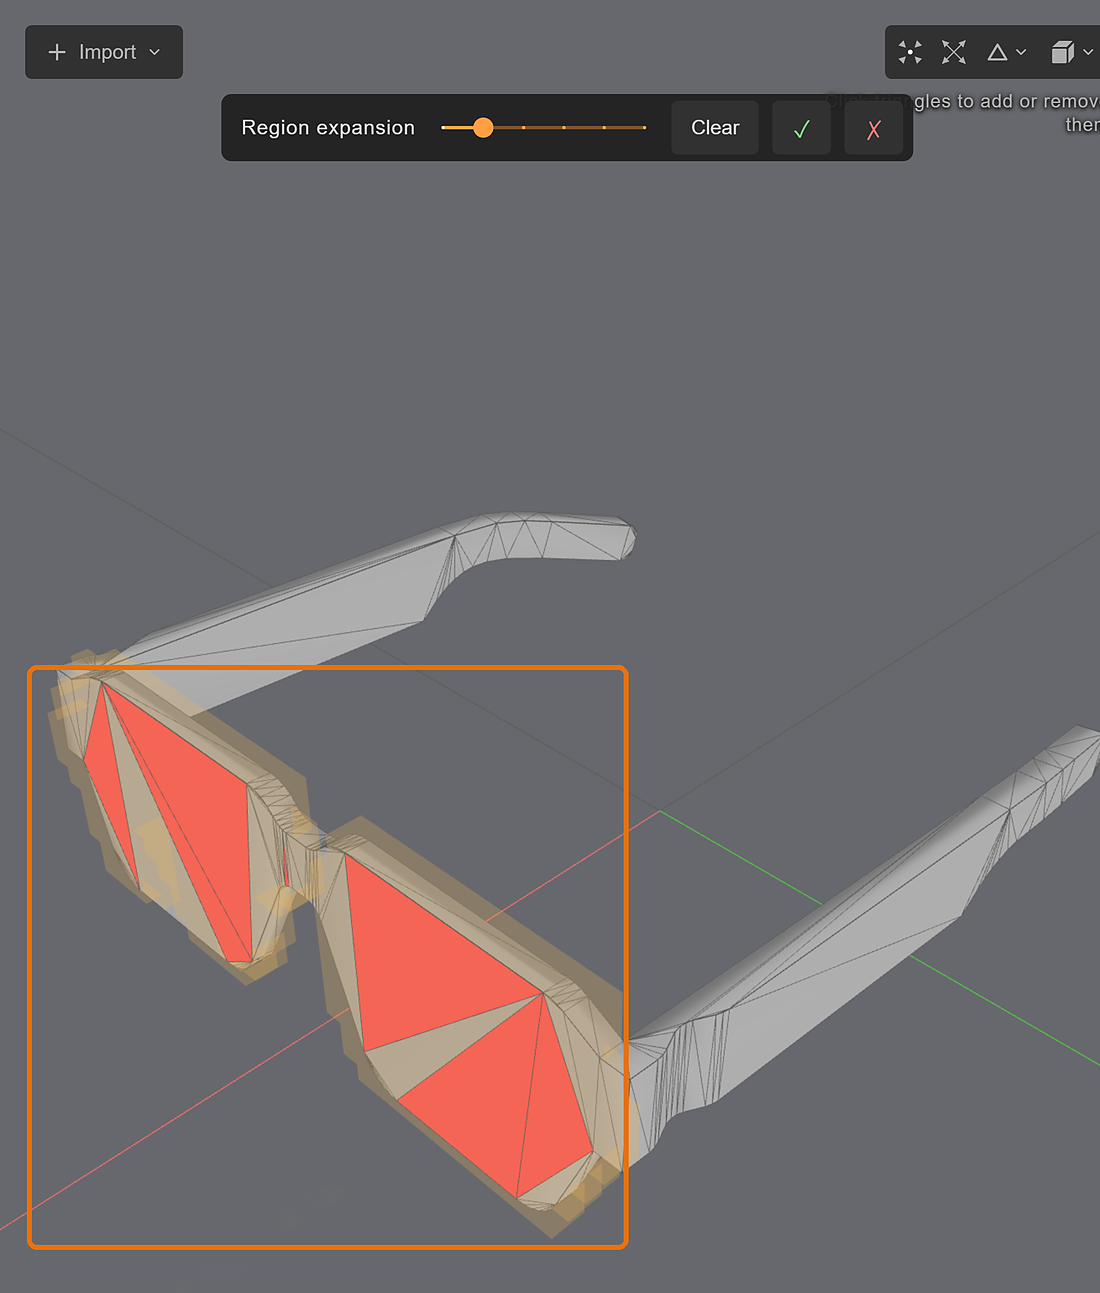
Follow the same steps with Rigid regions, for example for the front frame of glasses or the electronics in the arms of smart glasses. The cells of a rigid region show in orange. A rigid region barely bends, so the fit moves it as a whole and bends the parts around it instead.
Where a soft and a rigid region overlap, the rigid one wins.
Compare a fit with and without regions
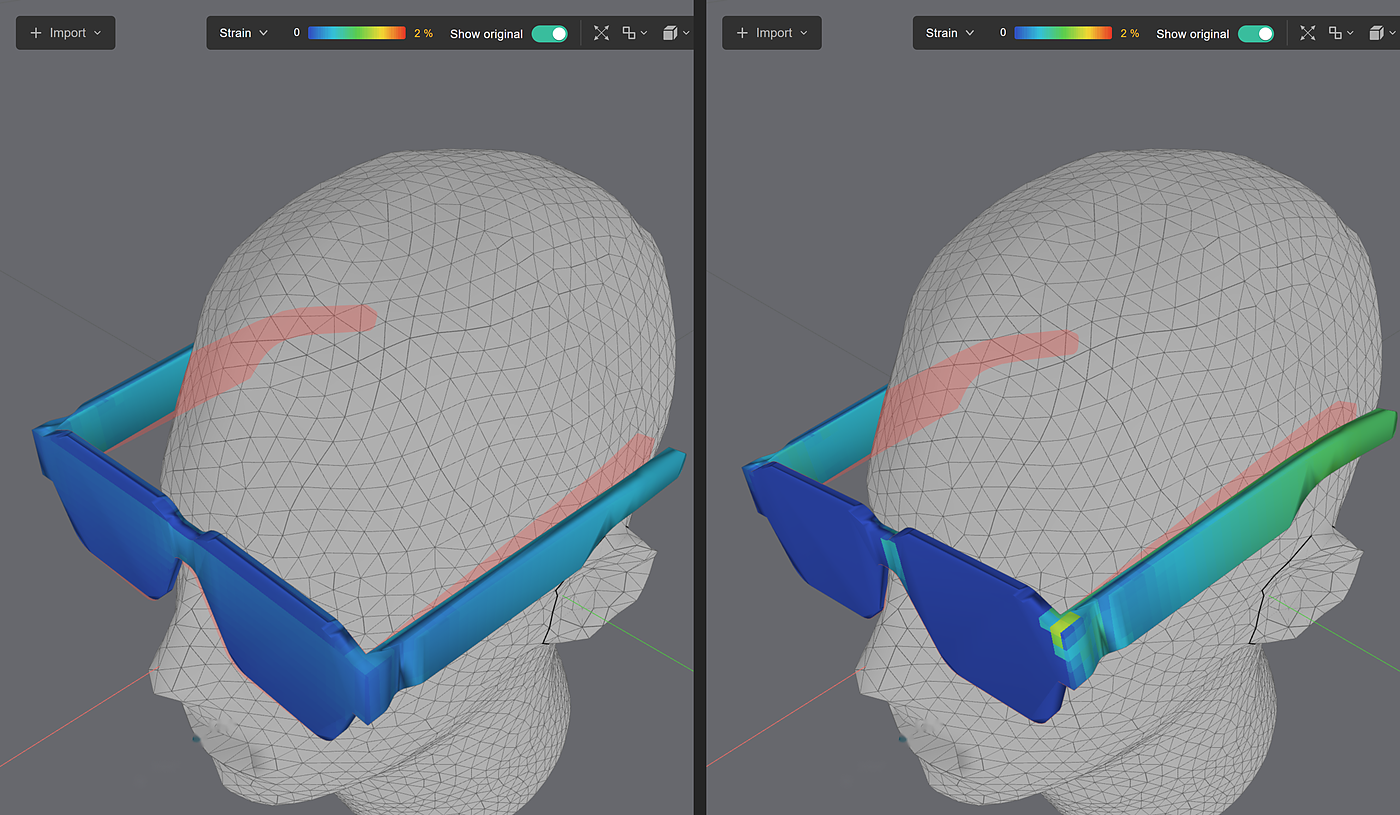
Both sides are colored by Strain with the same scale, 0 % to 2 %, and Show original is on. On the left the glasses are fitted without regions, so the bending spreads along the whole arm. On the right the hinges are soft and the front frame is rigid. The front barely bends, and the bending collects at the hinges, where a real pair of glasses bends too.
Fit and the geometry check
The geometry check and Add to project use the device as it is in the 3D view, so a fitted device is checked and added in its fitted shape.
If the fitted device is missing from the checked model, move it slightly into the mannequin, so the two overlap a little, and fit again. That's like a pair of glasses pressing lightly into the skin. Don't move the device away from the mannequin: a gap makes it more likely to go missing. For the mesh quality, see Tips for the best mesh quality.
The fit can't run while a check result is shown. Click the Editor tab first.