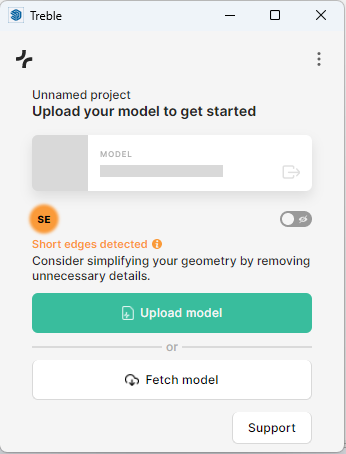
How to fix SketchUp model (Test Case with local check)
From this test case, you can get an idea on how you can simplify your model according to the feedback from the geometry check.
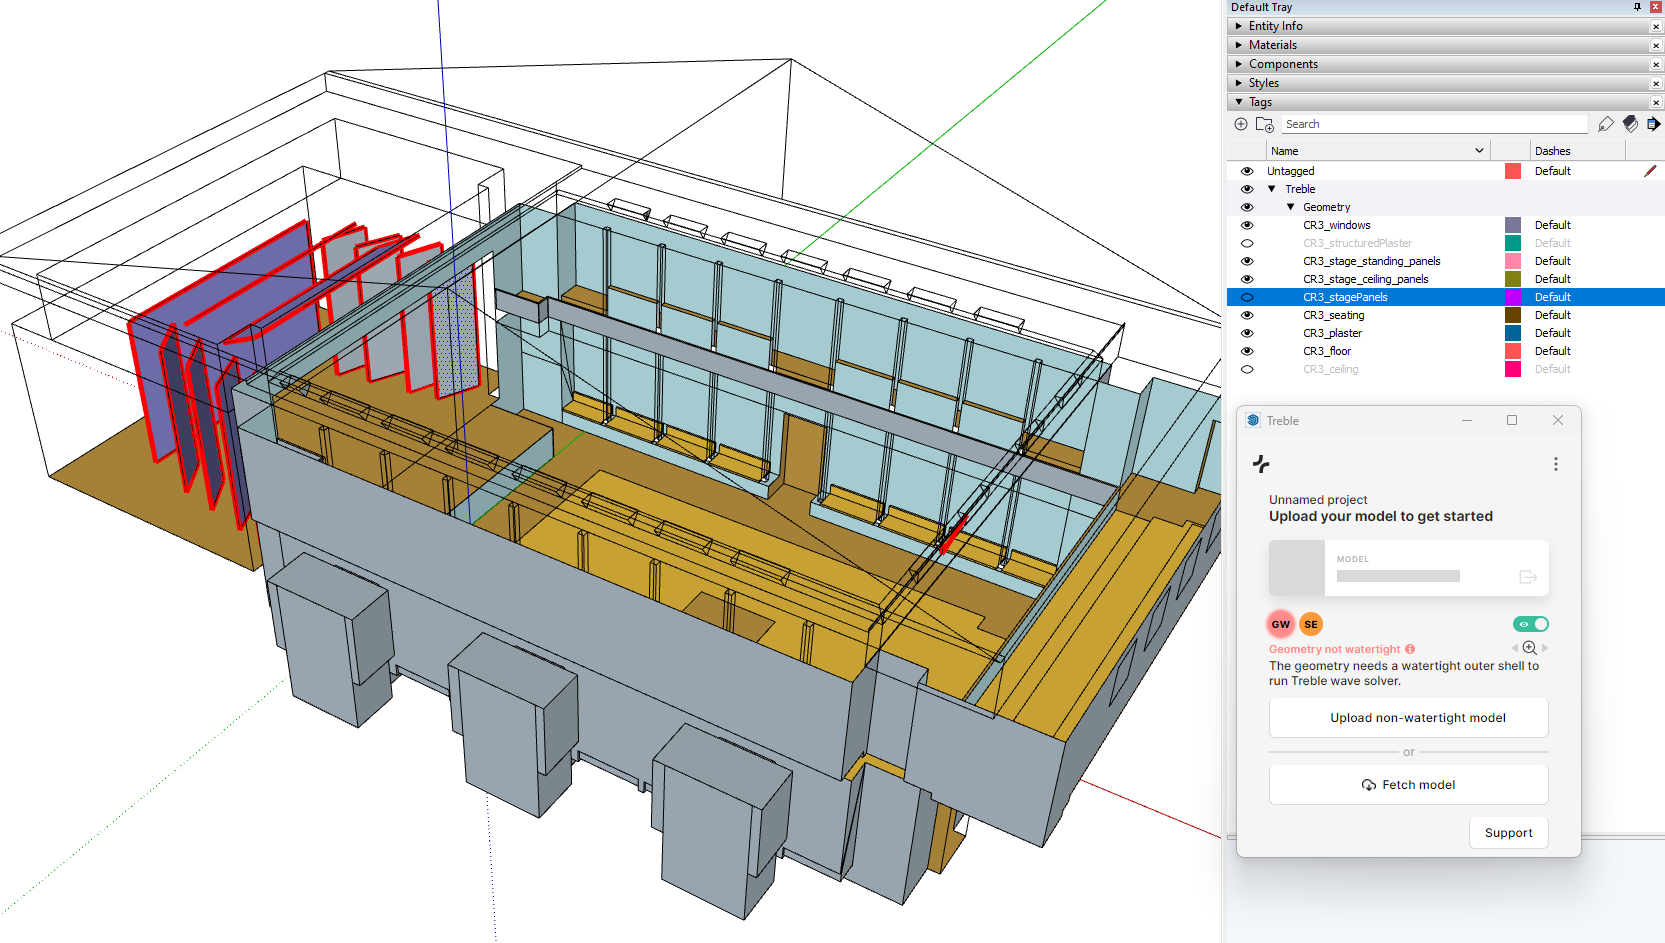
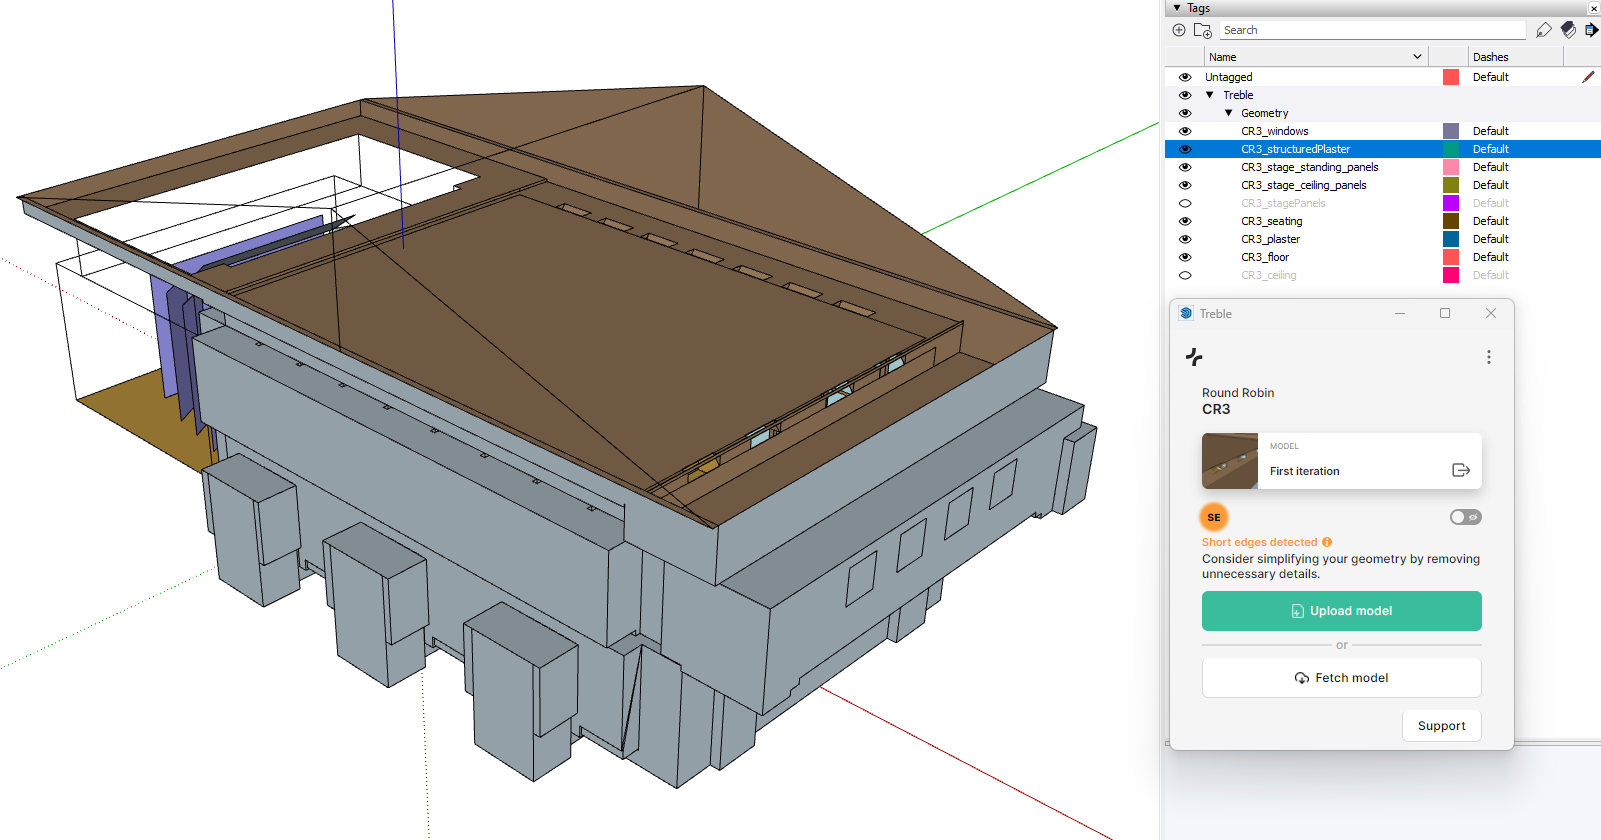
Initial state
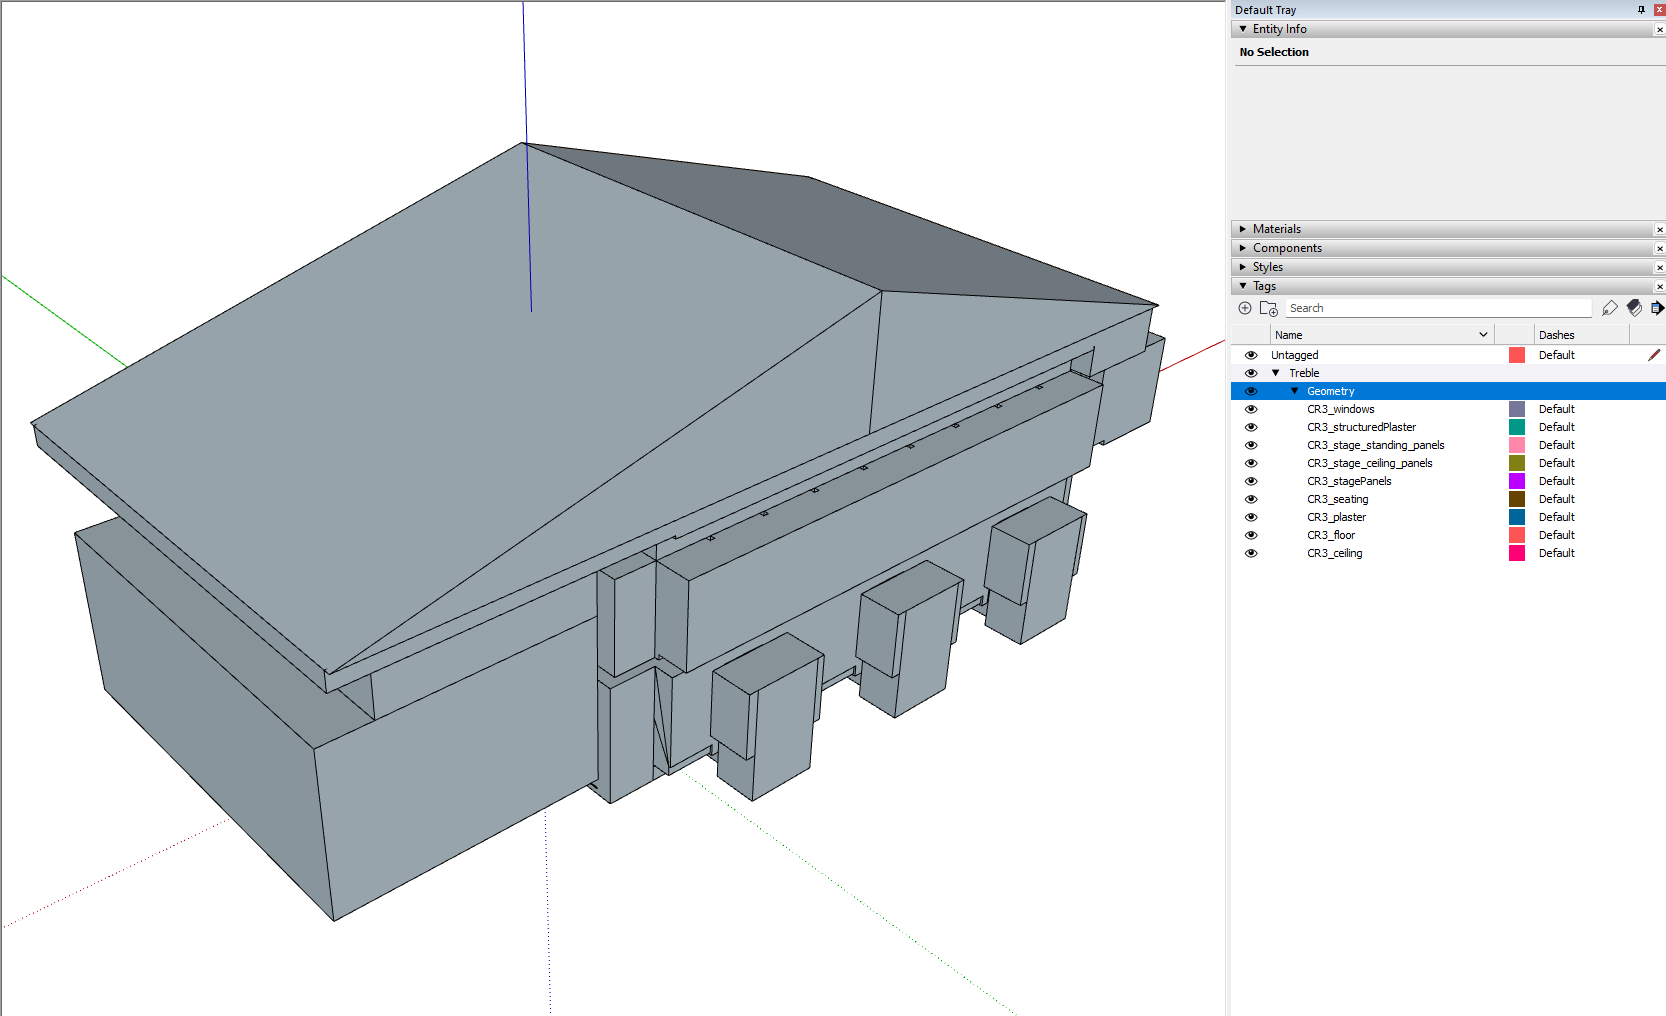
This is the initial state of the model: Initial model
The model has all of its relevant faces in the Treble > Geometry folder
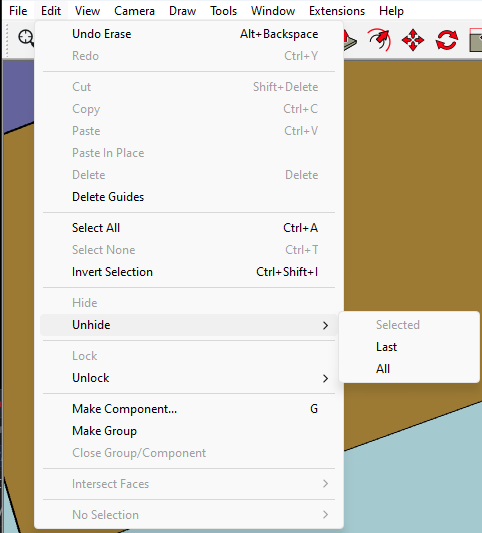
Check the model
Please have the documentation page regarding the geometry checking feedback. This is a good starting point for fixing the geometry, and this guide is merely an illustration of how to use it.
BM warning
This guide has been created using the now deprecated check within SketchUp.
Currently, the new cloud-based checking service does not return the BM warning, and will return a GW error instead. The step below is still relevant regardless.
Check validity of found volume:
Use the toggle to spot what volume has been chosen as the biggest volume in the model.
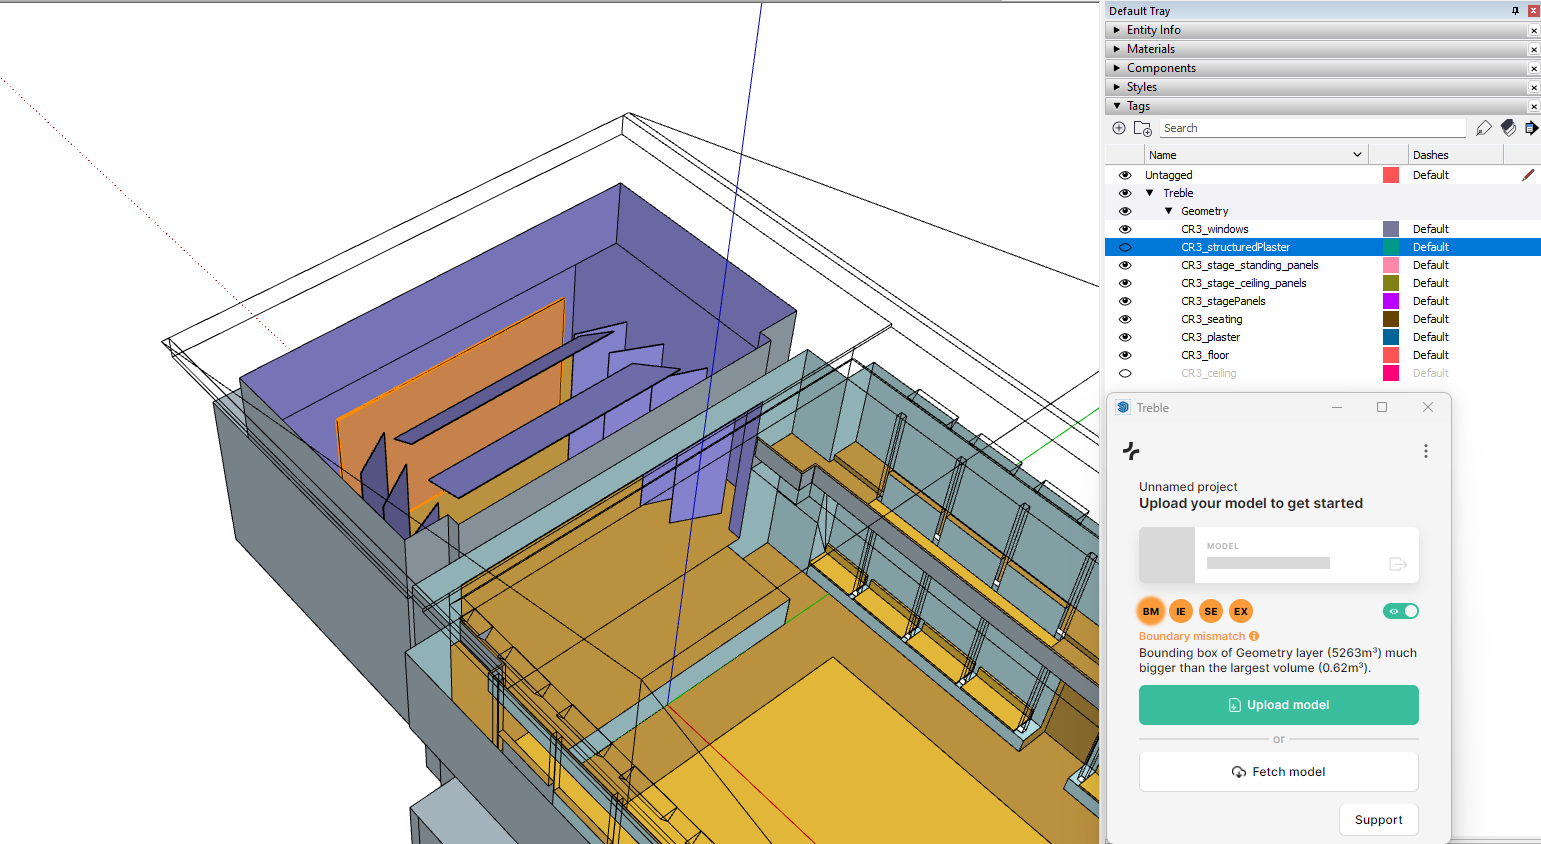
Sound panel chosen as biggest volume
If the volume seems unnecessary, you can check its width by using the Tape tool (press the key T to activate it). Here it is only 2cm, so below a meaningful width. A rule of thumb is that a thickness lower than 5cm is irrelevant for up to 2kHz.
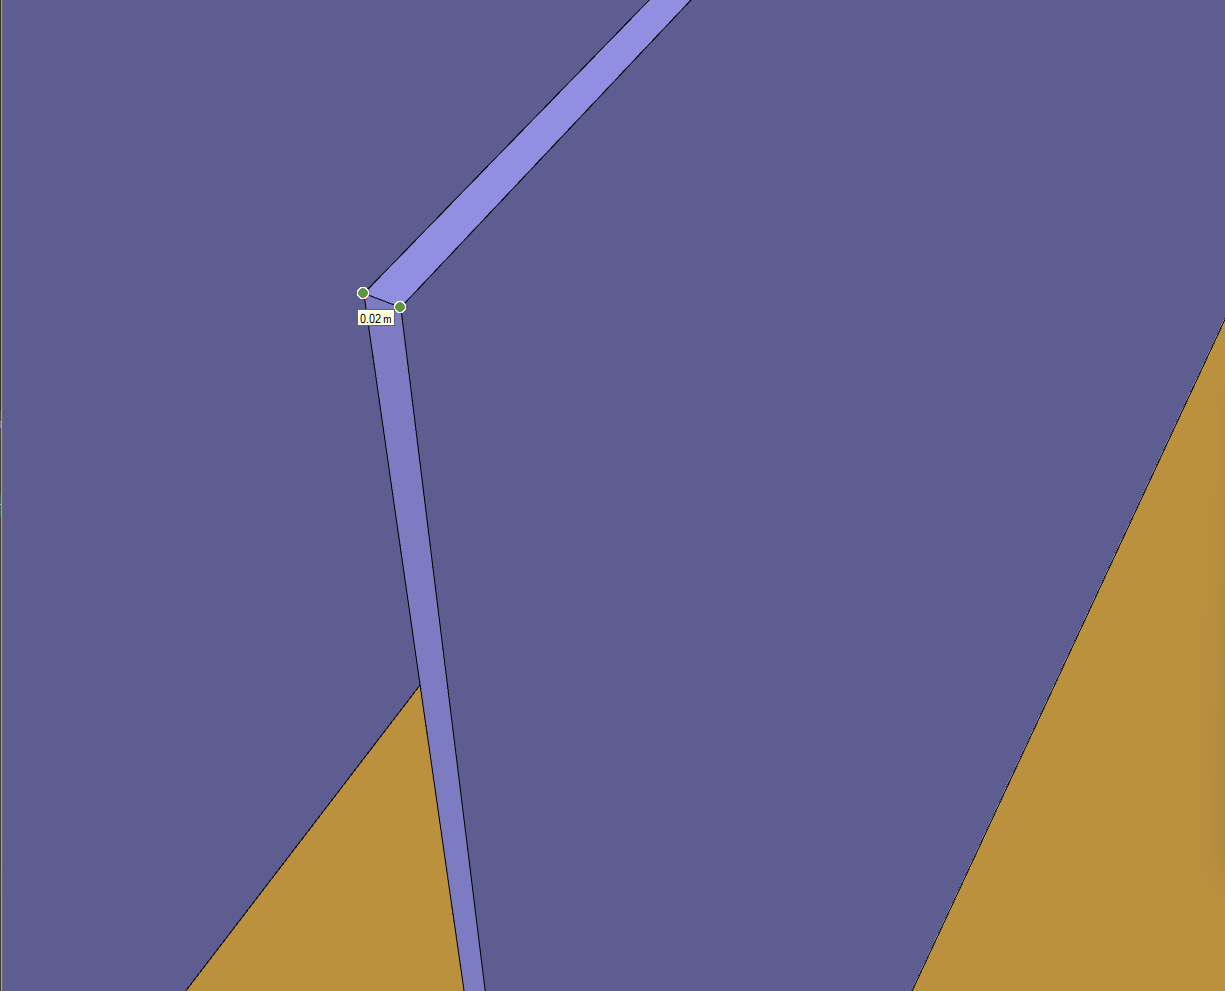
Therefore you can collapse the volume into an open surface, thus removing this inner volume and helping us moving forward.
Collapse the panel
The simplest way to remove the thickness of a small volume is to delete the thickness from one of the side. In this case the volume is floating, so either side works.
- Press space to activate the Selection tool
- Select one of the side layers
- Press M to activate the Move tool
- Click on one of the face corners (and release)
- Move the mouse above the matching corner of the other face
- Click (and release) to execute the move
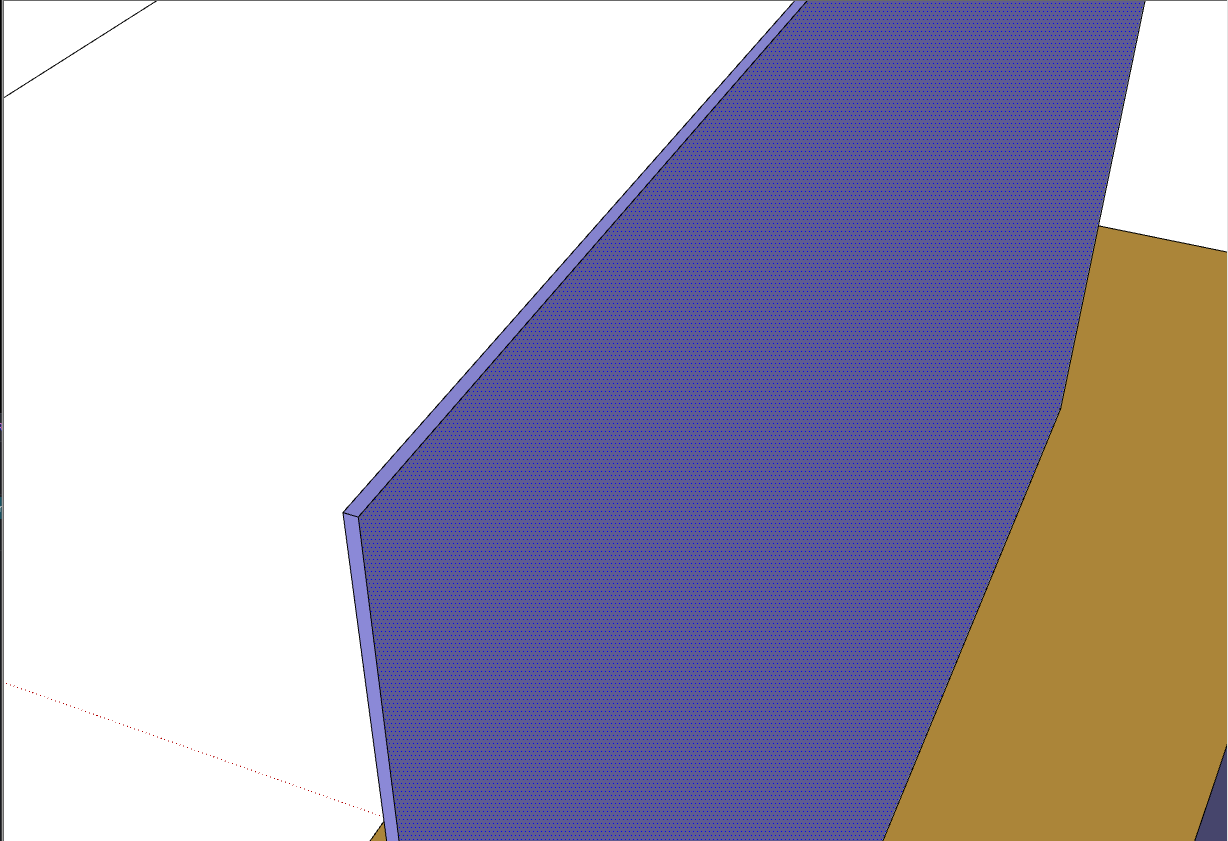
Volume reduced to a single surface
Run the check again
This issue has been sorted, and you can run the check again. As expected, the same error comes with the next biggest sound panel.

You can remove the width of all of the panels before moving to the next step:
Save a new copy of the model to ensure that we have a backup if anything gets corrupted in the way.
GW error
Find the cause of the error.
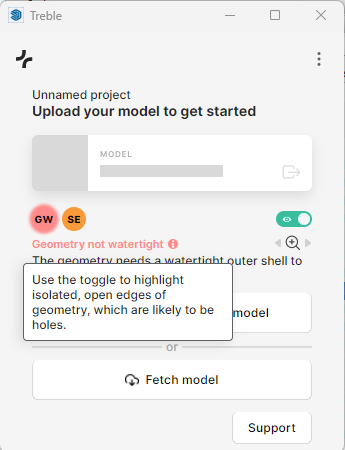
Now that other inner volumes have been collapsed, the expected Geometry not watertight error comes up.
The plugin shows all edges that are likely to be holes. Such edges are the edge of a face that are not connected to another face, leaving the edge open.
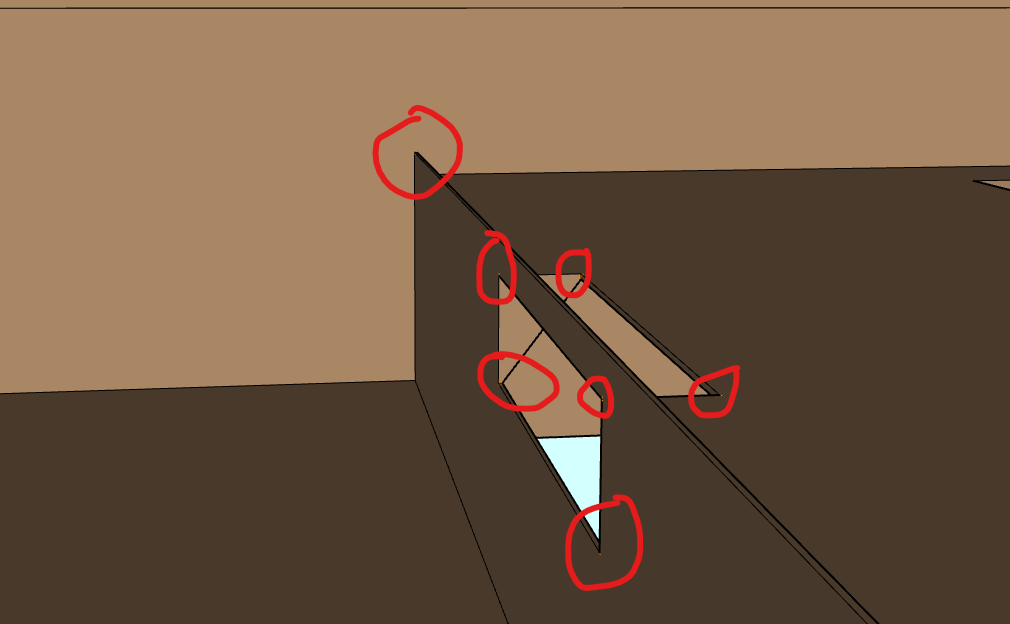
In our case, this shows false positives in the contexts of the sound panels. We can ignore these and focus on the other edges that are flagged in red (see below)
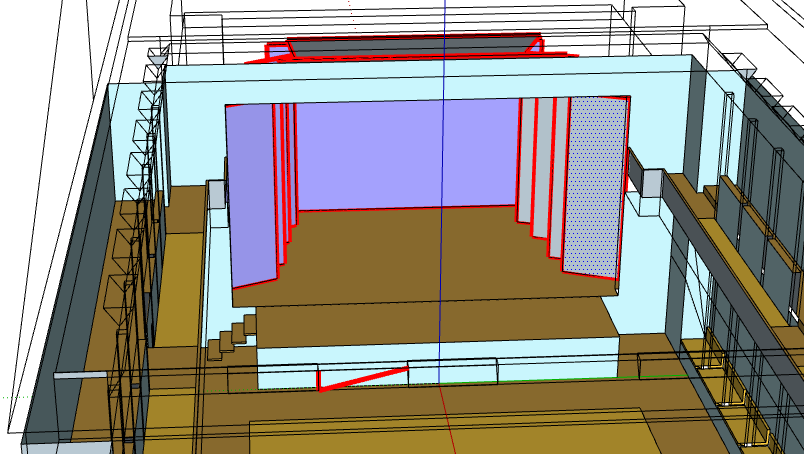
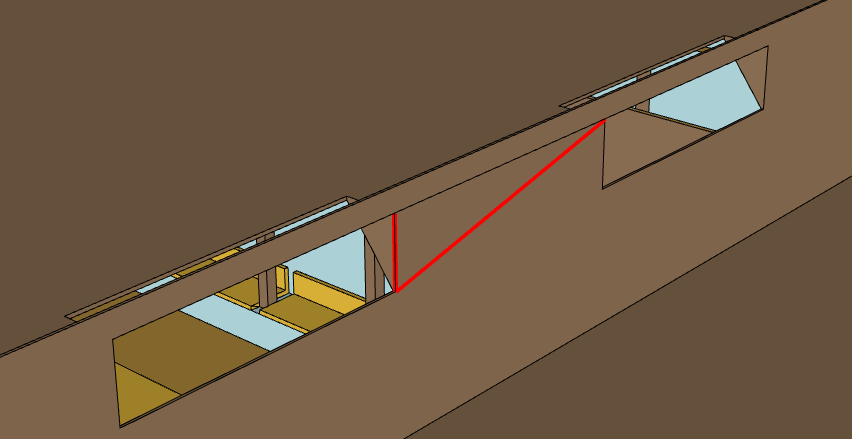
Open edges are at the bottom of the screenshot
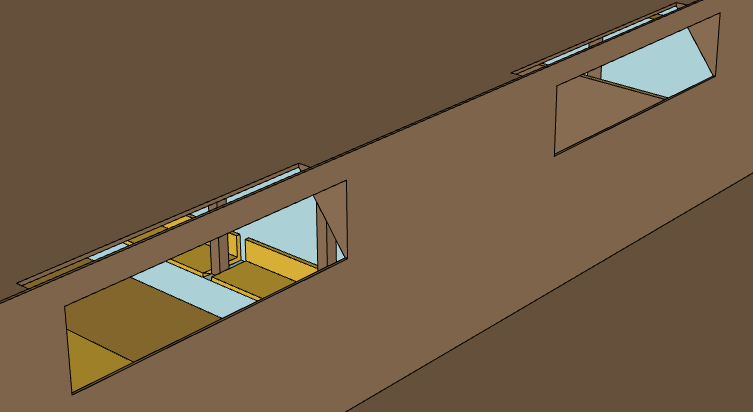
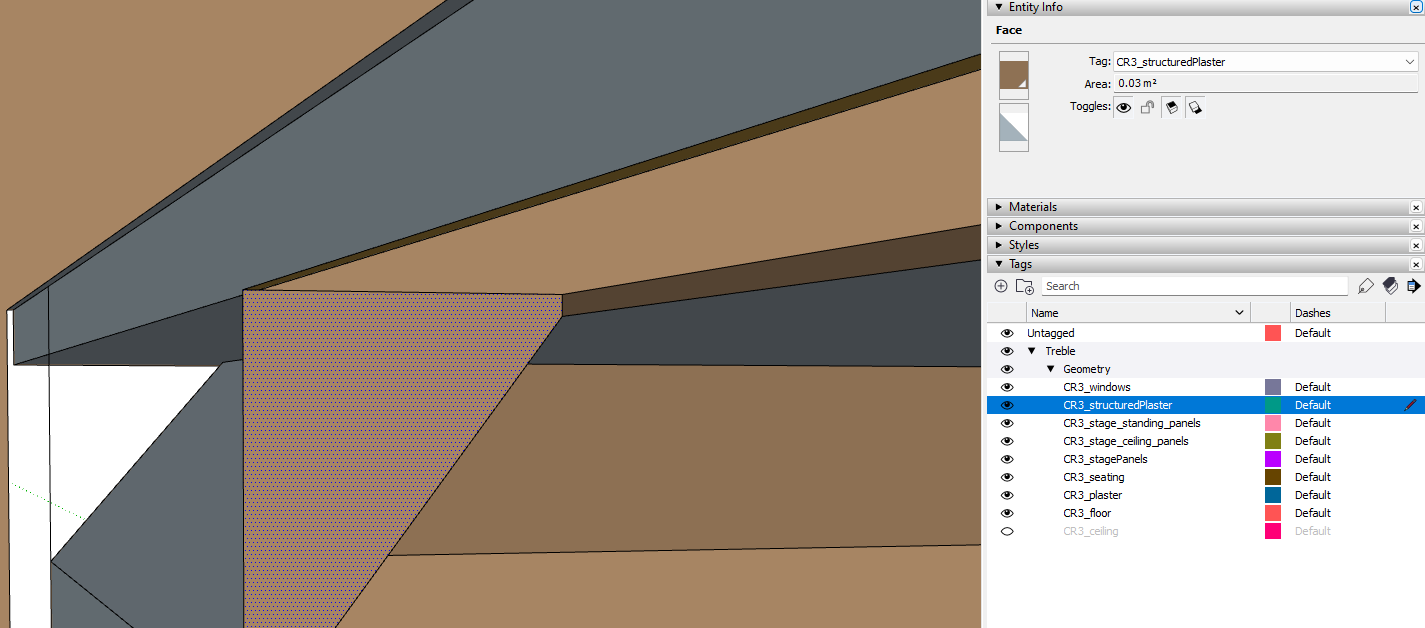
These are in the CR3_structuredplaster tag. Show again this tag, and hide the faces of the roof to be able to see the inside:

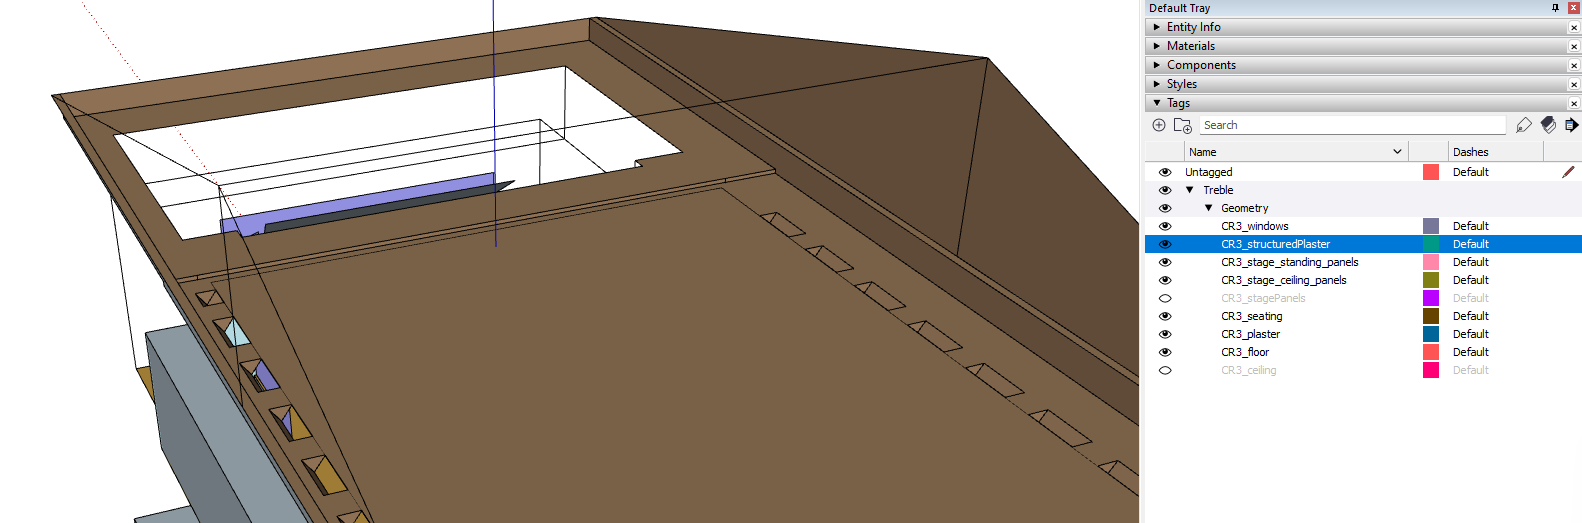
Let’s show it and run again a Geometry Check: and look at the problem
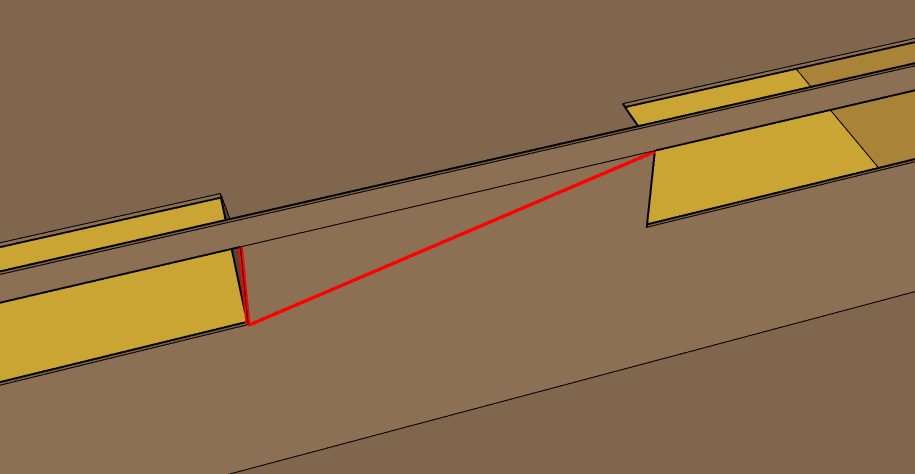
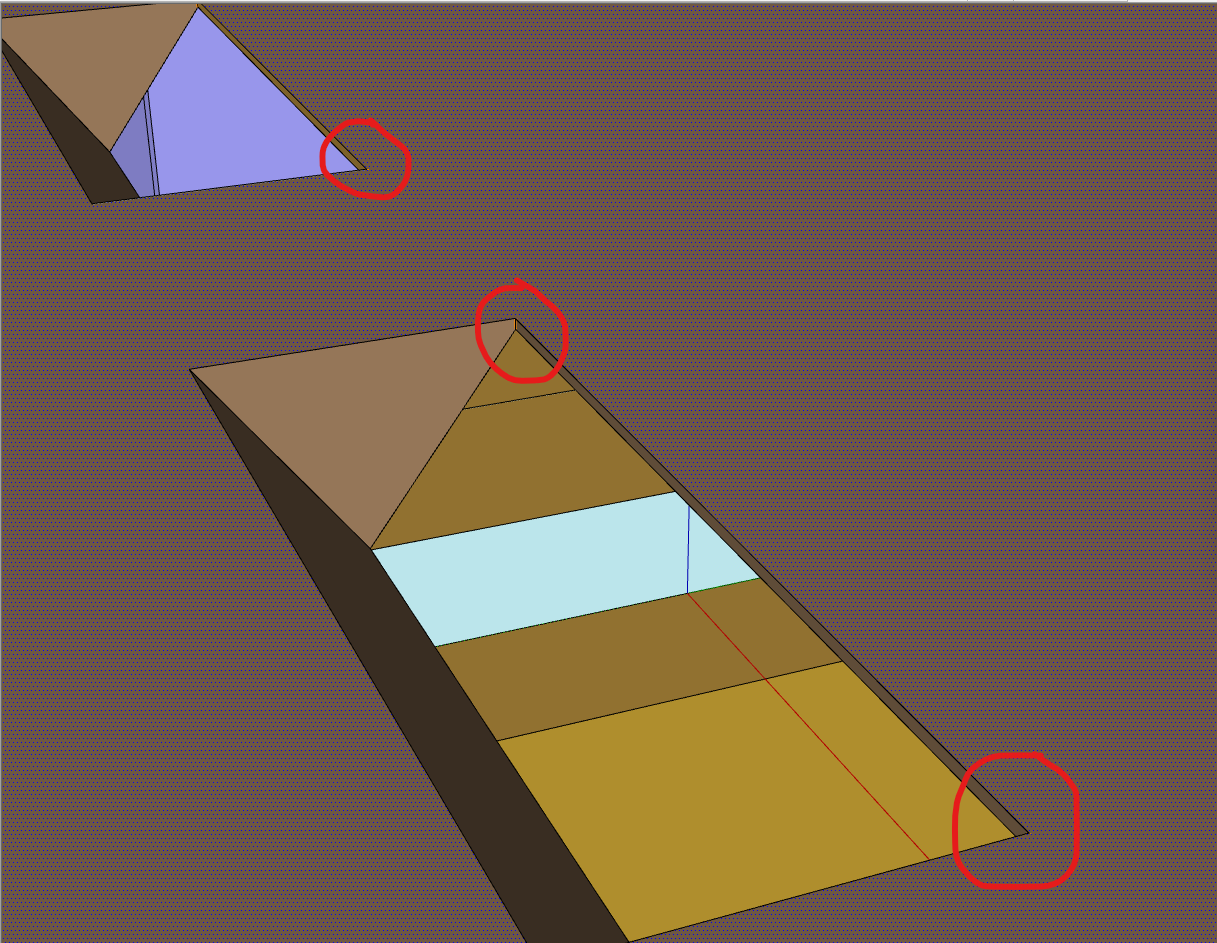
Diagnose the issue
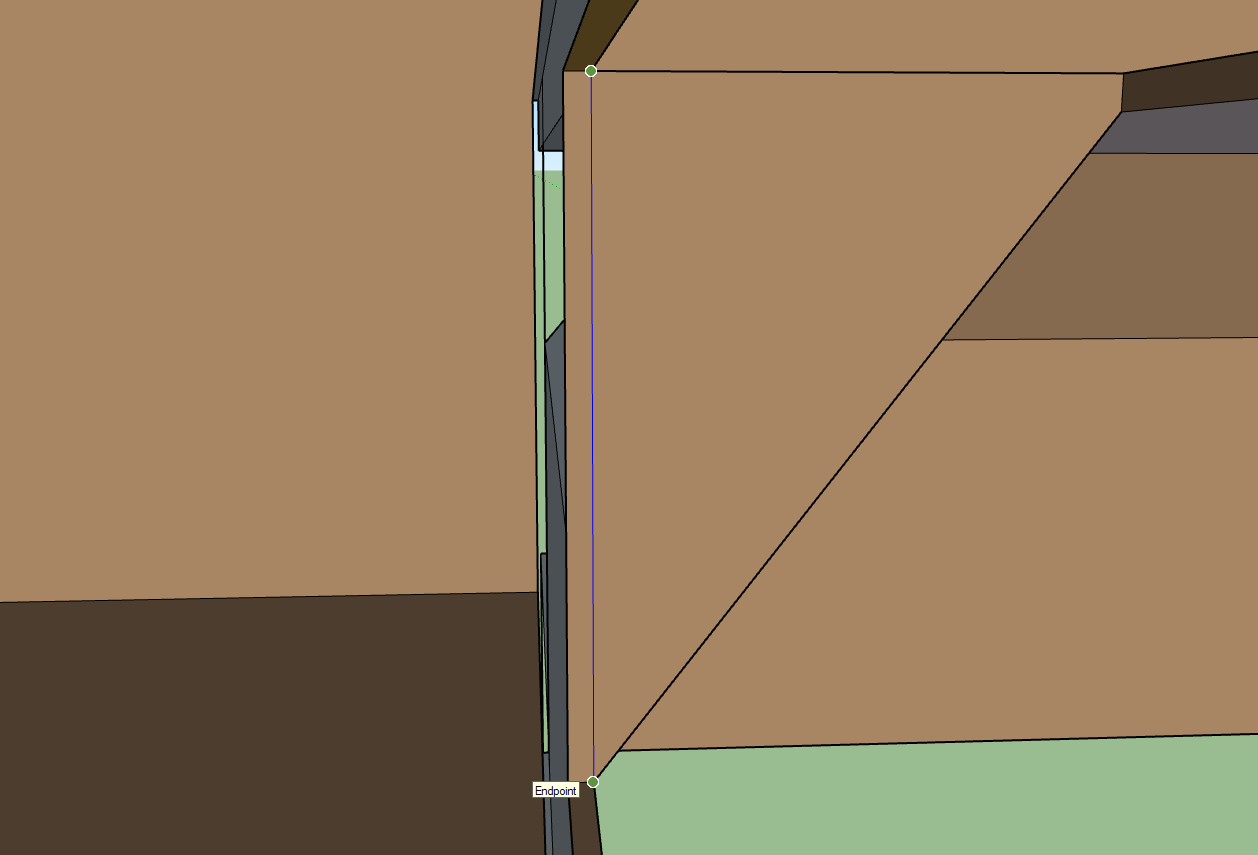
Here we have a peculiar case, wherein the open edges do not seem to make sense: the red edge does not exist in the SketchUp model. This is due to the process of the model, which needs to be triangulated before export. Here something does not work at export time when getting the triangles of that face.
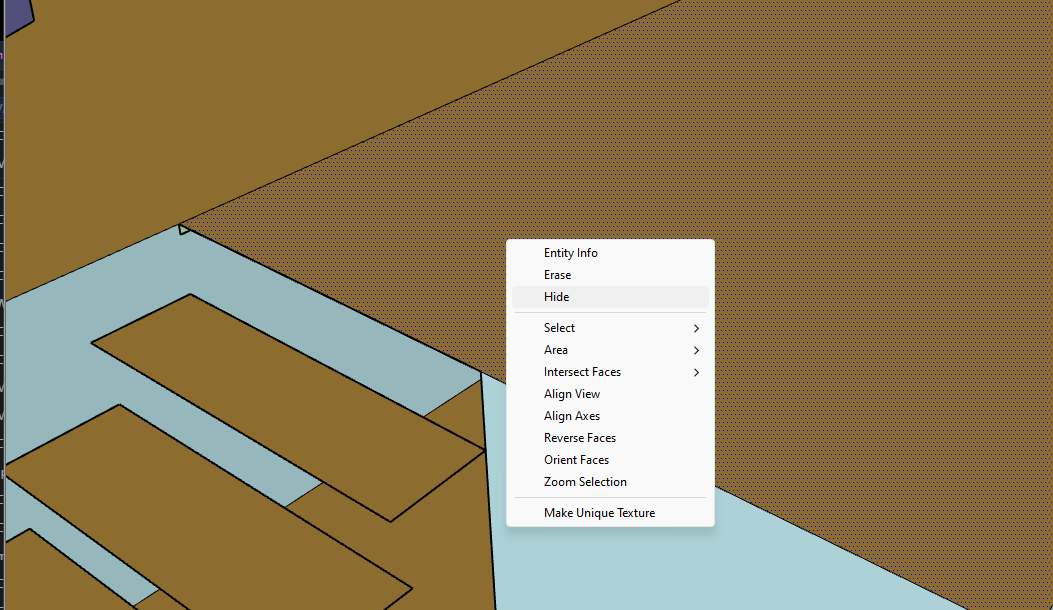
In the screenshot below the face is selected. We can see that the edge between the holes is the only one in that area, and guess that it is not necessary.
You can press Space to close the Geometry Checking tool and activate the Selection tool, select the edge and delete it.

Select the edge
Delete it
Run the Geometry Check again, and this time it is successful! There are still SE warnings (short edges) but you can now upload the model to Treble.
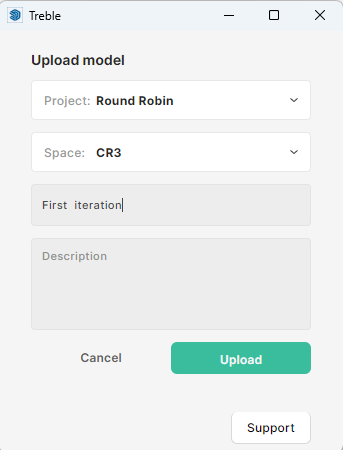

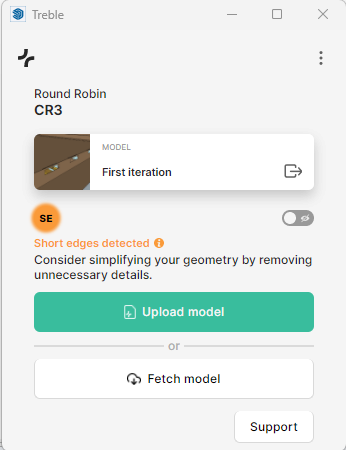

Click on the icon to open the model in the Treble web app
Assessing the quality of the model (in spite of the SE warnings)
Short edges do not directly impact the Geometry Analysis. However, it is very likely that the much more accurate wave-based analysis will suffer.
To assess the quality, you only have to run an Estimation in the Settings tab. There is no need to set any material to do so, which makes it a quick check

Unfortunately in our case, the SE warnings have a reason to be: the short edges present in the volume of our model directly impact the quality of the mesh. (A mesh consists in cutting the volume of the model into small triangular pyramids to calculate the wave propagation).
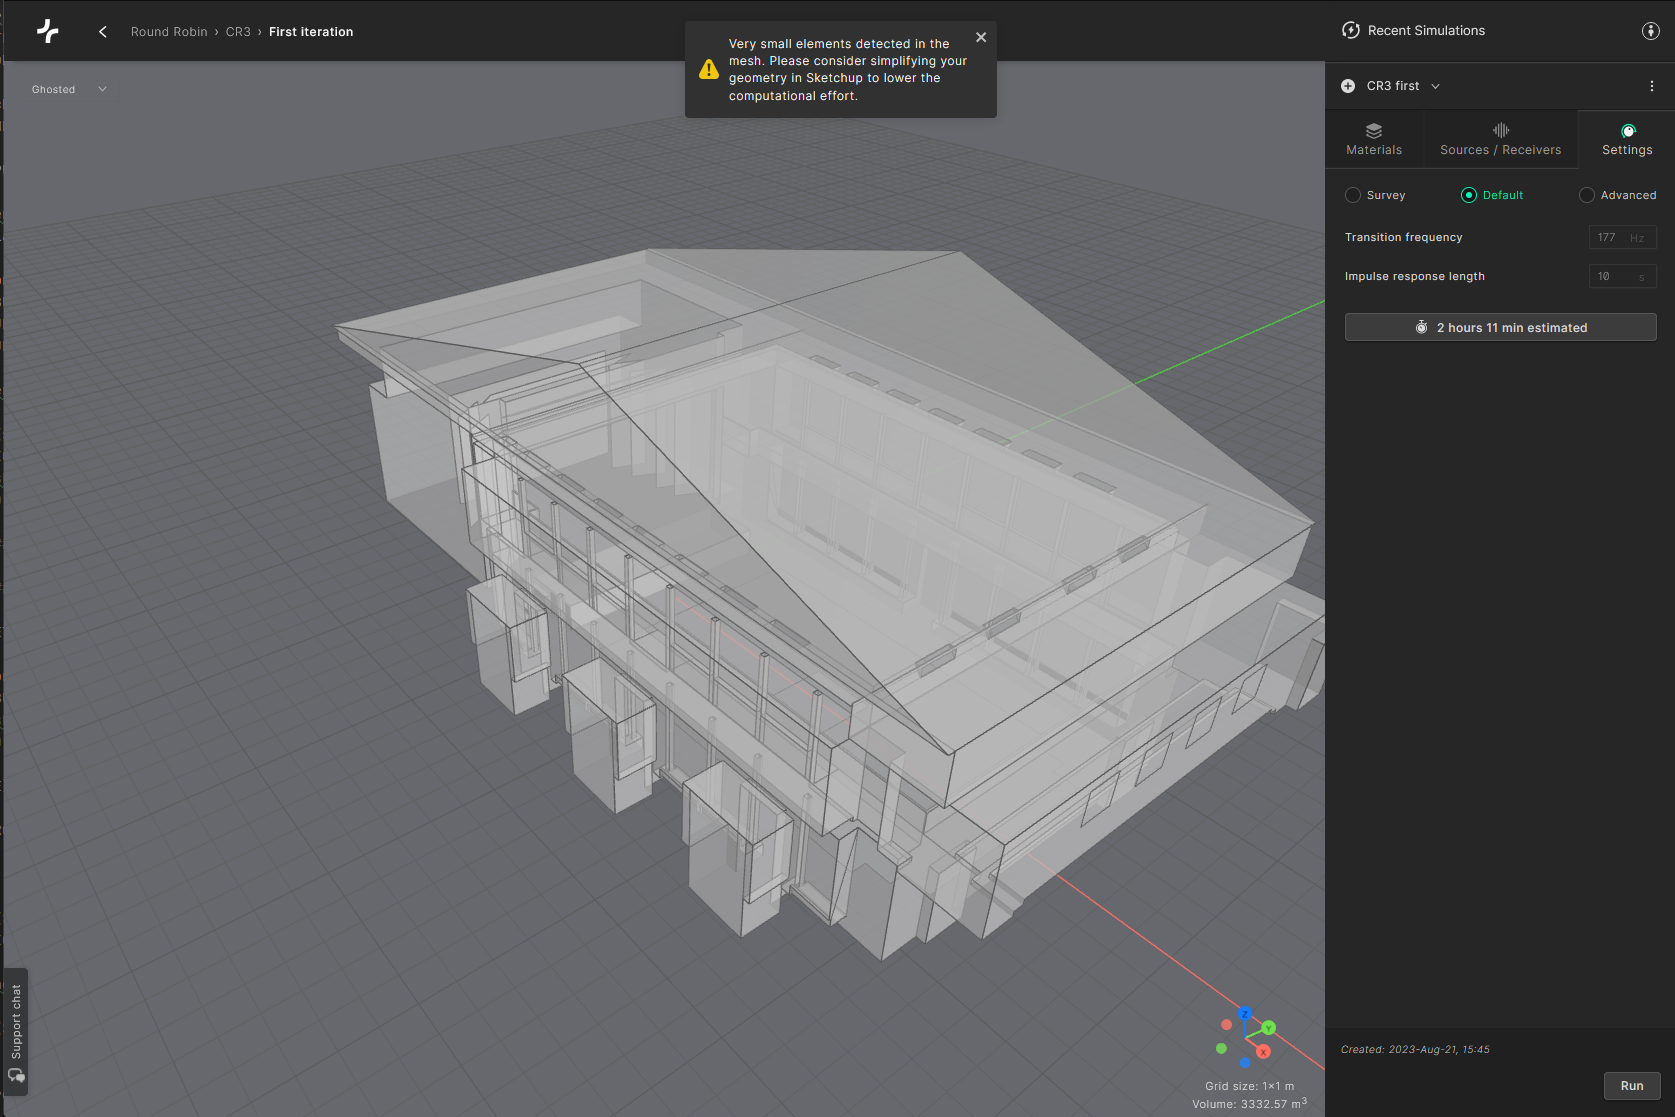
Warning about small elements and long duration
Obviously such a warning is not a blocker: the simulation will only run much slower than it could do. Here it takes 2 hours, which is way more than it should take, and is not the most relevant way to spend compute-hours on Treble platform. Therefore the SE warnings must be answered!
SE warnings
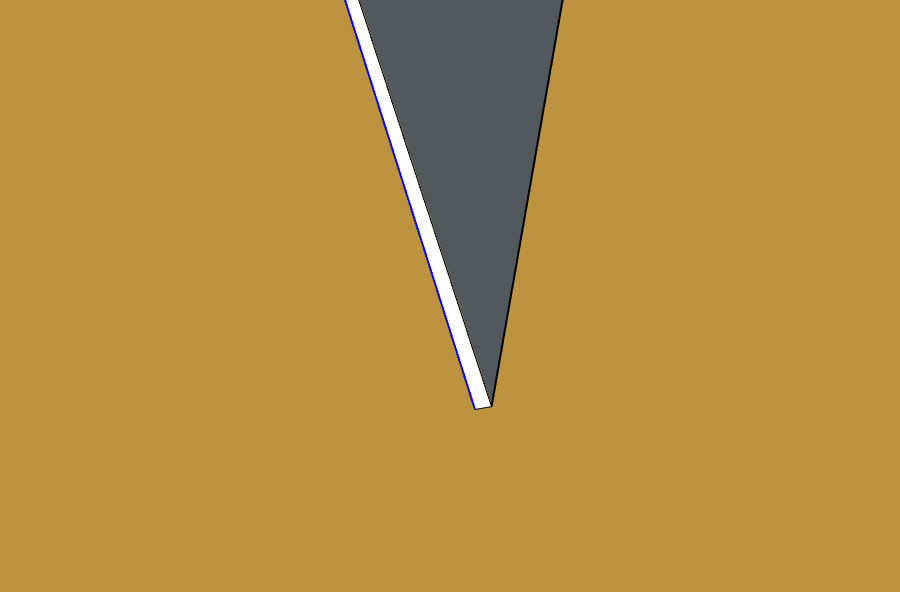
Let’s run the Geometry Check again, and then toggle the feedback tool:
Nothing can be seen as is due to the fact that the edges are very small. The magnifier can be used to help with finding them.
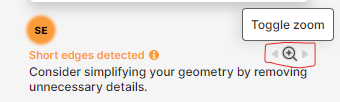
Zooming in small edges ends up being very close to the edge, it is usually necessary to zoom out with the mouse wheel to get a better context

After clicking on the magnifier
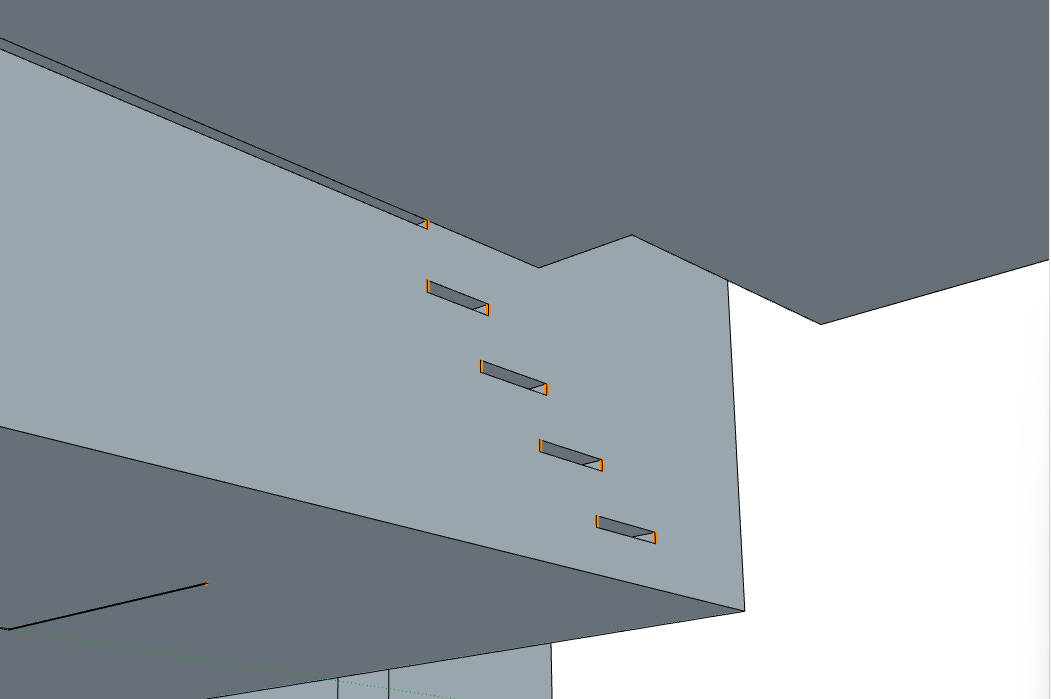
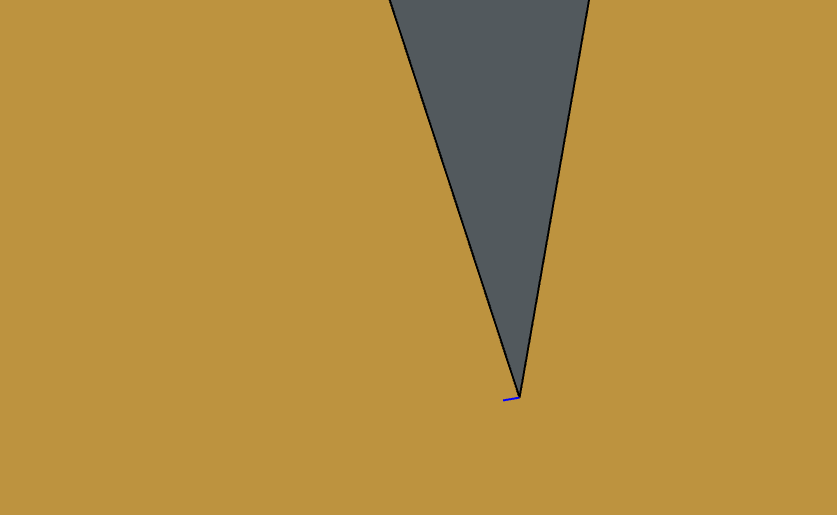
After zooming out
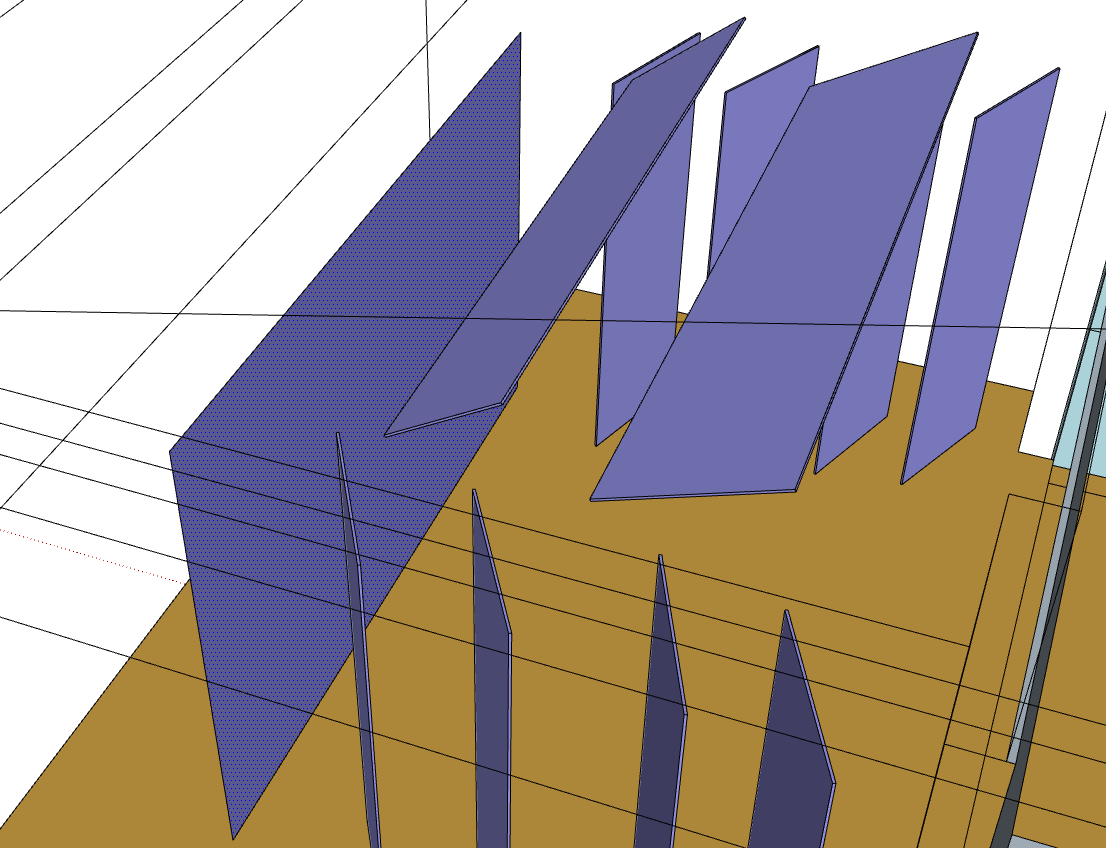
The issue here is the thickness of the steps:
Remove thickness of the steps
These volumes are not floating so we need to use a slightly different approach:
-
press E to activate the Eraser tool
-
Click and drag above the edges that you want to delete (they get marked in blue) and release the mouse to execute the deletion. Hit Escape to cancel the deletion.
-
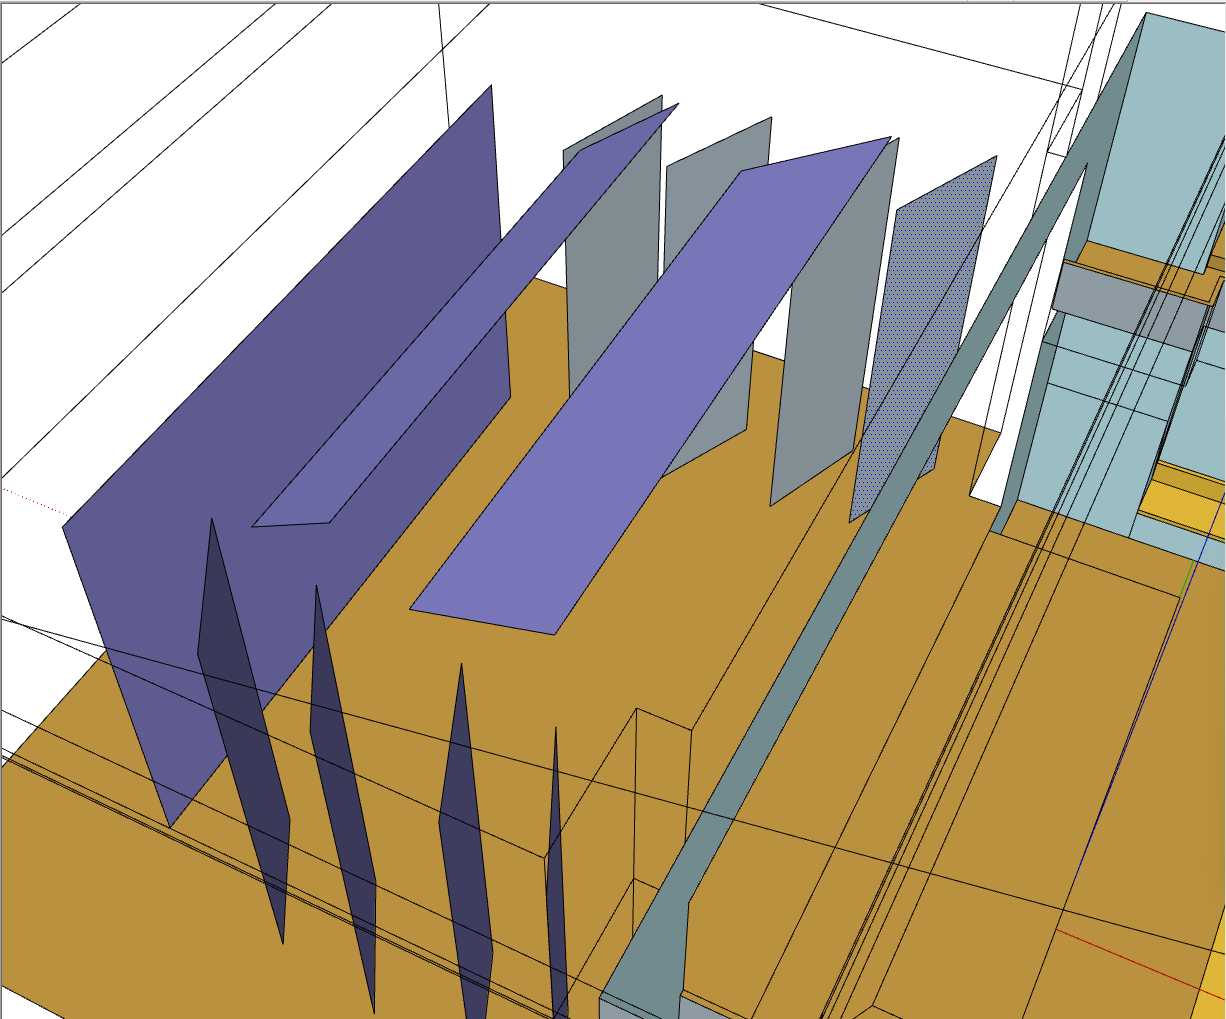
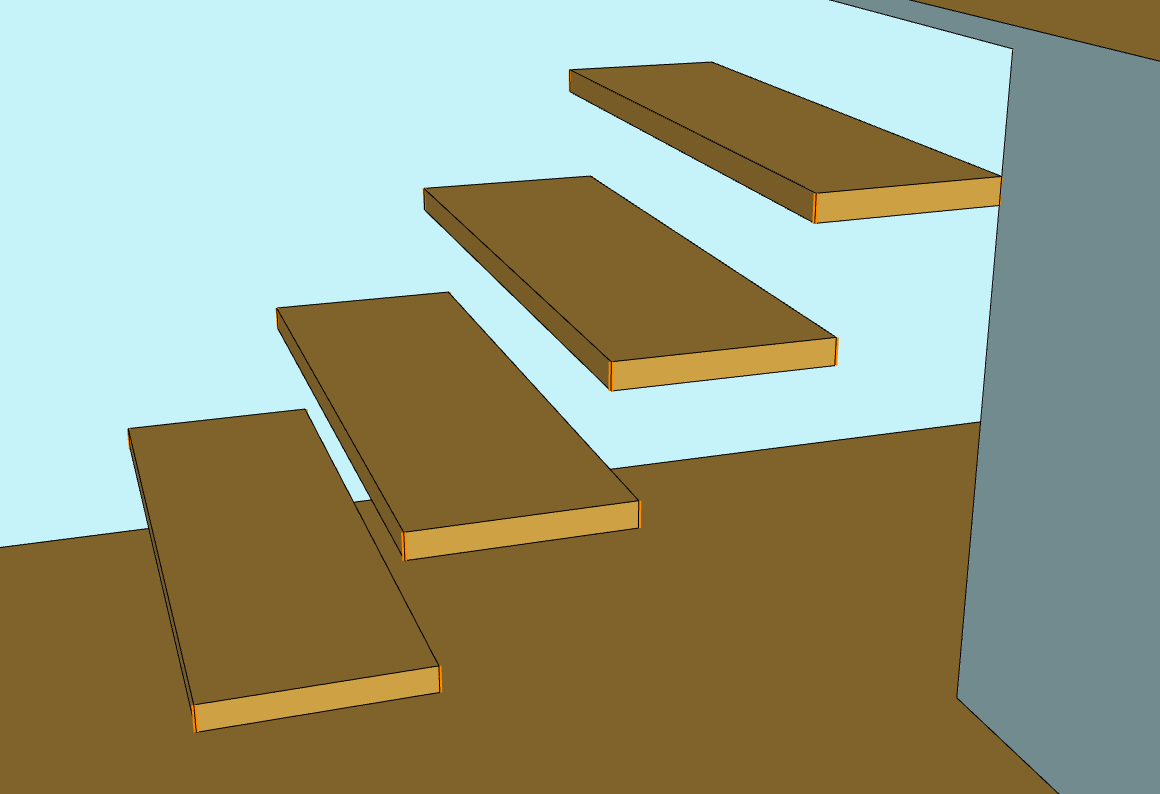
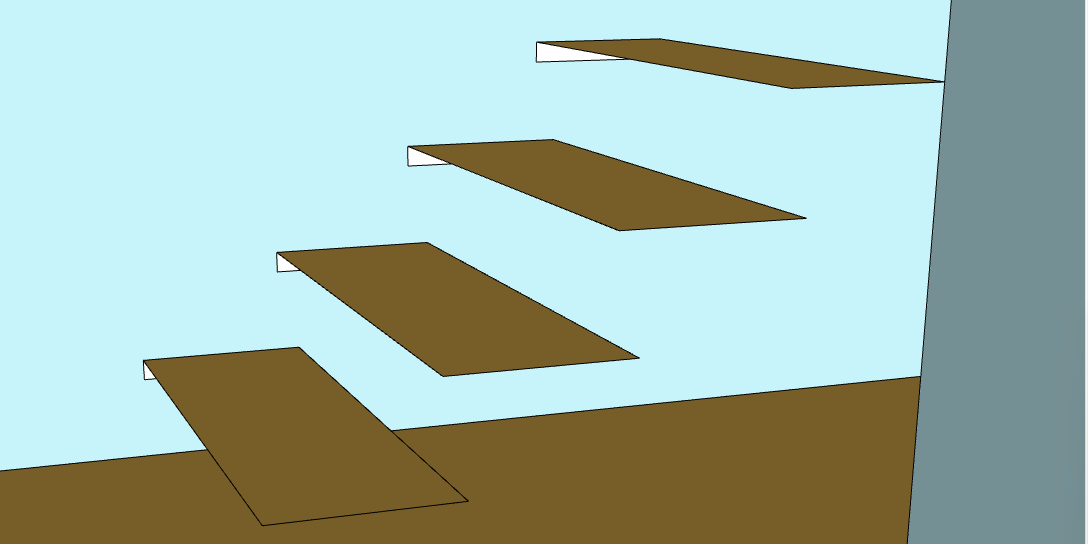
Use this to delete all the bottoms of the steps. Holes appear, but we’re going to fix them later:
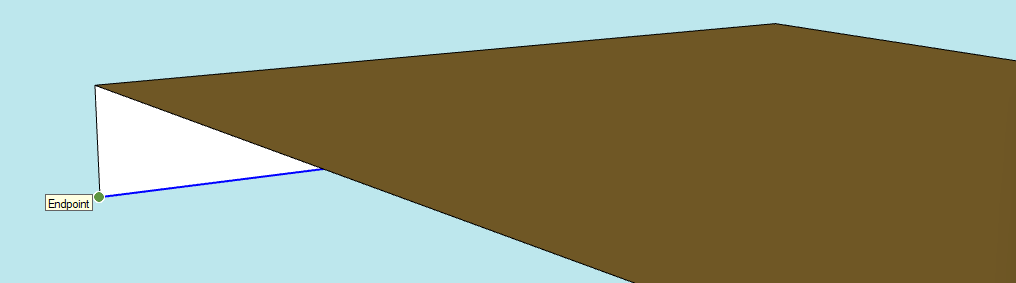
Fix the holes
- Press Space to activate the Selection tool and select the bottom edge of the hole:

- Press M to select the move tool
- Hover over the left corner until a ball appears
- Click (and release) to start the Move operation
- Move the mouse above the top corner
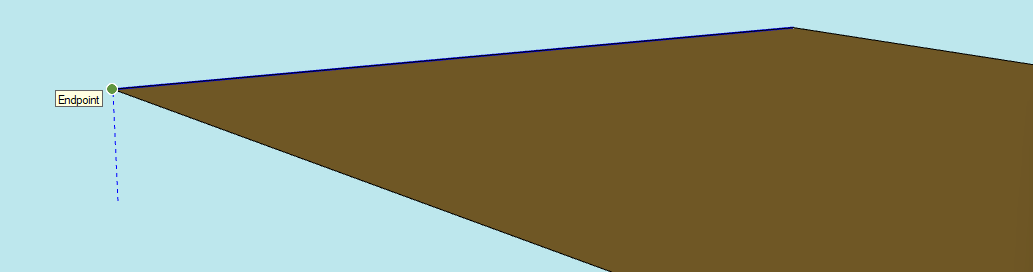
- Click and release to validate the movement and close the hole
- Repeat the sequence Select-Move for all the holes
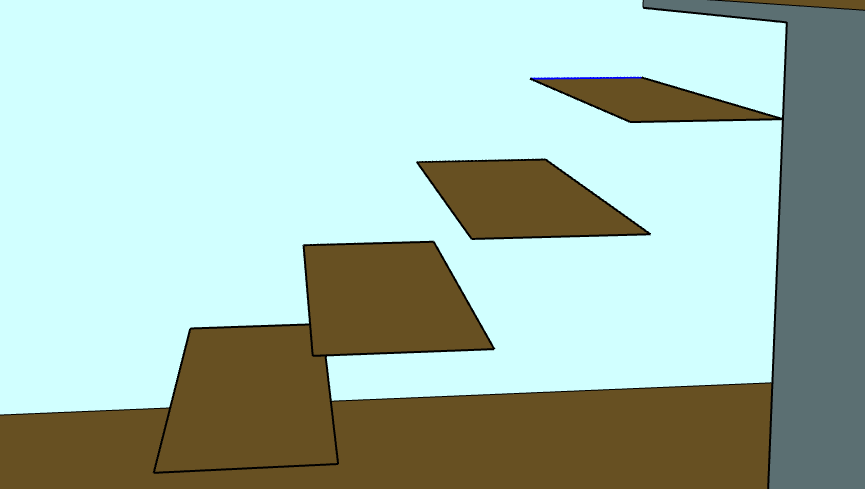
Stair steps simplified
Run a new Geometry Check to ensure that nothing got corrupted, save a copy of this model after this valid improvement, and check where is the next small edge.
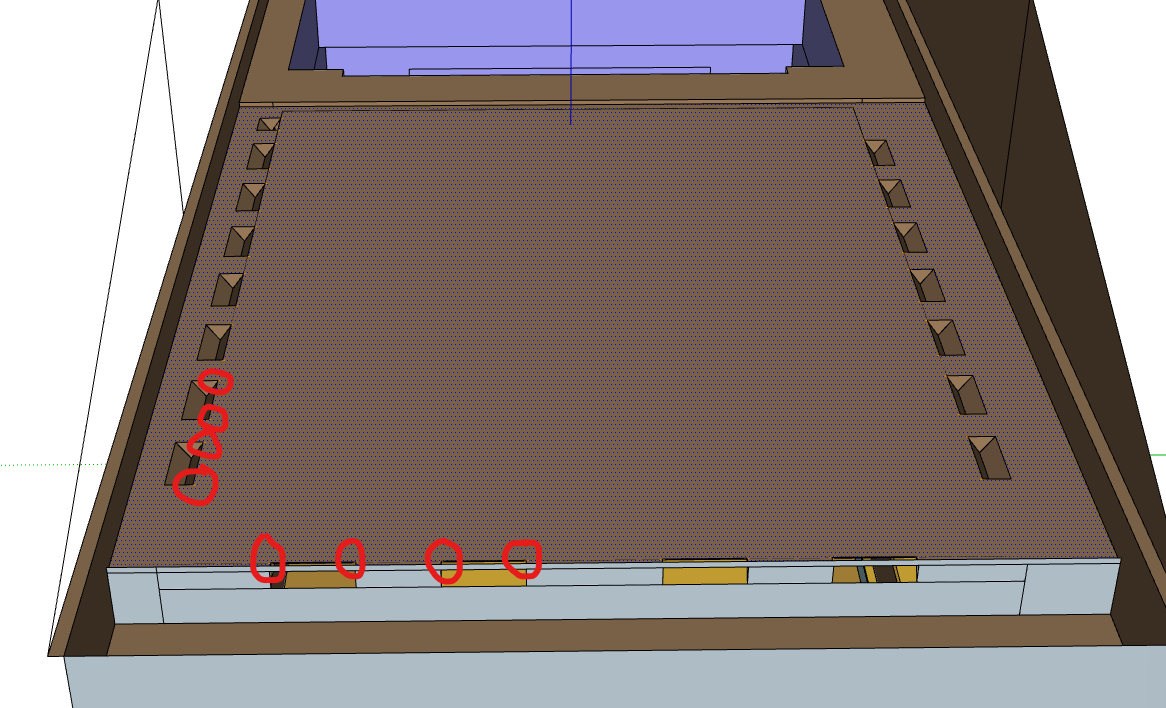
Remove stage thickness
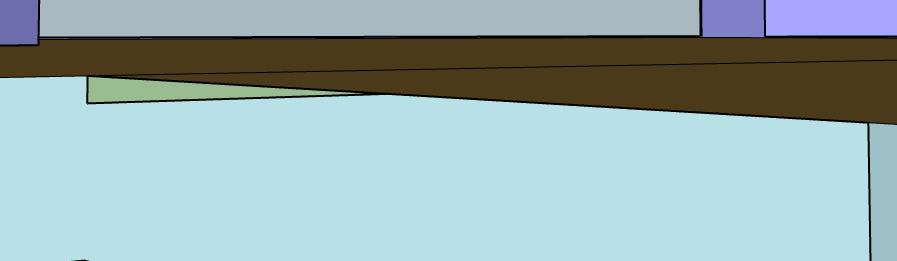
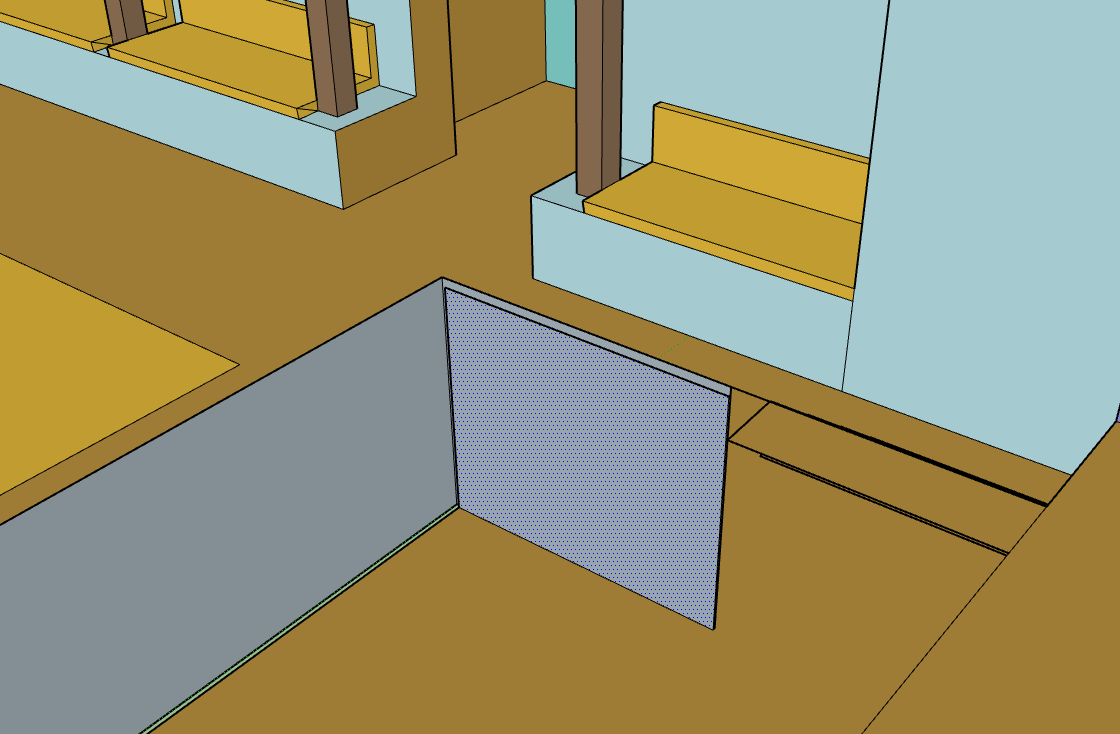
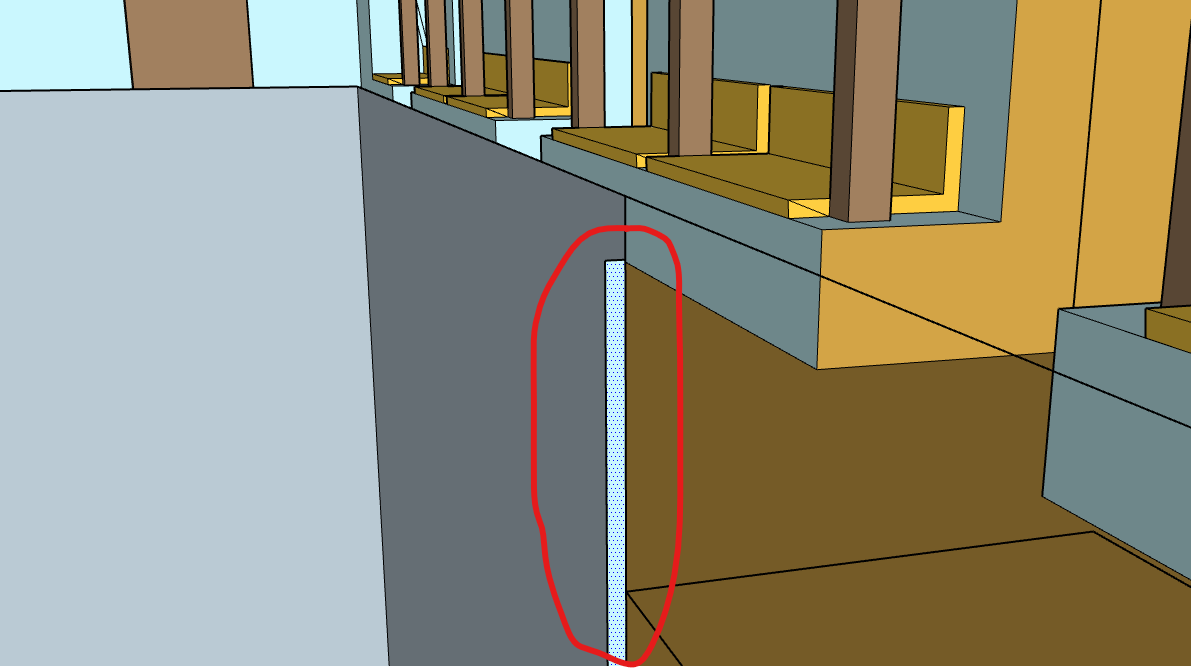
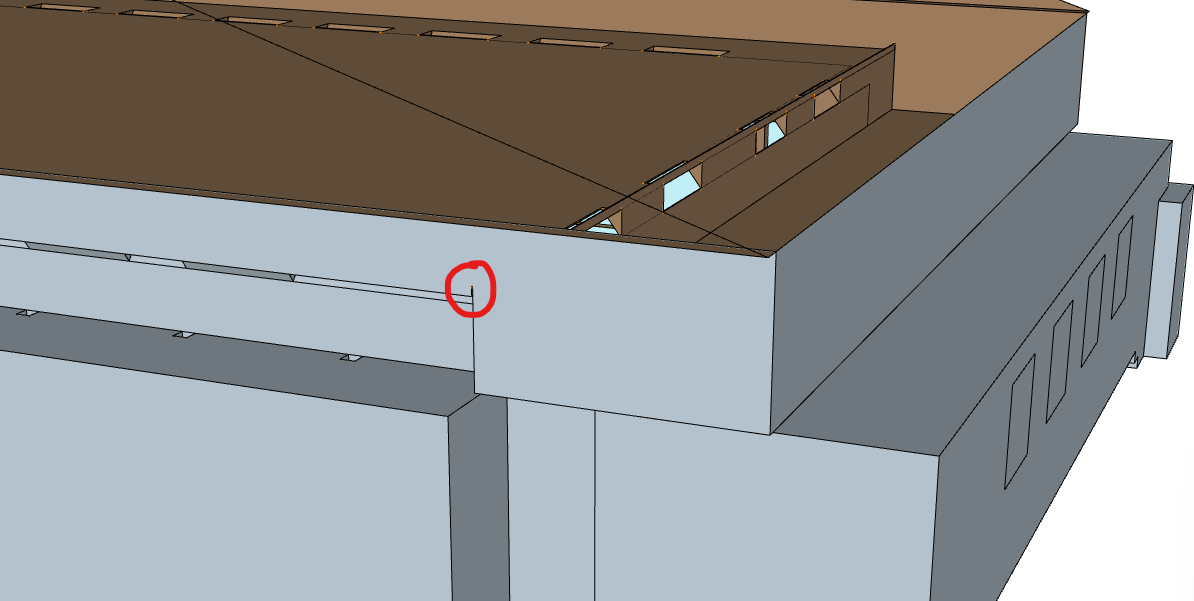
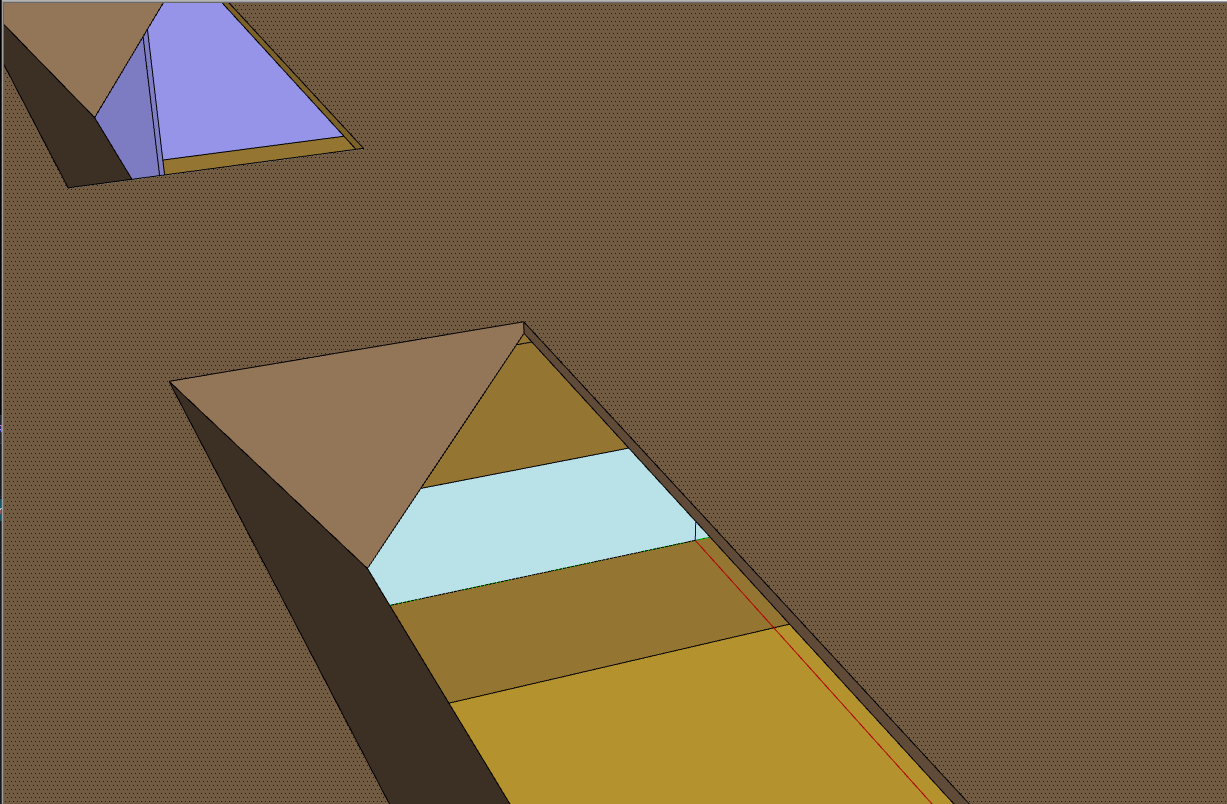
The next issue is the thickness of the stage. The small edges are reported where the stage meets the wall - see the circles as seen from the bottom of the model
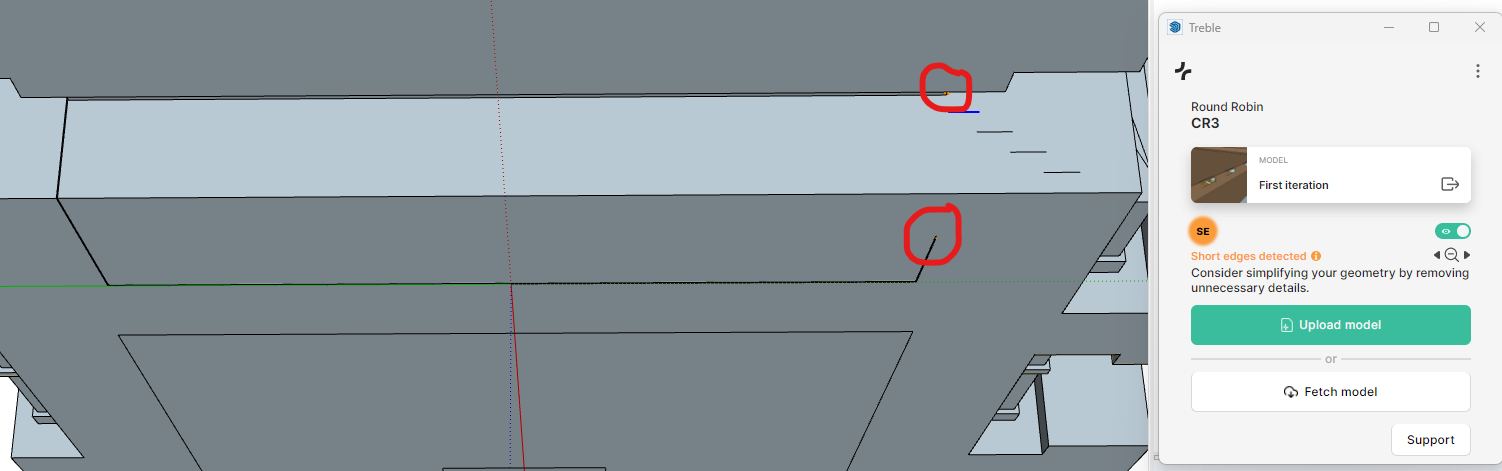
Remove the top thickness
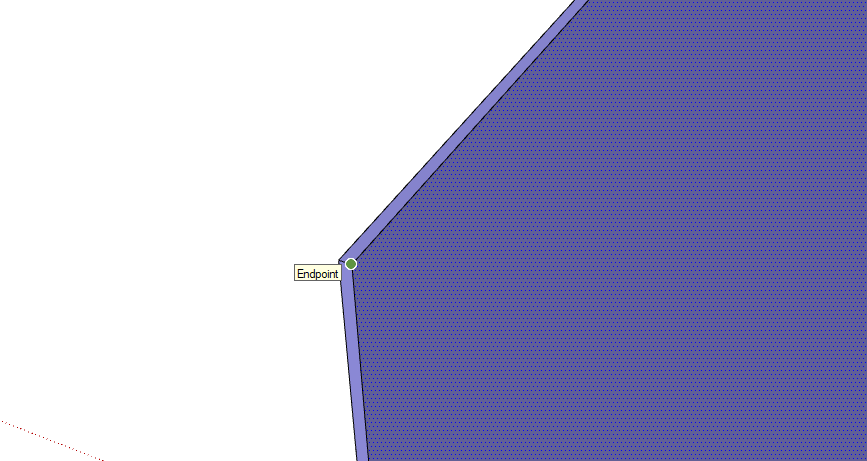
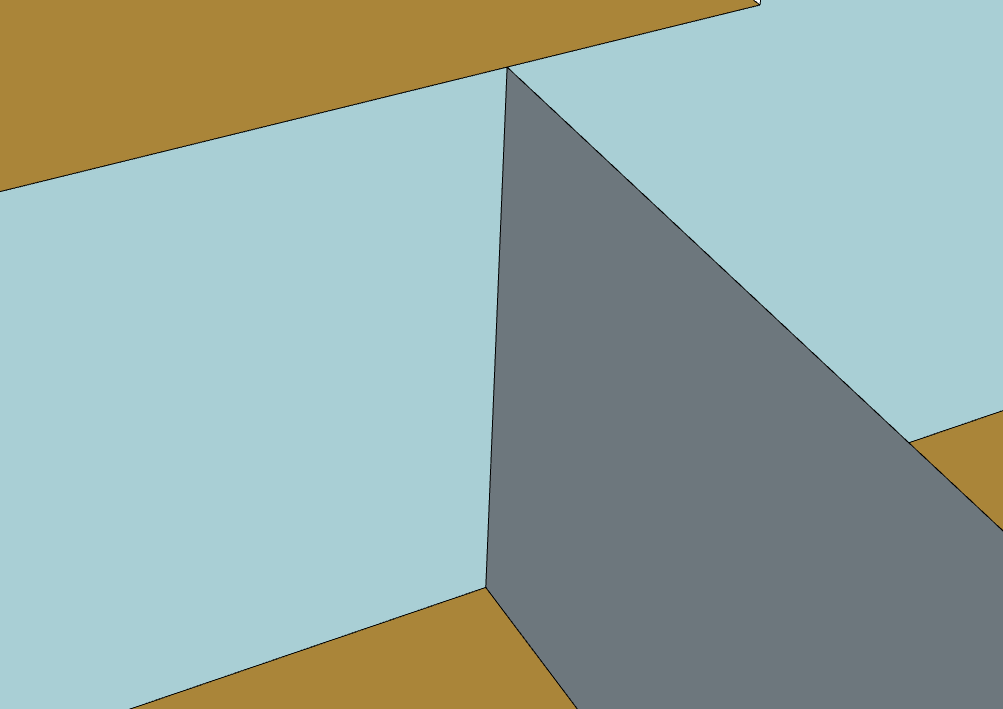
We’ll remove the top thickness by drawing the missing edge to the top in the following view, this time looking from the inside of the model:

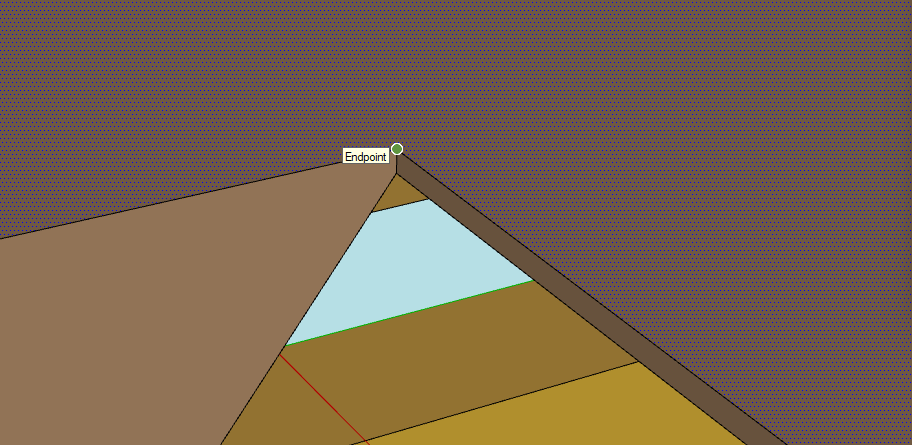
- Press L to select the Line tool
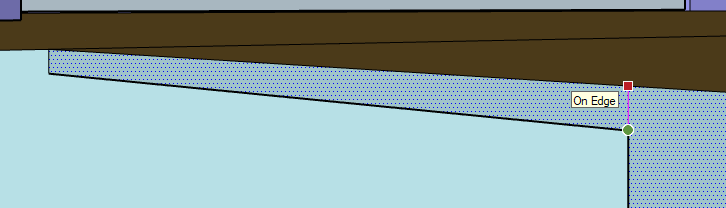
- Hover over the corner until the ball appear, click and release
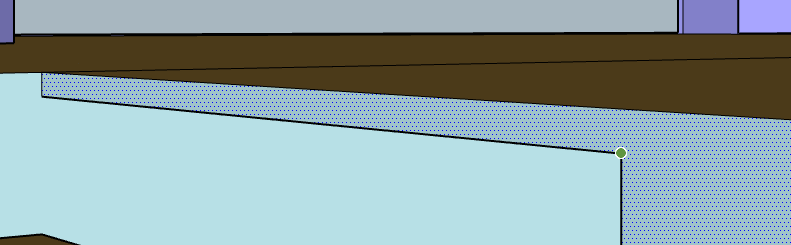
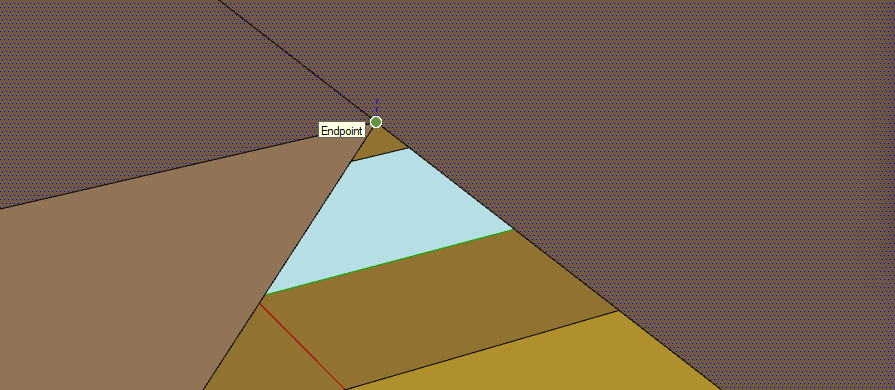
- Move the mouse vertically above the corner until the red diamond appears and displays On Edge
- The newly-created face is now selected
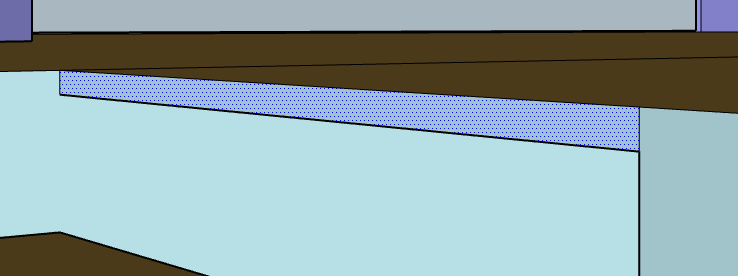
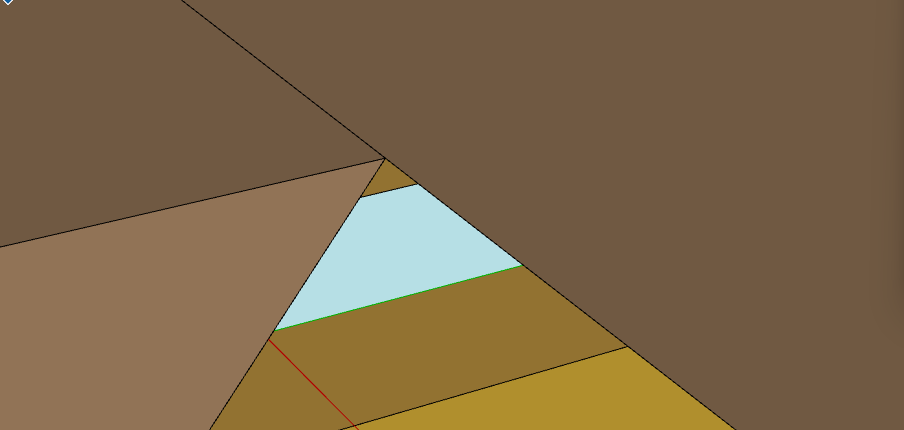
- Delete it
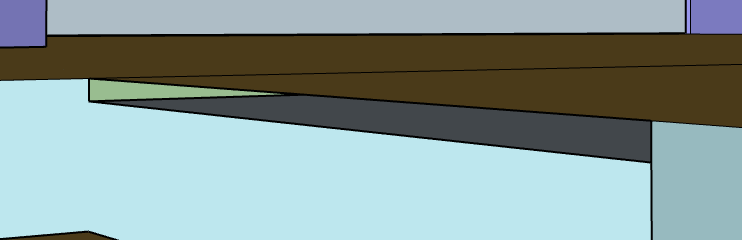
- Delete the lower face
- Select the top face of the stage and hide it
- Select and delete all the inner layers of the stage (and the leftover edges after deletion using the Eraser tool)
Fix the holes
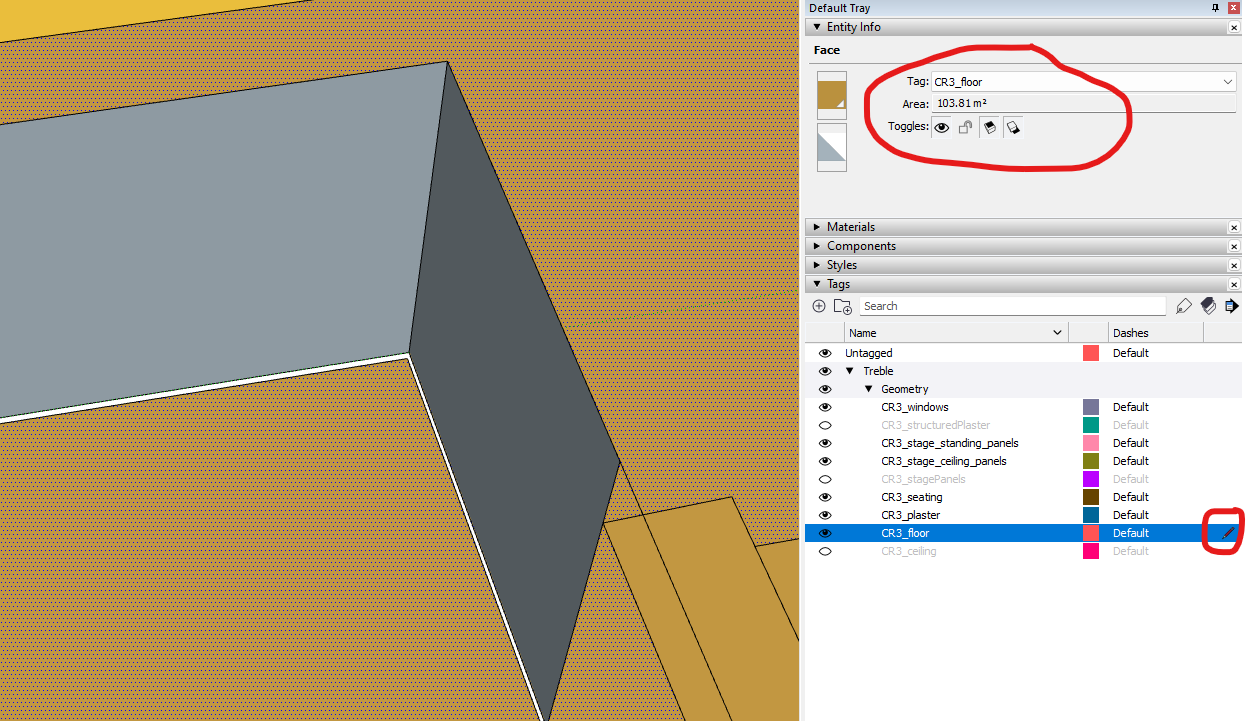
Select the face on the floor, and check its Tag in the Entity Info. Select its layer (Floor) as the default layer by clicking where the Pencil is in the Tags panel
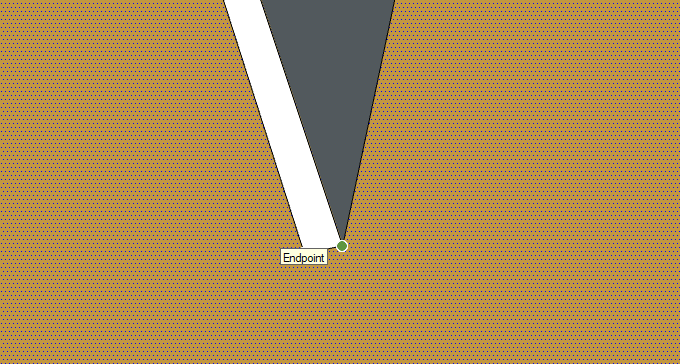
Press L to select the Line tool, and draw a line in the corner. This will draw a face that fills the gap
Use the Eraser tool to delete the inner edges created:
Do the same in the back wall of the stage:
- Change the default tag to CR3_plaster (the tag of the back of the stage)
- Draw a line at the bottom
- Delete the inner edges
Create a face to fill the gap
Erase the leftover inner edges
Erase the leftover inner edges
Unhide the last hidden face:
Run the Geometry Check to ensure that nothing got corrupted, save a copy of this valid improvement, and let’s move to the next step.
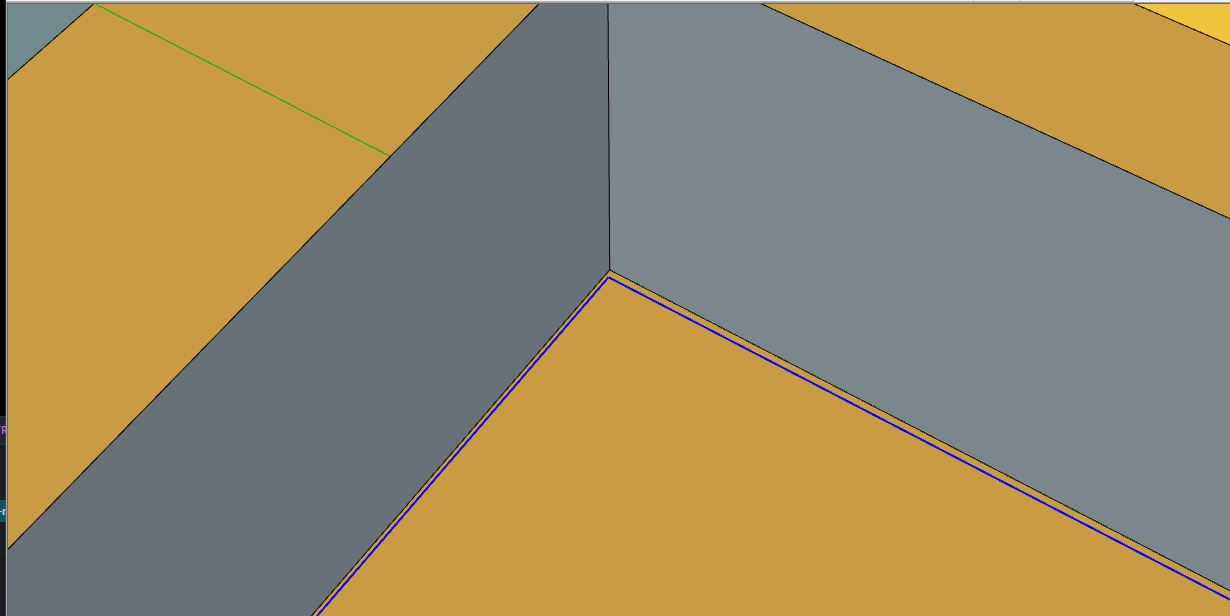
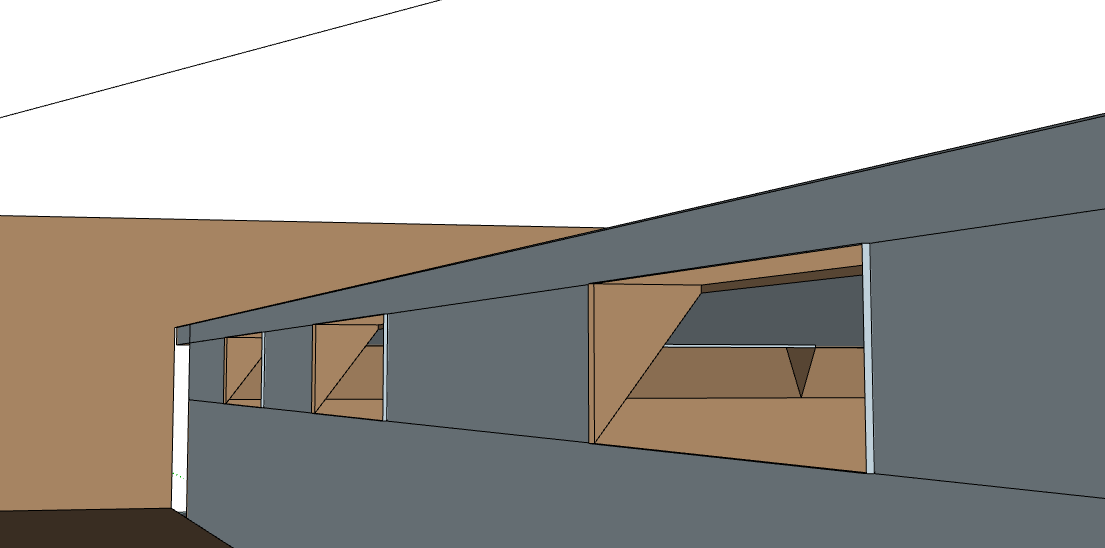
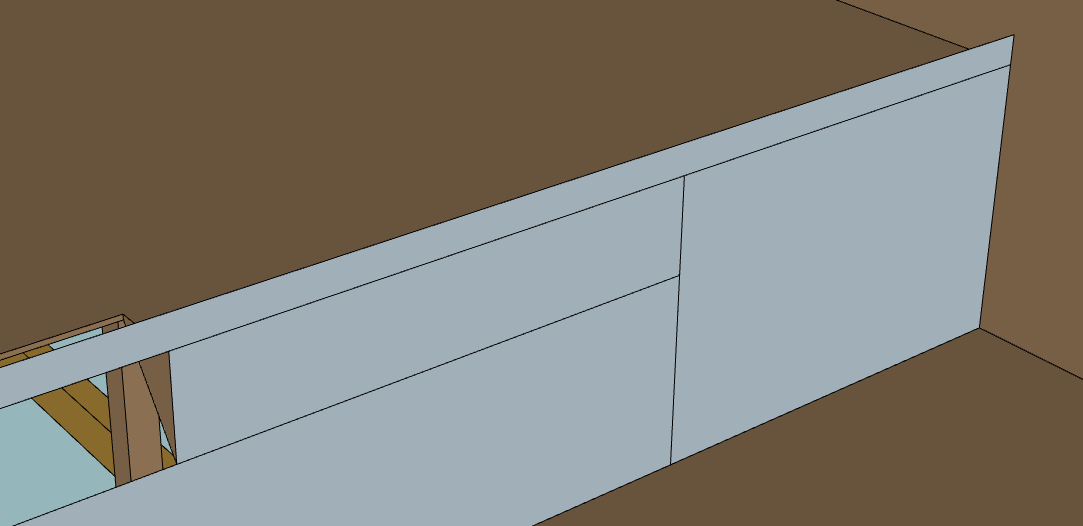
Fix the balcony width
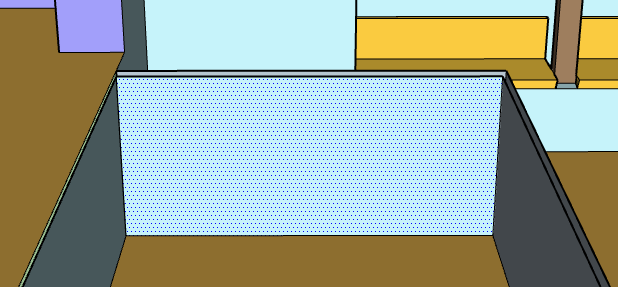
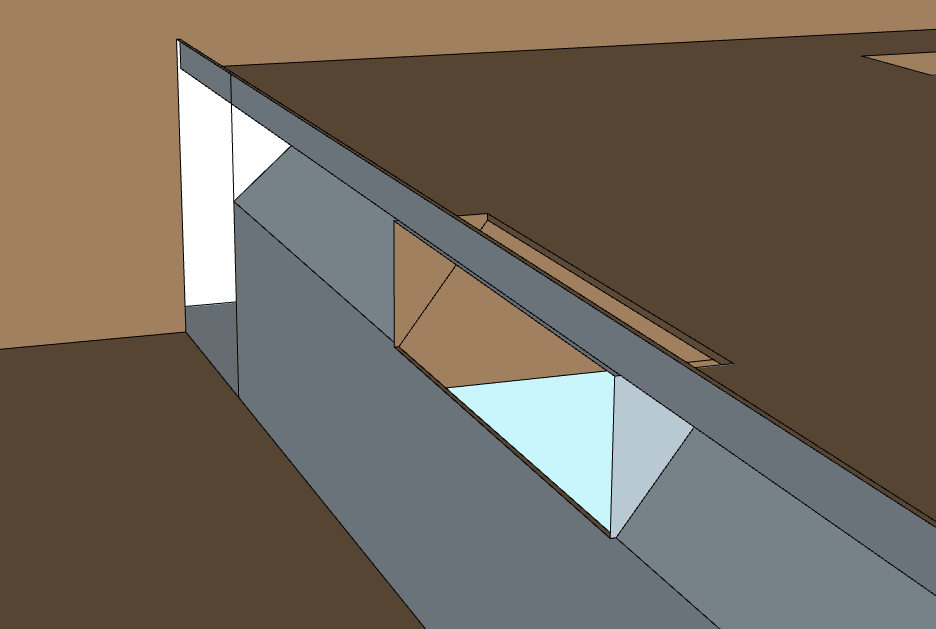
New small edge flagged (outside view)
Small edges caused by the thickness (inside view)
We are going to remove the left layer and move all that was connected to the right.
- Remove the left layer
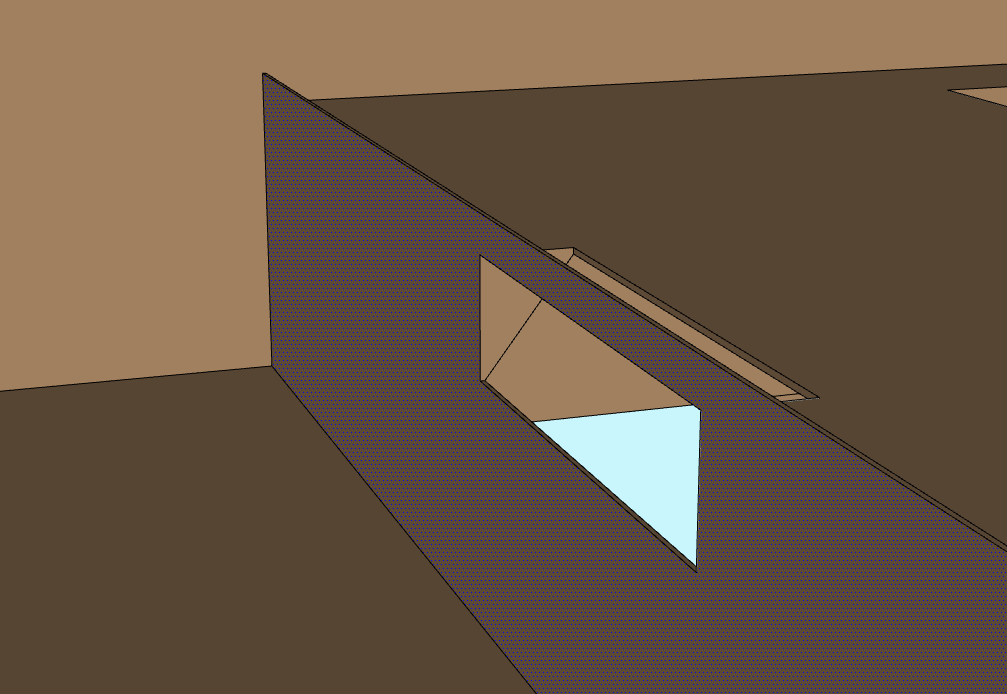
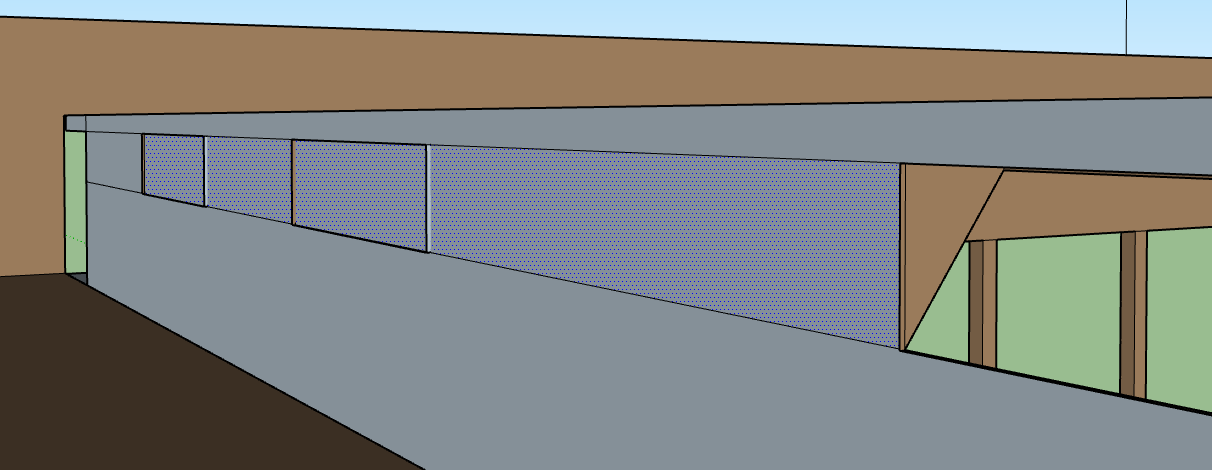
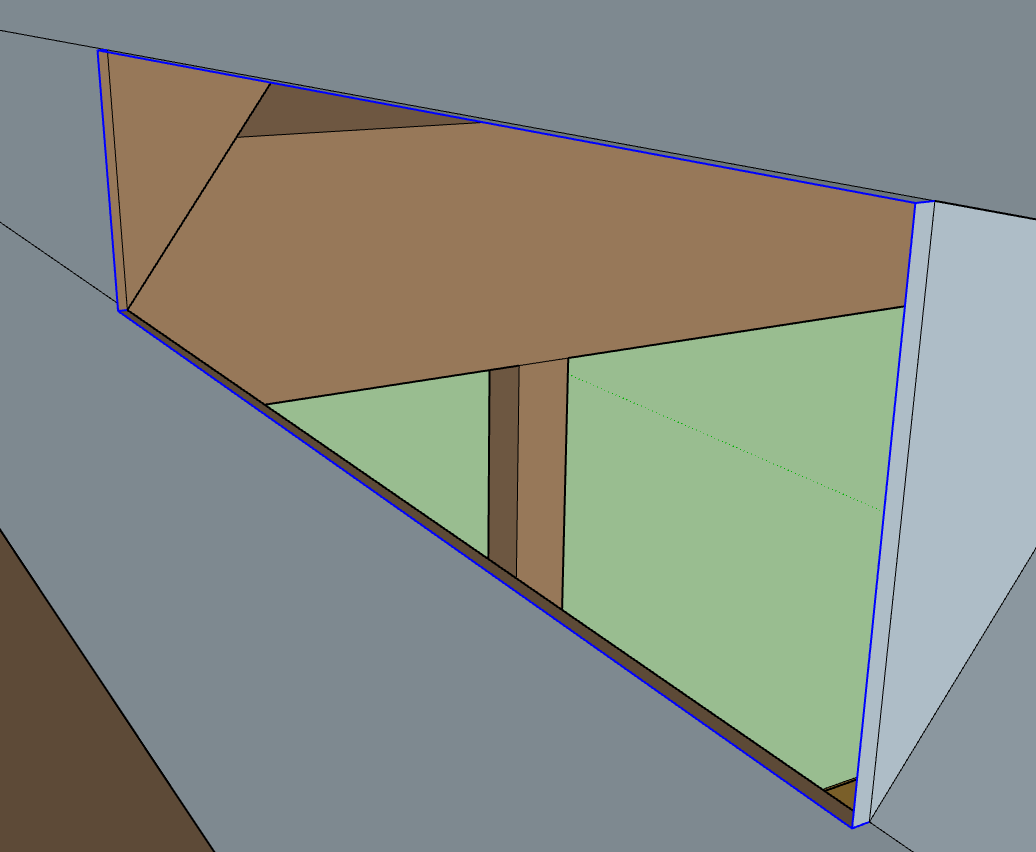
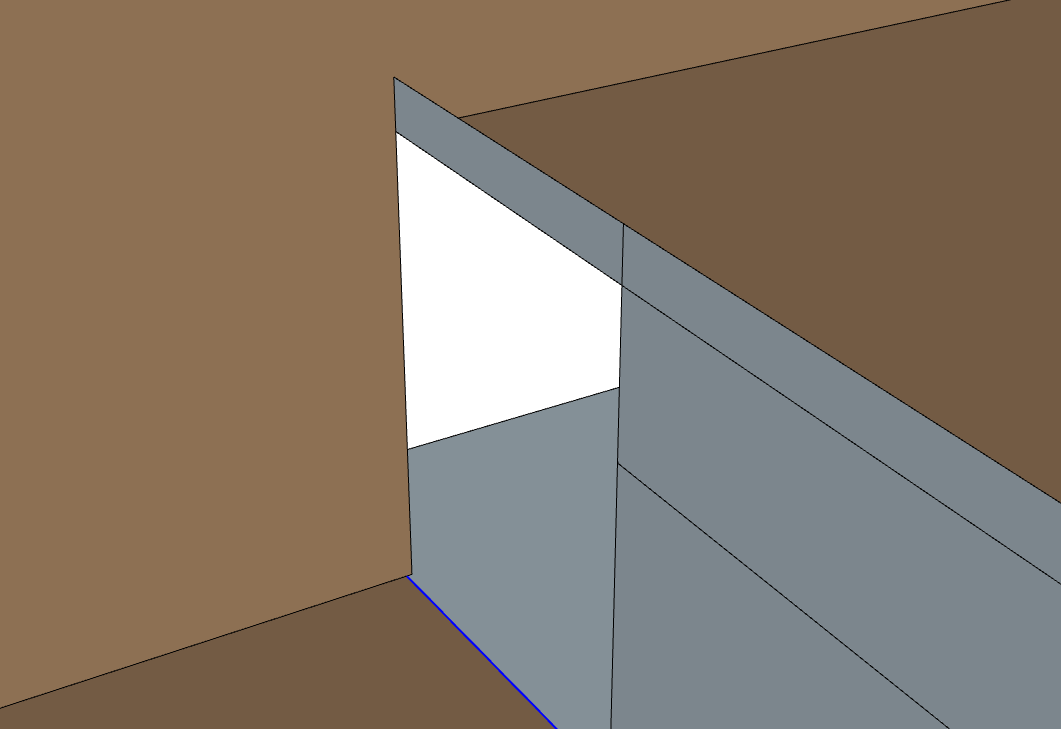
Fix openings thickness
All of these are using the CR3_stucturedPlastered tag, so set it as the default tag
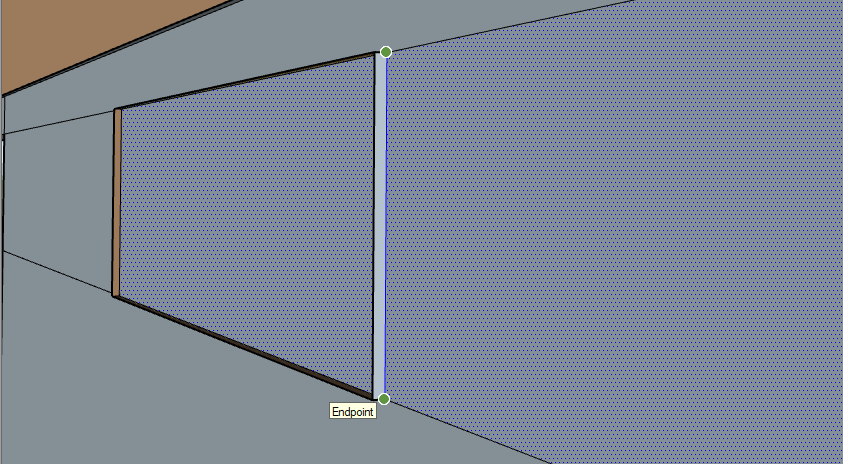
- Press L to activate the Line tool and draw an edge
This closes the gap with a long face
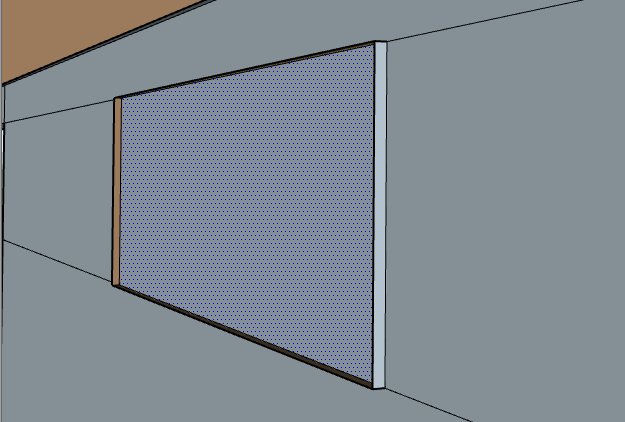
We need to segment the face using the Line tool
Press Space to activate the Selection tool, select the face in the hole and delete it
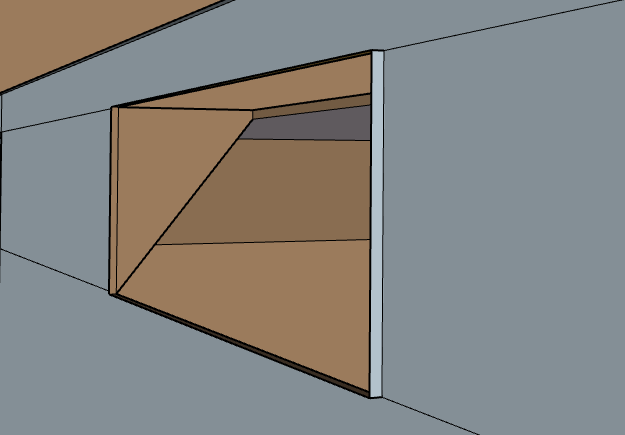
Repeat for the next openings. You should have the following at the end:
Press E to activate the Eraser tool and remove all the leftover faces by deleted their outer edge (marked in blue in the screenshot below):
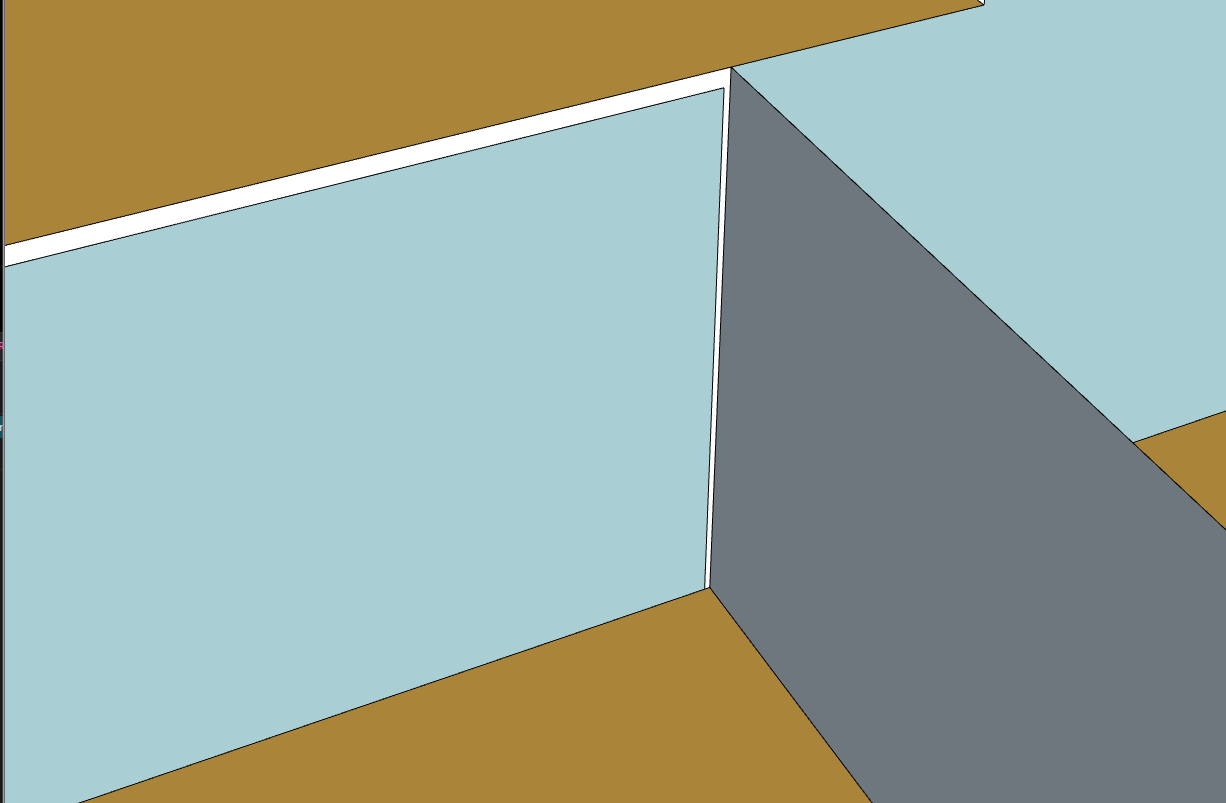
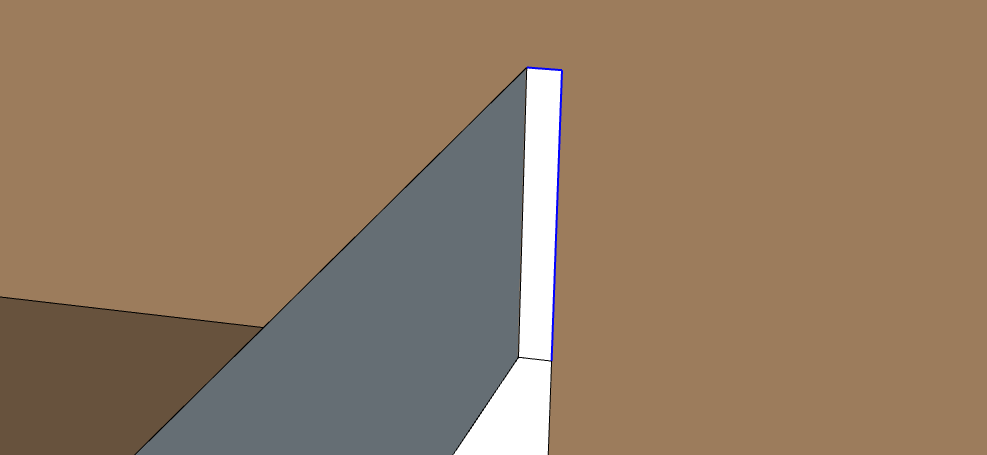
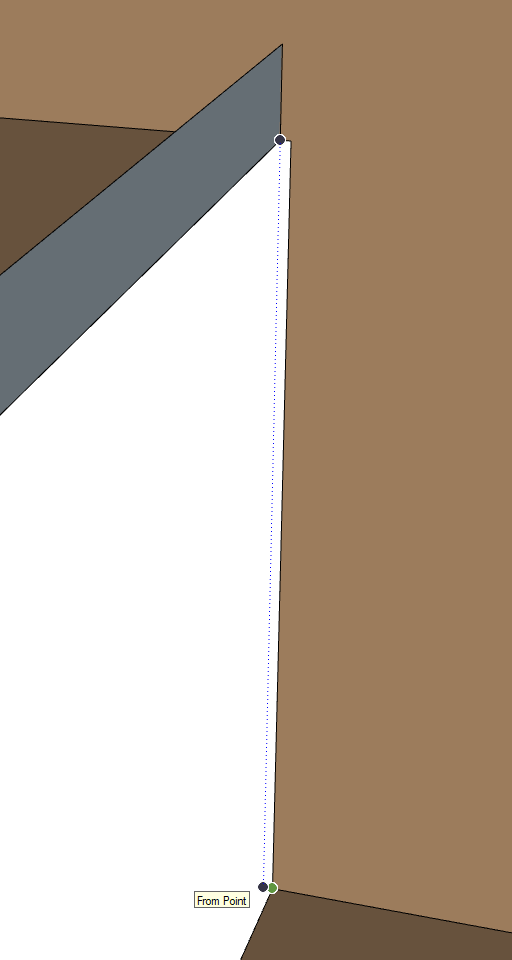
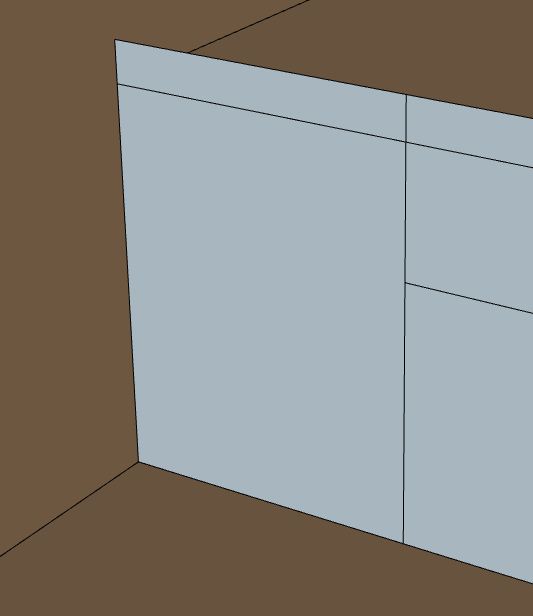
Move the wall forward
Remove the thickness of the balcony by removing the edge marked in blue
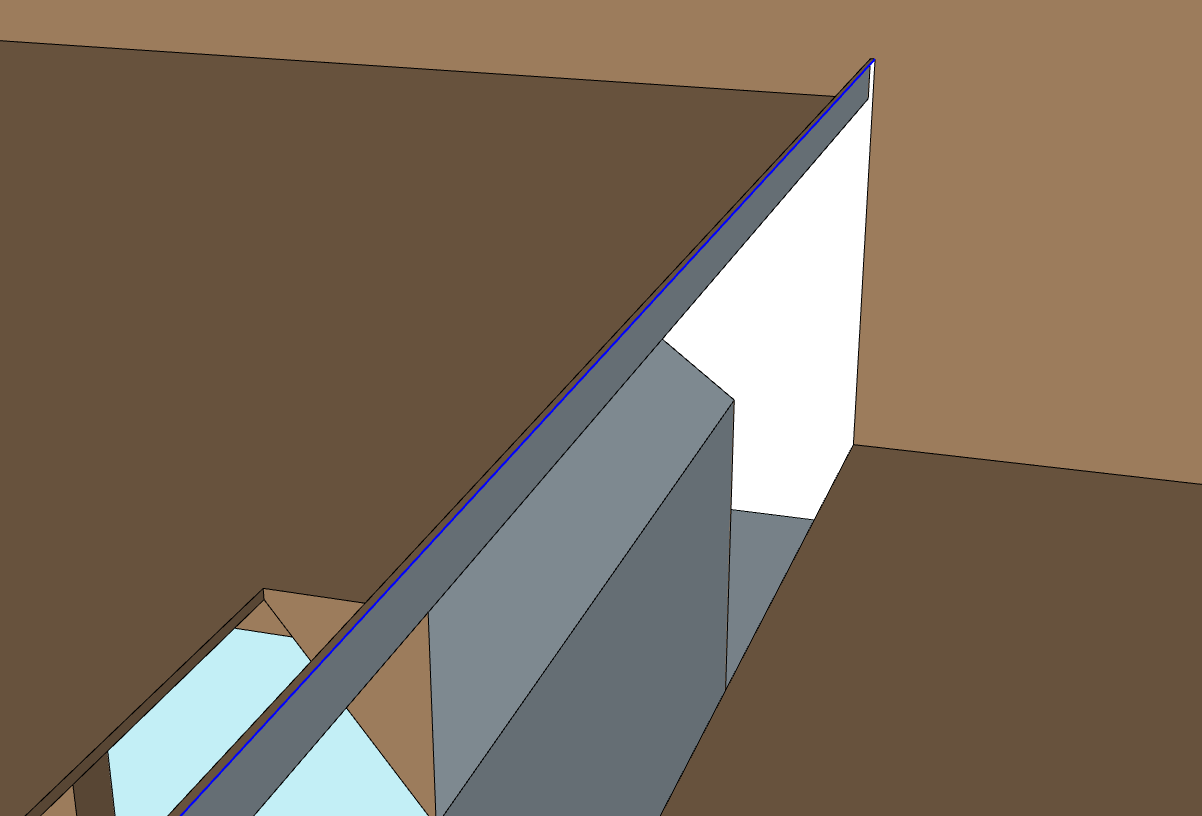
Press L to select Line tool and create a new edge to close the top of the gap

Remove the edges to clear the new face

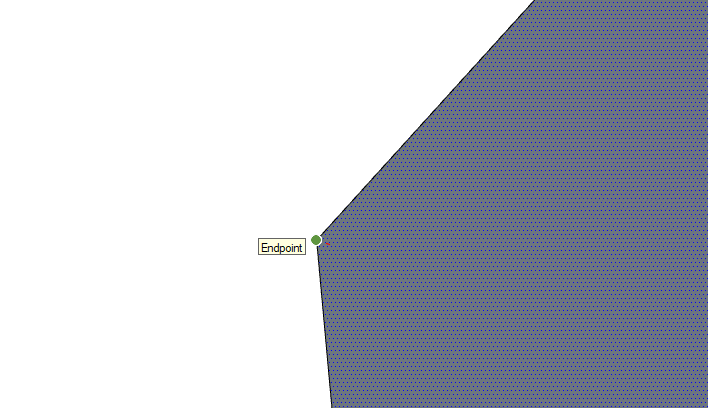
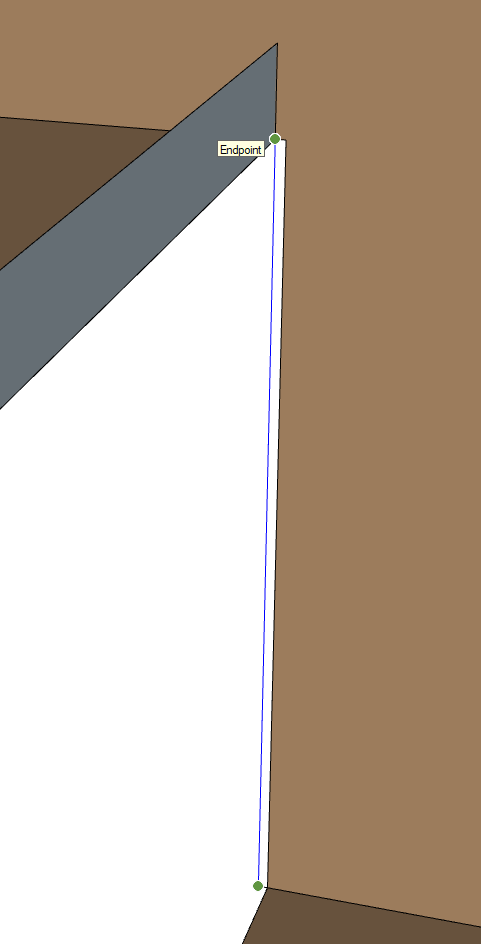
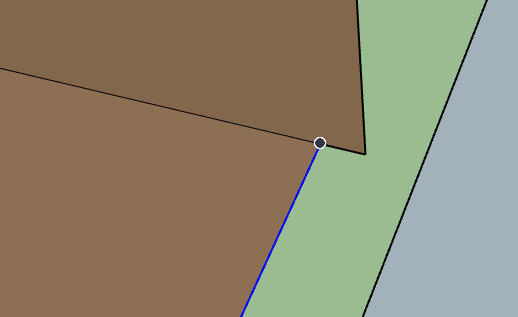
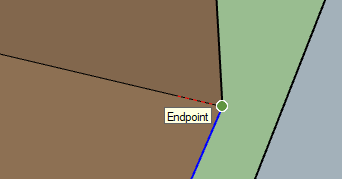
Click on the bottom corner (green ball) and draw an edge up to the black ball next to it. Ensure that the blue dotted line appears to show alignment with the top corner (top black ball).
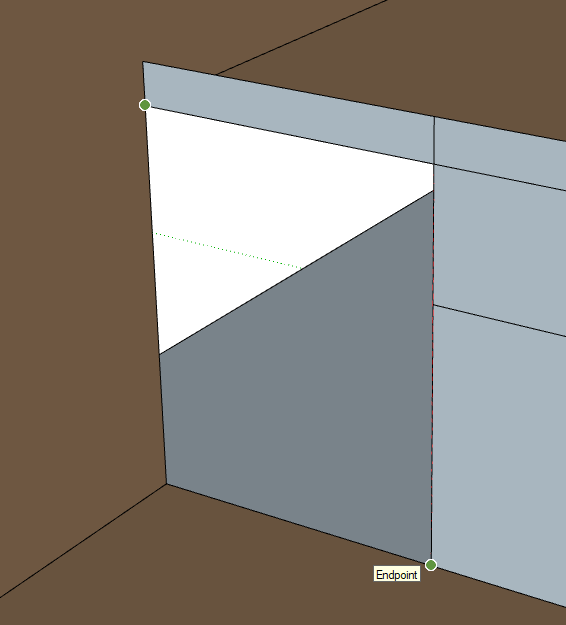
Draw another edge to close the gap and draw the face, and remove the created edges
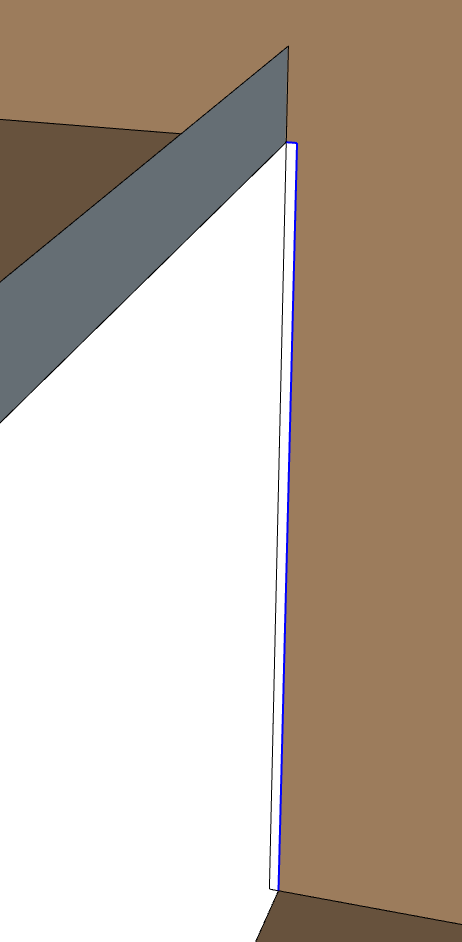
Do the same on the other side, so you have the following on both side:
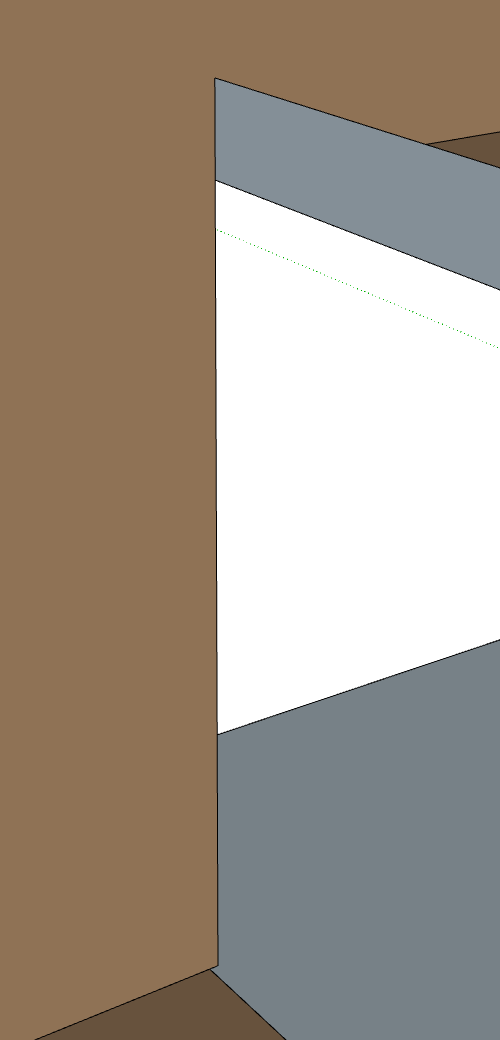
Select the edge of the balcony floor
Zoom in on the corner with the wall, press M to select the Move tool. Move the edge to the angle of the wall
Fix the last holes
Press R to select the Rectangle tool and draw a rectangle from the top left corner to the bottom right corner
Move the view to the other side. Press L to select the Line tool and draw a line such as below to close the gap.

The line gets blue when following the vertical axis
Run the Geometry Check to check that nothing got corrupted, save a copy of this file, and let’s do the next cleaning.
Remove all openings thickness
The next source of small edges is the small thickness of the ceiling, and
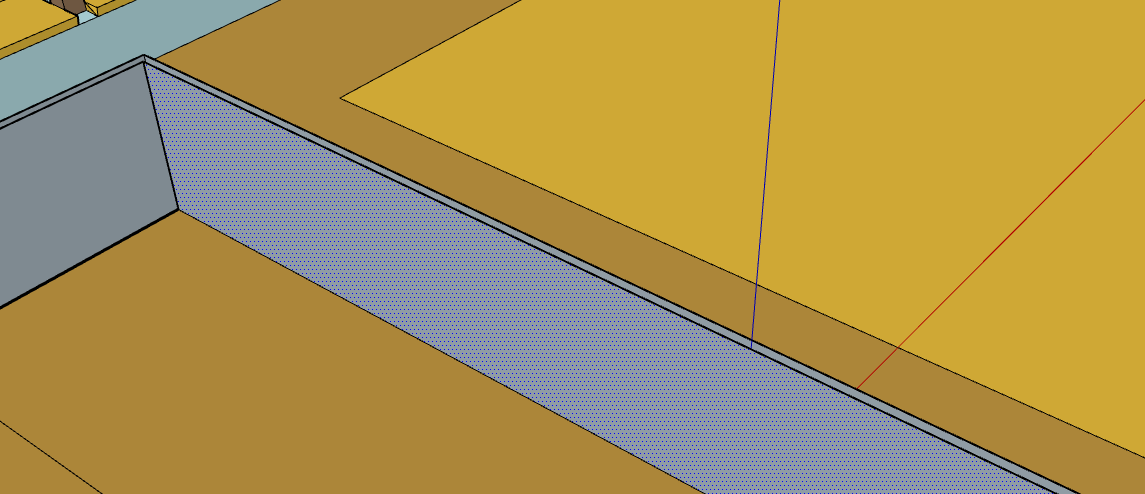
View from above
Zoomed in view
Zoomed in view
Thankfully there is a rather easy fix for this one: moving the ceiling face down.
- Press Space to activate the Selection tool, and select the ceiling face
- Press M to activate the Move tool
- Click on the corner of the top layer (and release)
- Hover over the bottom of the layer to remove all thickness
- Click and release: the thickness has all disappeared!
Run a Geometry Check to check that no corruption occurred (no GW error or other symptom of having created a leak) and save a new copy of the model.
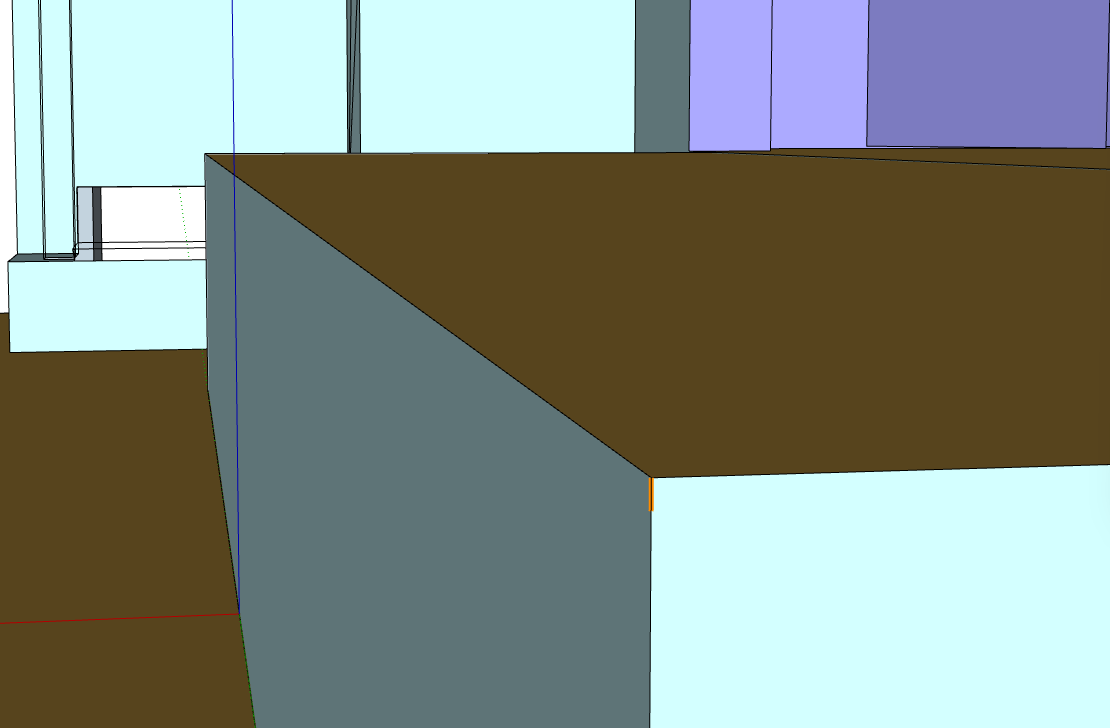
Leftover stage small edges
There are still some small edges in the stage. These are the leftover of the previous thickness, but because they are aligned, there is not a real need to fix them.
If we upload the model to Treble web app and run an estimation, we now have something more reasonable: 1h06min estimation.
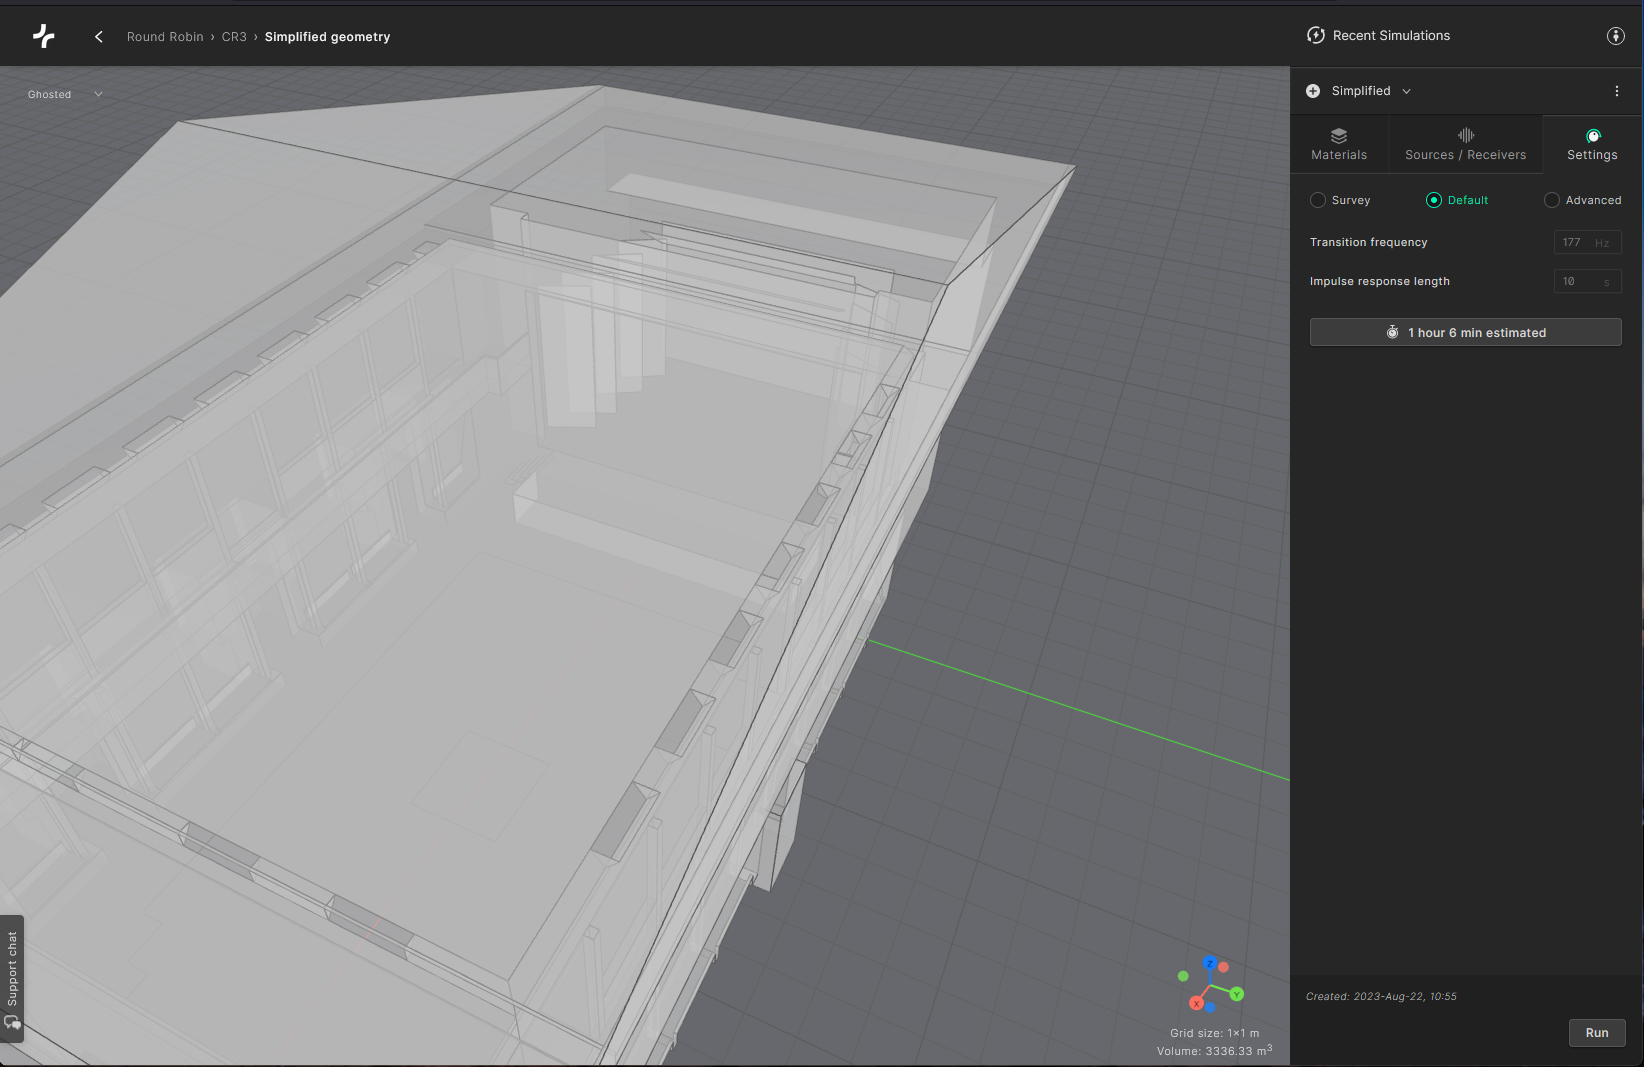
With this we have decreased the simulation time by 1 hour, more or less dividing the original estimate by 2. Not too bad!
This is the improved model:
Fixed model