Setting up a model for Treble
Treble, in its current version, accepts geometry input (3D models) from SketchUp Pro 2021.1.2 on. In SketchUp you can open existing models, import 3D files from other 3D modelling software or start a new model from scratch.
If you already have models saved on your Treble profile you can fetch them by clicking Fetch model. When the extension is asking you to save your model, use the option Save As.
Modelling tips
There are certain restrictions to the geometry that Treble can work with, generally:
-
For running a wave-based simulation, the model must include a closed external volume (watertight outer shell). If absent, only a geometrical acoustic simulation will be available.
-
Both “solids/closed surfaces” and “open surfaces” are allowed inside the external shell. When a surface is touching the external shell, the intersecting surface should be placed in a group (or a component) different from the outer shell. Make sure the group is tagged and placed inside the Treble Geometry folder.
-
Geometries protruding out of the external shell might be ignored.
Having very fine geometric details in the model can negatively impact the runtime of the wave-based simulation. It is therefore desirable to keep the details of the model fairly low. It is however important to make an assessment of whether a simplification will have an effect on the acoustic properties of the space.
Example: Tables and chairs, can be modelled as “open surfaces” because the legs and the thickness of the object do not affect the sound propagation very much, especially at low frequencies.
A general rule of thumb is to simplify objects to 2-dimensional if the thickness is within 5 cm, but one can additionally relate to the wavelength that is in focus for the study (see the detail relevance table). A single tight spot in the geometry can slow down the process quite significantly.
The Treble folder
For every new Treble model, you will be met with the error Unexpected tag folder hierarchy and you will need to create a Treble folder, which in SketchUp corresponds to a tag folder. This folder needs to contain the geometry that you want to simulate.
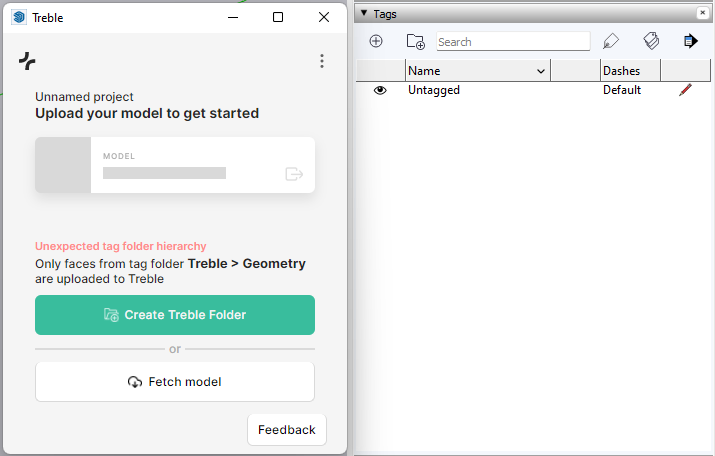
Click the button Create Treble Folder, this will create a new tag folder for Treble and a sub-tag folder for the Geometry.
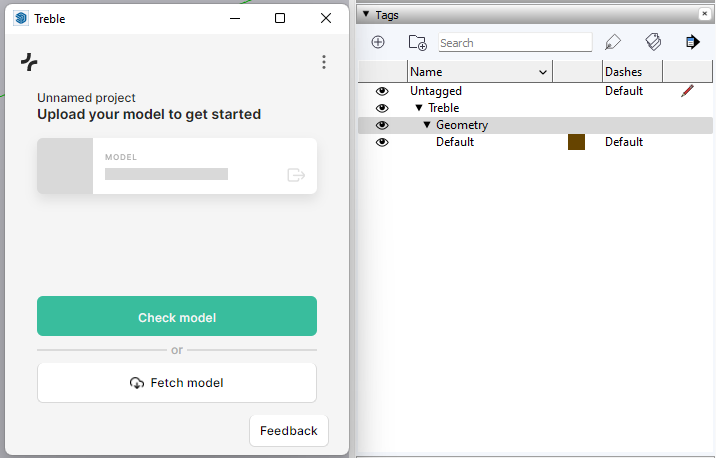
All tags must be contained in the Treble-Geometry tag folder, if they are to be included in the simulation. In Treble, you will be able to assign acoustic materials to each of these layers and to the single surfaces inside the layers.
Assigning layers (tags) to surfaces
If you already have defined tags in your model, you can move those tags under the Treble-Geometry folder.
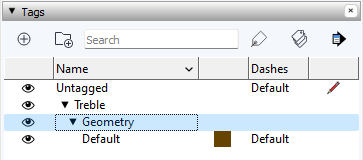
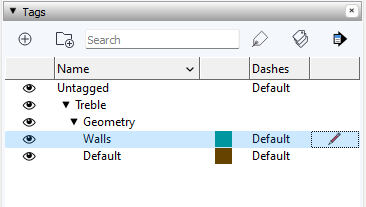
To add a new tag for geometry, select the Geometry tag (in blue in the image below) and click on the plus-icon. This appears in the upper left corner of the Tags tray, on the right pane of the SketchUp window. You might need to scroll down to find the Tags tray.
Give the newly created tag a name, e.g. “Walls”.
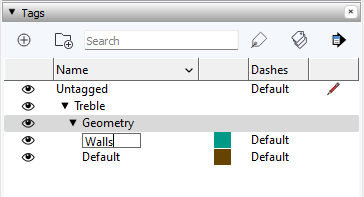
Assigning materials to layers is faster than assigning to the individual surfaces, thus we recommend to tag your geometries with layer names that group materials of the same kind.
In Treble, you will be able to assign acoustic materials to each of these layers and to the single surfaces inside the layers. Thus it is common practice to divide the geometry objects (surfaces) into layers (tags), corresponding to the acoustic material, e.g., “gypsum walls”, “upholstered chairs”, “windows”, “absorbing ceiling”, “wall absorber”, etc.
To create geometrical objects on this tag, ensure that the tag is set to current, by double-clicking on the tag row on the right, in the column corresponding to the pencil icon. The pencil icon should now appear on the tag of your choice.
You can inspect which tag is assigned to one or multiple geometries in the Entity Info tray. To apply a tag to a surface or a set of surfaces, select the appropriate surfaces and change the Tag in the Entity Info tray.
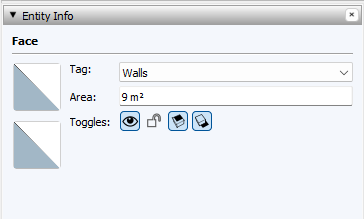
If you want to assign the same material to multiple surfaces, you can do so by selecting all the surfaces and assigning the relevant tag you have previously created to all the surfaces selected in the Entity Info tray.
Tips regarding groups and components
Treble allows to upload models that contain groups and components. A group or component is added to the geometry only in one the two following configurations:
-
all its entities have a tag that is in Treble > Geometry tag folder
-
OR it has a tag that is in Treble > Geometry tag folder and each entity is either Untagged or with a tag that is in Treble > Geometry tag folder
This means that if a group / component contains an entity that has a tag that is not in Treble > Geometry tag folder, the whole group will be ignored.
Checking the geometry
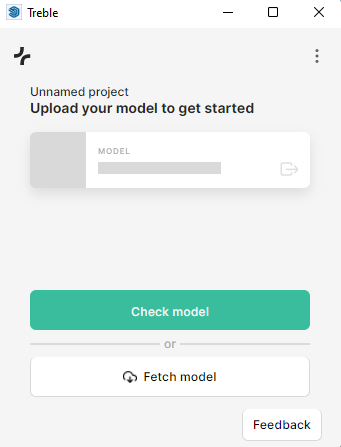
Once tags are applied to all surfaces and your model is ready, click Check model so that the geometry is validated in Treble before the upload is possible.
Note that warnings do not prevent you from uploading the geometry, they only highlight potentially undesired configurations.
Checking with Cloud service
In order to run the checking service, your model is exported and sent to our cloud-based webservice. This enables the geometry to be checked using powerful processes that are not available in SketchUp.
The operation consists in 3 steps:
Geometry export
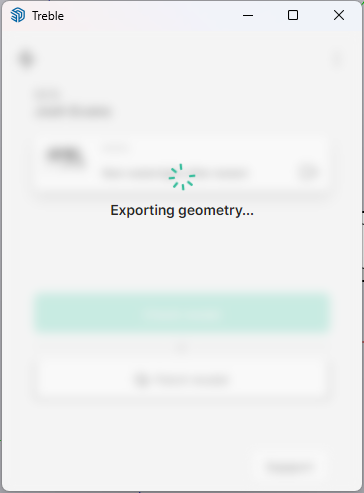
This is the only step executed on your local machine and may impact SketchUp performance while running.
Geometry check running
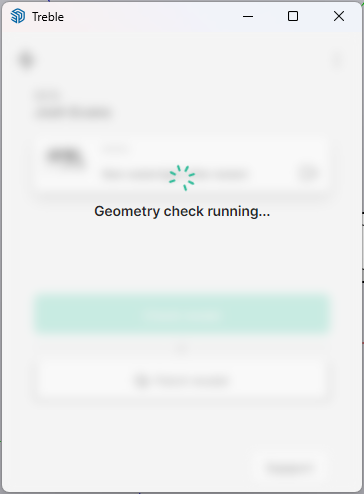
After the geometry has been successfully exported and sent to our checking service to be processed. This step usually takes between 7 seconds and a minute.
You are free to close the plugin while the check is running, and it will pick up the state of the check when reopened.
Keep in mind that if you change anything in the model, it will cancel the running geometry check as the geometry will no longer be relevant.
Fetching the feedback
This can take more than few seconds if the model is big or if there is a lot of issues to report (small edges or small gaps).
Successful check
If the check has run successfully, it is now possible to click the Upload model button in order to send the model to Treble.

Partly successful check
The check can be successful but contain warnings: the model can be uploaded and used, but cannot be used with all of Treble's simulation capabilities:
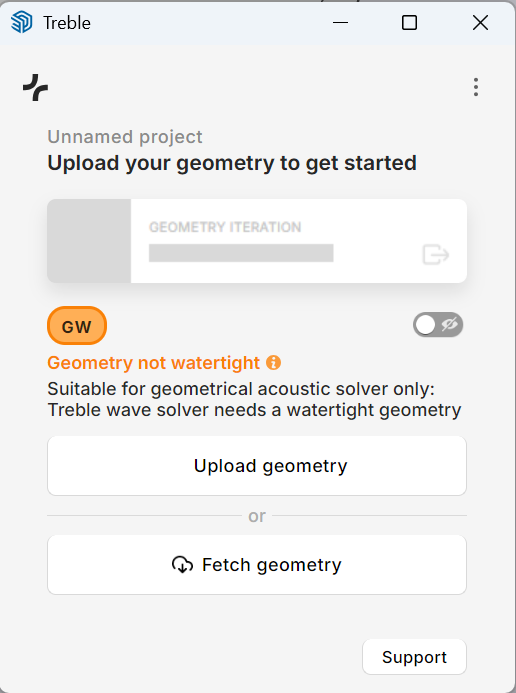
Upload for Geometrical Acoustics solver only
If the geometry is not watertight, it is possible to upload the geometry but only for the Geometrical Acoustics solver (Image Source and Ray Radiosity).
This is especially useful when importing a model from another CAD software into SketchUp caused small leaks to appear between elements, and if you don't want to run a wave-based analysis.
Unsuccessful check
If the check is unsuccessful, an error will be displayed in red, with some feedback.
Fixing the error(s)
More information can be displayed by hovering over the Information sign or highlighting the issues with the switch. Common fixes are available on our Geometry Feedback page.
You can also check the Trebleshooting page if you encounter issues that were not reported by the feedback tool, or that do not seem to have a clear solution.